After building the basic model, I was looking more closely at the photos, and decided I didn't like the placement of the door on the back. My initial concern what that if I moved it to the right, there wouldn't be enough space for the stairs, but after testing another position, I think it will work.
It appears the door is centered on the back, and based on the pictures, it needs to be there because the stove is in that back corner. So I ripped off the back and made a new one.
You can see that I added some corner braces in the bottom when first assembling it, and then I also decided I needed a floor since the windows are so large.
The new back wall, before straightening out the right side of the door (below the window) with a file.
I then started framing the windows and doors. I used a piece of 1"x6" for the window sill (trimming the back flush with the inside wall once dry), 1"x3" for the sides and tops of each window, and 1"x2" for the trim around the outside.
There's a piece of 1"x2" under the window sill as well. I also framed the small door, then used a piece of scribed styrene for the door itself, plus a piece of 1"x2" for the crosspiece. The stack is a Utah Pacific part. I filed off the small nubs on either side for guy wires as they aren't needed here.
To build up the right side of the door frame I built a sandwich of 1"x3" pieces, and then started on building the platform from 3"x8" (because it's what I had on hand), and 1"x6" decking.
I test fit some Central Valley Model Works steps, but they looked pretty chunky. More importantly, they are a 45 degree angle, and stuck out too far. I originally thought they would be better because they look like wood stairs that are built with the treads on top of the riser. But I double checked the picture of the stairs, and found they are inside the risers, like the Tichy ones, which are 2 scale feet wide and a steeper grade and looks like a better match.
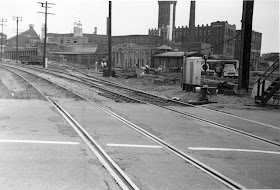
I also noted that the railings only have a support at the bottom and the top, and it looks like 2"x4" construction. Another detail I'll try to include is the small board at the bottom under the first riser, to avoid stepping down into mud (I'm assuming). Incidentally, this picture is also why I moved the turnout to the Union Manufacturing side track from the other side of the tower to this location on the mainline.


No comments:
Post a Comment