Tuesday, August 18, 2020

What else am I working on? Stanley S-1

No, it's not an Alco S-1, it's the road number for their HK Porter 0-6-0F (fireless) steam locomotive.

About a month ago I had a coworker test positive for Covid-19. Since I had worked with them, I needed to get tested and it would take 4-5 days for the results. In the meantime, I had to isolate myself from the rest of the family, and since several of Emily's nurses wouldn't come in until the results were back, Laura was on Emily duty 24-hours a day for that time. I tested negative, and fortunately I didn't have to wait another 14 days to take a second test (and the 4-5 day wait after that). 

But on one of those days in isolation in the basement (it's never as much fun when you have to be down there...) and I was thinking of what sort of things I needed to do so I could get out of the house and away from the family, it occurred to me that I could take a road trip. To Watertown, NY, where the old Stanley locomotive is sitting outside after being damaged in a fire. 

So I took the 4 1/2 hour drive (starting about 1:00 pm), finding out it was near Amish country, and also the second largest wind farm in the country (Maple Ridge) with 195 turbines spread over 22,000 acres. 

It looks like the entire property is abandoned, but I knew I planned on staying away from everybody (since I had been exposed), and just taking pictures and measurements. I've been planning this for years.

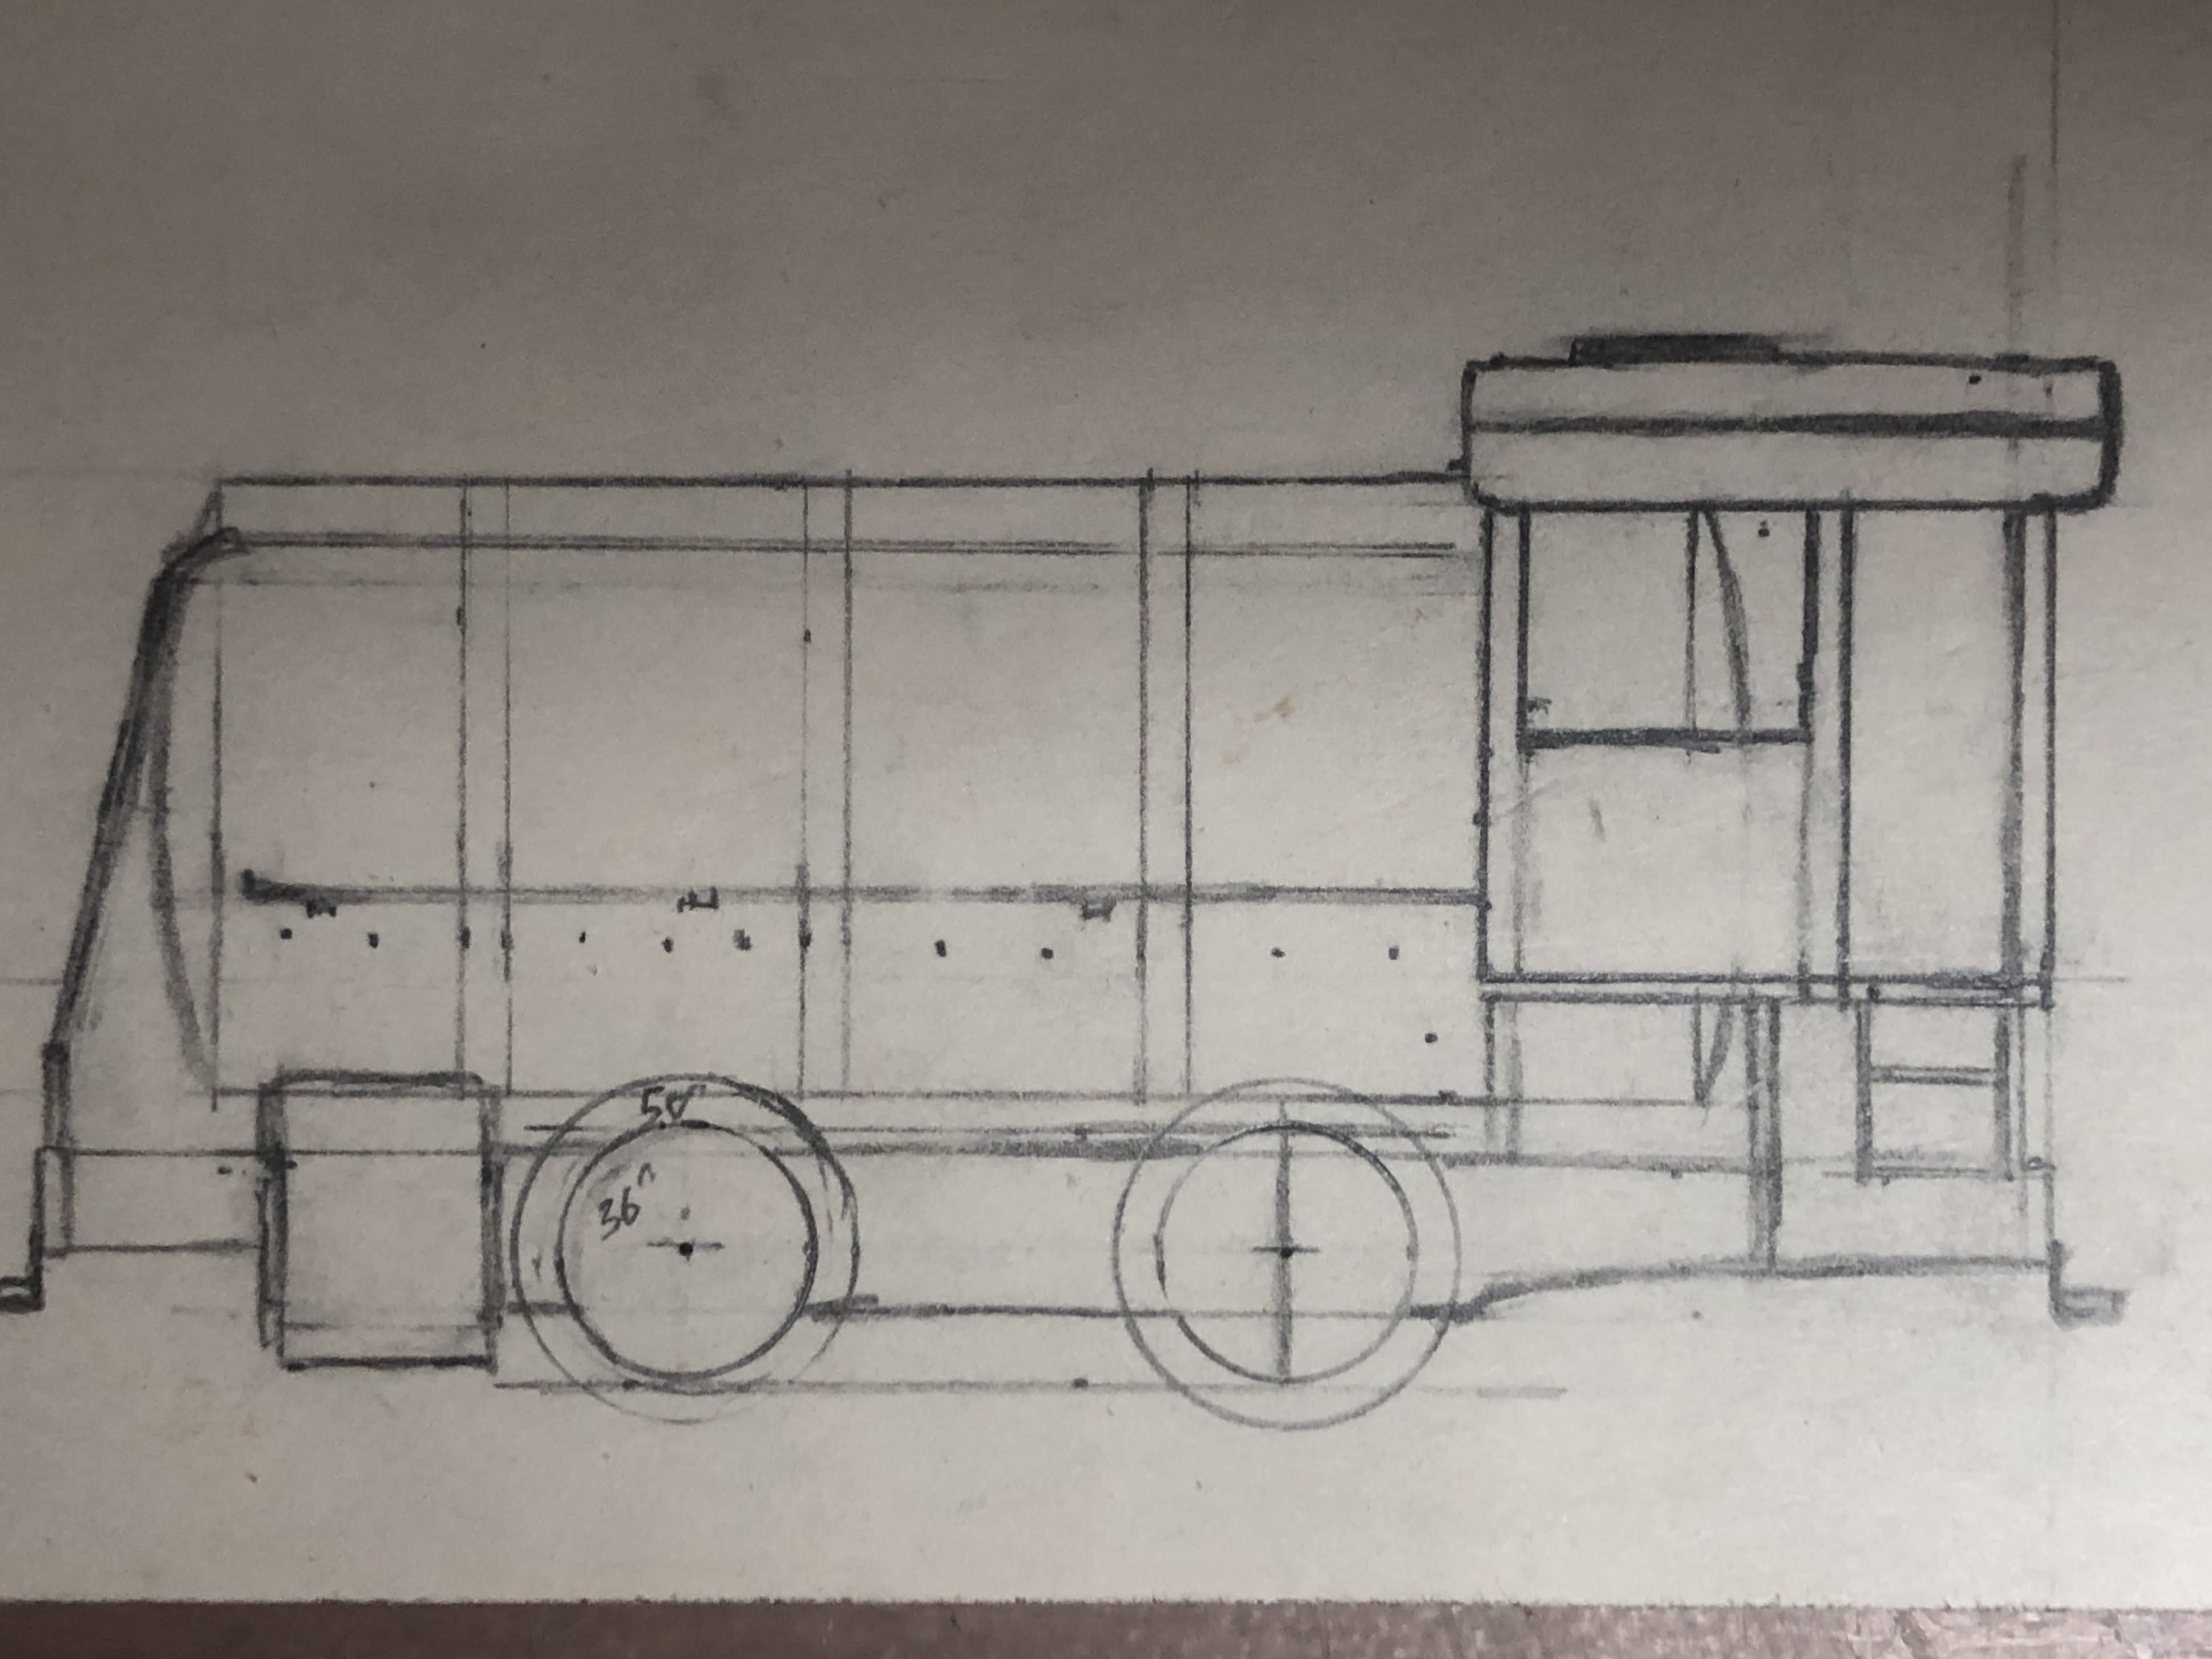
I got my photos and measurements, made a quick sketch, and started reworking my mockup using a Mantua chassis.

Lots of work (and decisions to make). The tank car tank is the correct diameter, and I had used it as a mockup for years. The S-1 has ~35"ish drivers, and the Mantua is 50". But I don't have to figure out how to make the valve gear with the Mantua chassis. Also, even though I know the tank car tank matches the dimensions, it looks small, although that could be because of the size of the drivers and the current height above the frame. The cylinders are pretty close to the correct size. 

I think the feel is more important than being exactly correct, and my current plan is to work with the Mantua chassis to get a completed locomotive operational, and then work on scratchbuilding a more accurate one. 


Thursday, August 13, 2020

Modeling NY/YN Freights - DERS-2b (RS-2) 0502 and 0503 - Part IV

Part I, II and III...

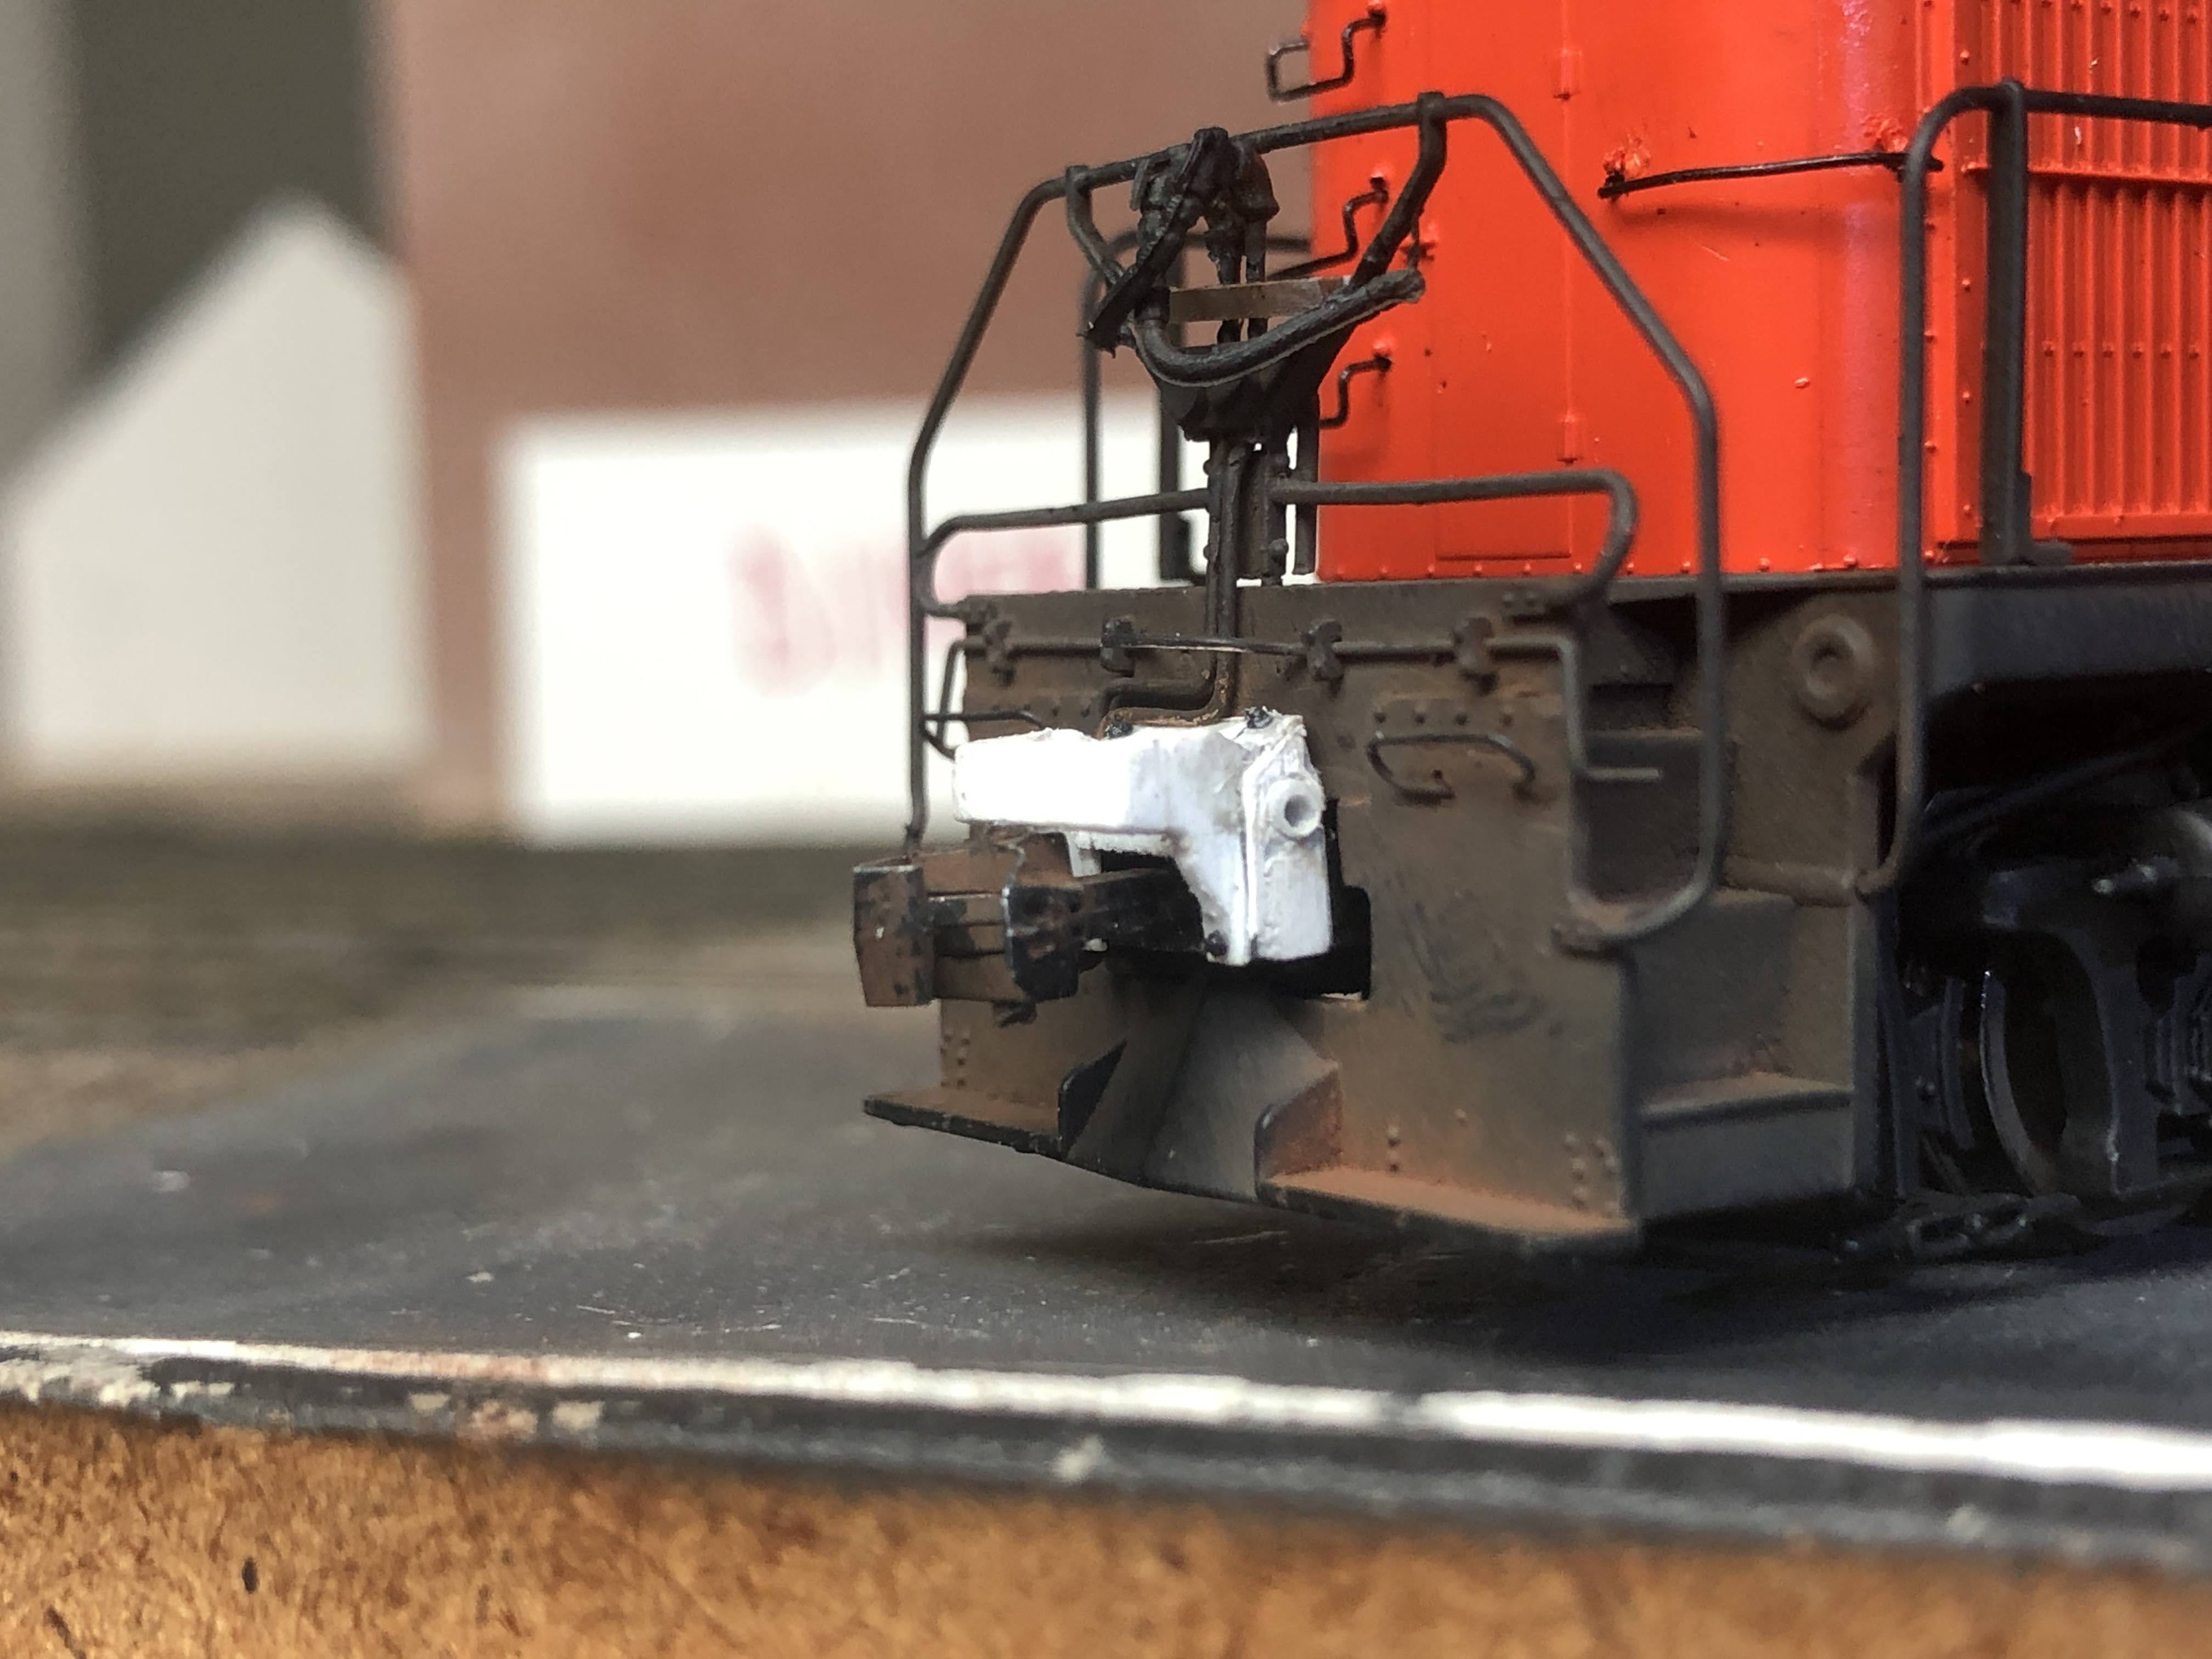
Next up is an often seldom-modeled detail - coupler buffers. In the case of the DERS-2b this consists of two parts. First is the actual buffer, which is a large casting that is also a close match to what is used on the DERS-2c (RS-3) locomotives. The New Haven also had an extended buffer since these were assigned for passenger service. This is shaped steel and you can see that it is bolted to the buffer itself in the picture below:


If you examine the photo closely enough, you'll see that there is an upward angle on the top portion that mirrors the angle on the bottom. This is a piece of steel in a 'U' shape, open at the top for the uncoupling lever to attach to the coupler below. Also of note is the hole in the side of the buffer itself. I'm not sure what it's there for, but I wanted to try to capture it.


This is my first attempt, which I determined was too small altogether, and too short top to bottom. But like many of my experiments, it served as a proof-of-concept so I could go about making the four buffers I'd need, and was very helpful in figuring out just how I'd go about it.

The starting point is a standard Kadee #242 snap together gearbox (coupler box). I trimmed two pieces of scale 2" x 8" cut .185" long, then cut an angle with the front edge measurement at .125" to form the sides of the buffer.


I used .040" x .080" strips for the sides and the front of the buffer. I just eyeballed this measurement based on test fitting with the coupler. 


I glued a couple of small pieces of 1" x 3" to the front, and then small triangles of the .040" x .080".


I notched the top of the passenger buffer to match the angle formed by the side, and then back up where that side ended. I then drilled a small hole in each side, and then widened it with a bead reamer so I could fit a piece of .30" styrene rod inside the hole.


I trimmed the styrene rod and sanded it to leave it just a little proud of the side. I then drilled out the center of it, and reamed it to widen the hole. This formed the ridge around the hole. I then use some scrap styrene to make the top of the buffer itself, and glued 4 nbw castings for the attachment points of the passenger buffer. I filed the edges and corners (and the inside of the front of the buffer) to give it that slightly rounded look of formed steel.

For the other three, I used a small piece of scrap to form the front face of the buffer before attaching the front of the passenger buffer itself. It was easier than trying to do it after it was built. You can see the other completed buffer here, with the other three under construction.


The white didn't photograph all that well, but this is a test fit at this point in the process:


I was happy with that, so I finished the other three. Here are all four, and in the back you can see the (upside down) Custom Finishing part that represents the passenger buffer. 


You can see my consistency is not great, but when on the model, painted and weathered they are good enough for me.

I painted/weathered them using a Woodland Scenics Steel Rail paint pen (it really doesn't matter what color, though), and then Pan Pastels to provide the actual color. I did the same thing for the couplers themselves.


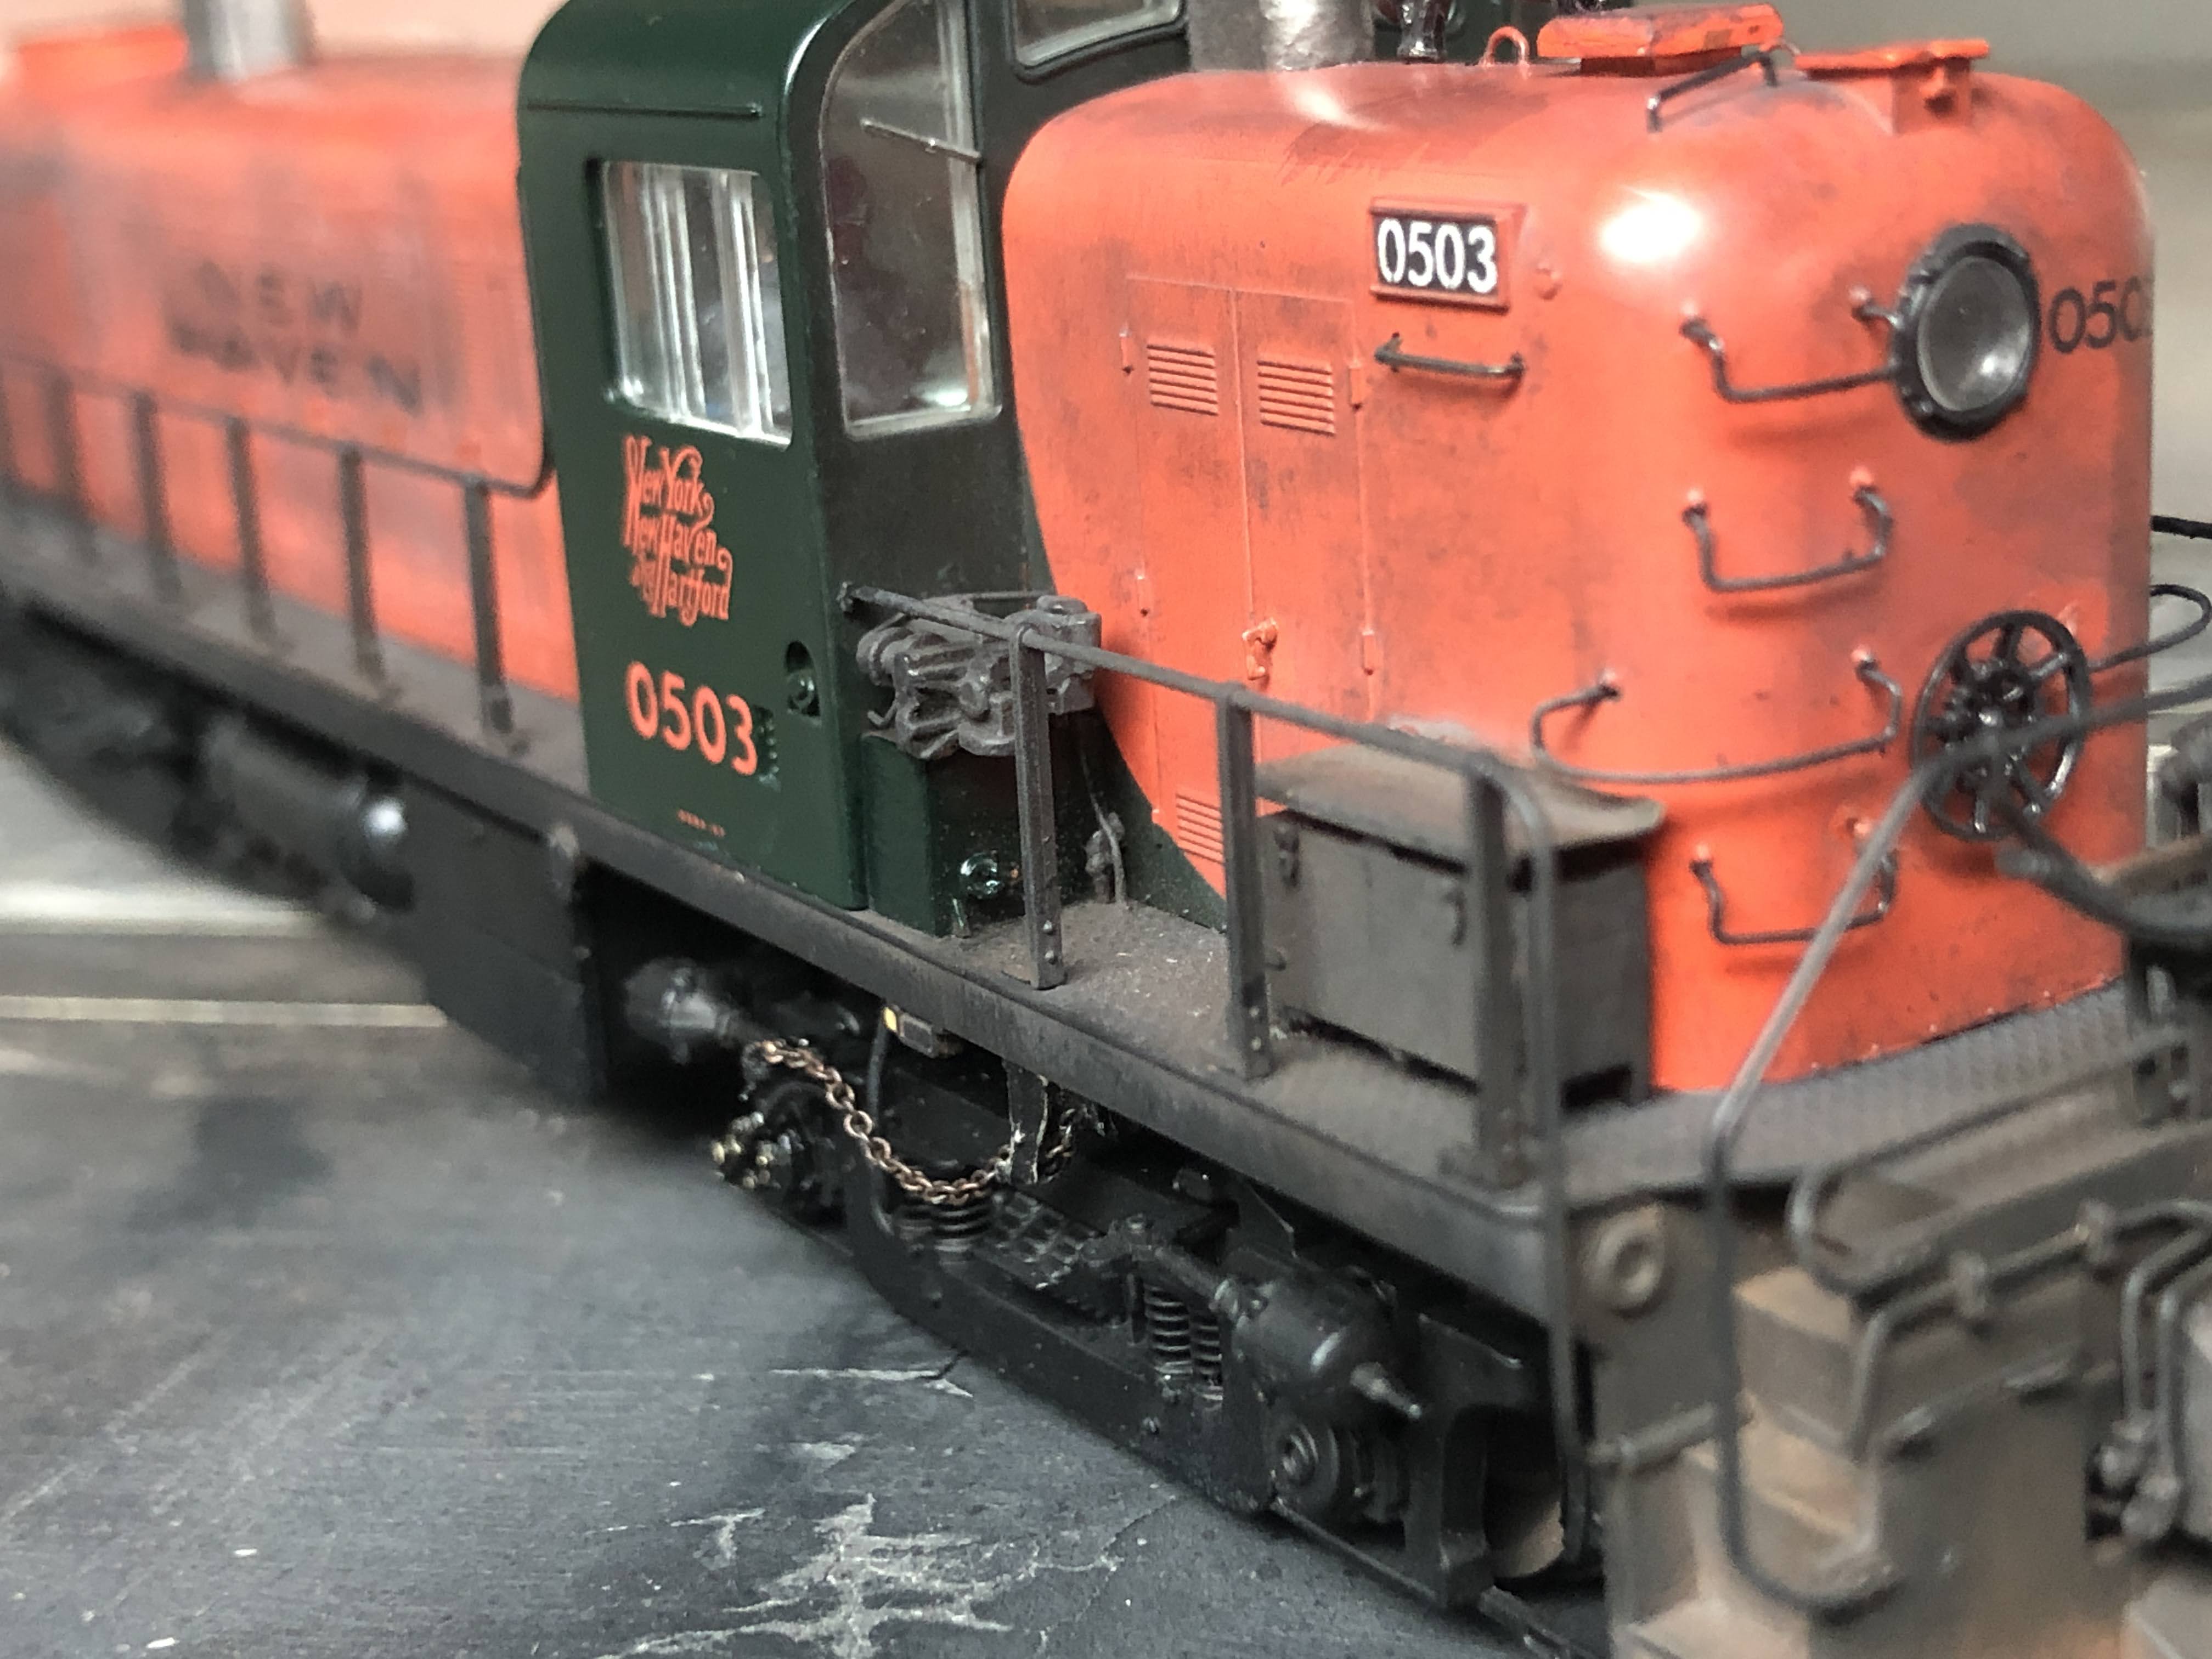
The finished buffers, along with a look at the new Cab Signal box that Jim Lincoln made for me. Jim is selling them for $10 for two, or $20 for five. I'm happy to hook you up with Jim if you'd like some.

The step above the box is Plano diamond tread material, bent to form the step, with three small strips of styrene (which you'll probably never see) as supports.


You can see I had to curve the underside of the buffer (and also file the top of the coupler) to get it to swing freely. It would work without that, but not self-center. I'm not sure I could have avoided this, since I couldn't really make the whole buffer taller. It's just a side-effect of things not being exactly to scale, but I don't think it detracts from the model.


Although hard to see in the photos, I used some of the rubber sprue from the Hi Tech Details air hose set for the air hose piping next to the coupler buffer that goes back under the walkway. I figured having some flexibility would be helpful, and I could easily bend them to glue to the back of the pilot. 

Parts Used in this post:
The model is a Life-Like Proto 1000 (now Walthers Proto) RS-2

Jim Lincoln (Contact me for ordering info)
New Haven Cab Signal Box


Tuesday, August 11, 2020

What else am I working on? The layout

Surprise, surprise! Yes, I'm still working on getting the track glued down and feeders installed. This is something that's much easier (or at least more fun) with a helper instead of by myself. With so many projects to work on, this is taking a bit of a back seat, but not for too much longer...I hope!

The goal, of course, is to have this all ready for the NE Prototype Meet at the end of next May. Obviously, I'd like to have it ready sooner if things improve enough that I'm comfortable hosting ops sessions again.

Reworking the engine servicing and installing the locomotive servicing pits.
They have travelled all the way to Cocoa Beach!

Widening Elm Street.

Reworking the east side of town (the west side and Stanley Works  were rebuilt as well)

Feeders at Whiting St Yard.

Thursday, August 6, 2020

Modeling NY/YN Freights - DERS-2b (RS-2) 0502 and 0503 - Part III

Here are links to Part I and Part II of this series of posts on modeling the NH DERS-2b (RS-2) locomotives.

I covered the pilot grab irons in Part I (although I've started using the jewelers pliers to make the curved bends since it's easier to be consistent), but one of the most challenging parts of identifying what needs to be done is the additions to the pilot that the New Haven made. There are similar modifications to the DERS-1b (RS-1) and DERS-2c (RS-3), but each class has a different configuration.

My original plan was to use the Custom Finishing part #347 RS-2 End Platform Railing Mounted MU hoses. However, closer examination showed that it wasn't an accurate representation.

Here's a picture of 0502 in Pittsfield in c1947/8. You can see that there are two MU receptacles, along with some air hoses mounted on the end railing. Two pipes run down the front of the pilot and work around the buffer. But it looks like there is another pipe of some sort behind the railing, just to the left of center.


It was the builders photo that clarified that for me. This is 0500.

First, you'll notice that the air hoses weren't installed by Alco, at least prior to this builder's photo. But you can see (particularly if you look at the left end railing), that the MU stands are the pipes that go down into the walkway, just left and right of center.

The air hoses are bent to come in front of the end railing just below the MU receptacles, and the piping is then bent to go to the left of the buffer, and then have elbows connecting them to pipes behind the pilot.

Because these were equipped for passenger service, they also had BARCO steam line pipes. You can see it sticking out of the door beneath the coupler.

Mike Robbins has a photo here that clearly shows the set of doors beneath the coupler, and the BARCO steam line. You can also see how the air lines and other pilot details.

He has another photo, that shows the pilot details even better. I also used this photo to identify details below the walkway on this engineer's side of the locomotive. It also shows the brake equalizer (?) in great detail mounted on the box behind the engineer.

The second group of RS-2s, 0510-0516, delivered in November and December 1948 had the piping routed down through the walkway, there is a single MU receptacle, and also looks like they didn't have the doors over the BARCO air hose, as seen in this Sweetland photo of 0516 in 1954:


Looking more closely, the end railings are also attached differently than the original delivery, and the uncoupling lever is longer too. These better match the model, but because the railing are so fine and well rendered on the P1k model, I decided not to replace them (I tried though!). I don't have a builders' photo of the second group handy, to see how they were delivered from Alco. 

Since 0502 and 0503 are from the first delivery, I'll need the dual MU receptacles and to have the piping visible on the pilot. So instead of using the Custom Finishing part, I cobbled together the ends from several parts. 

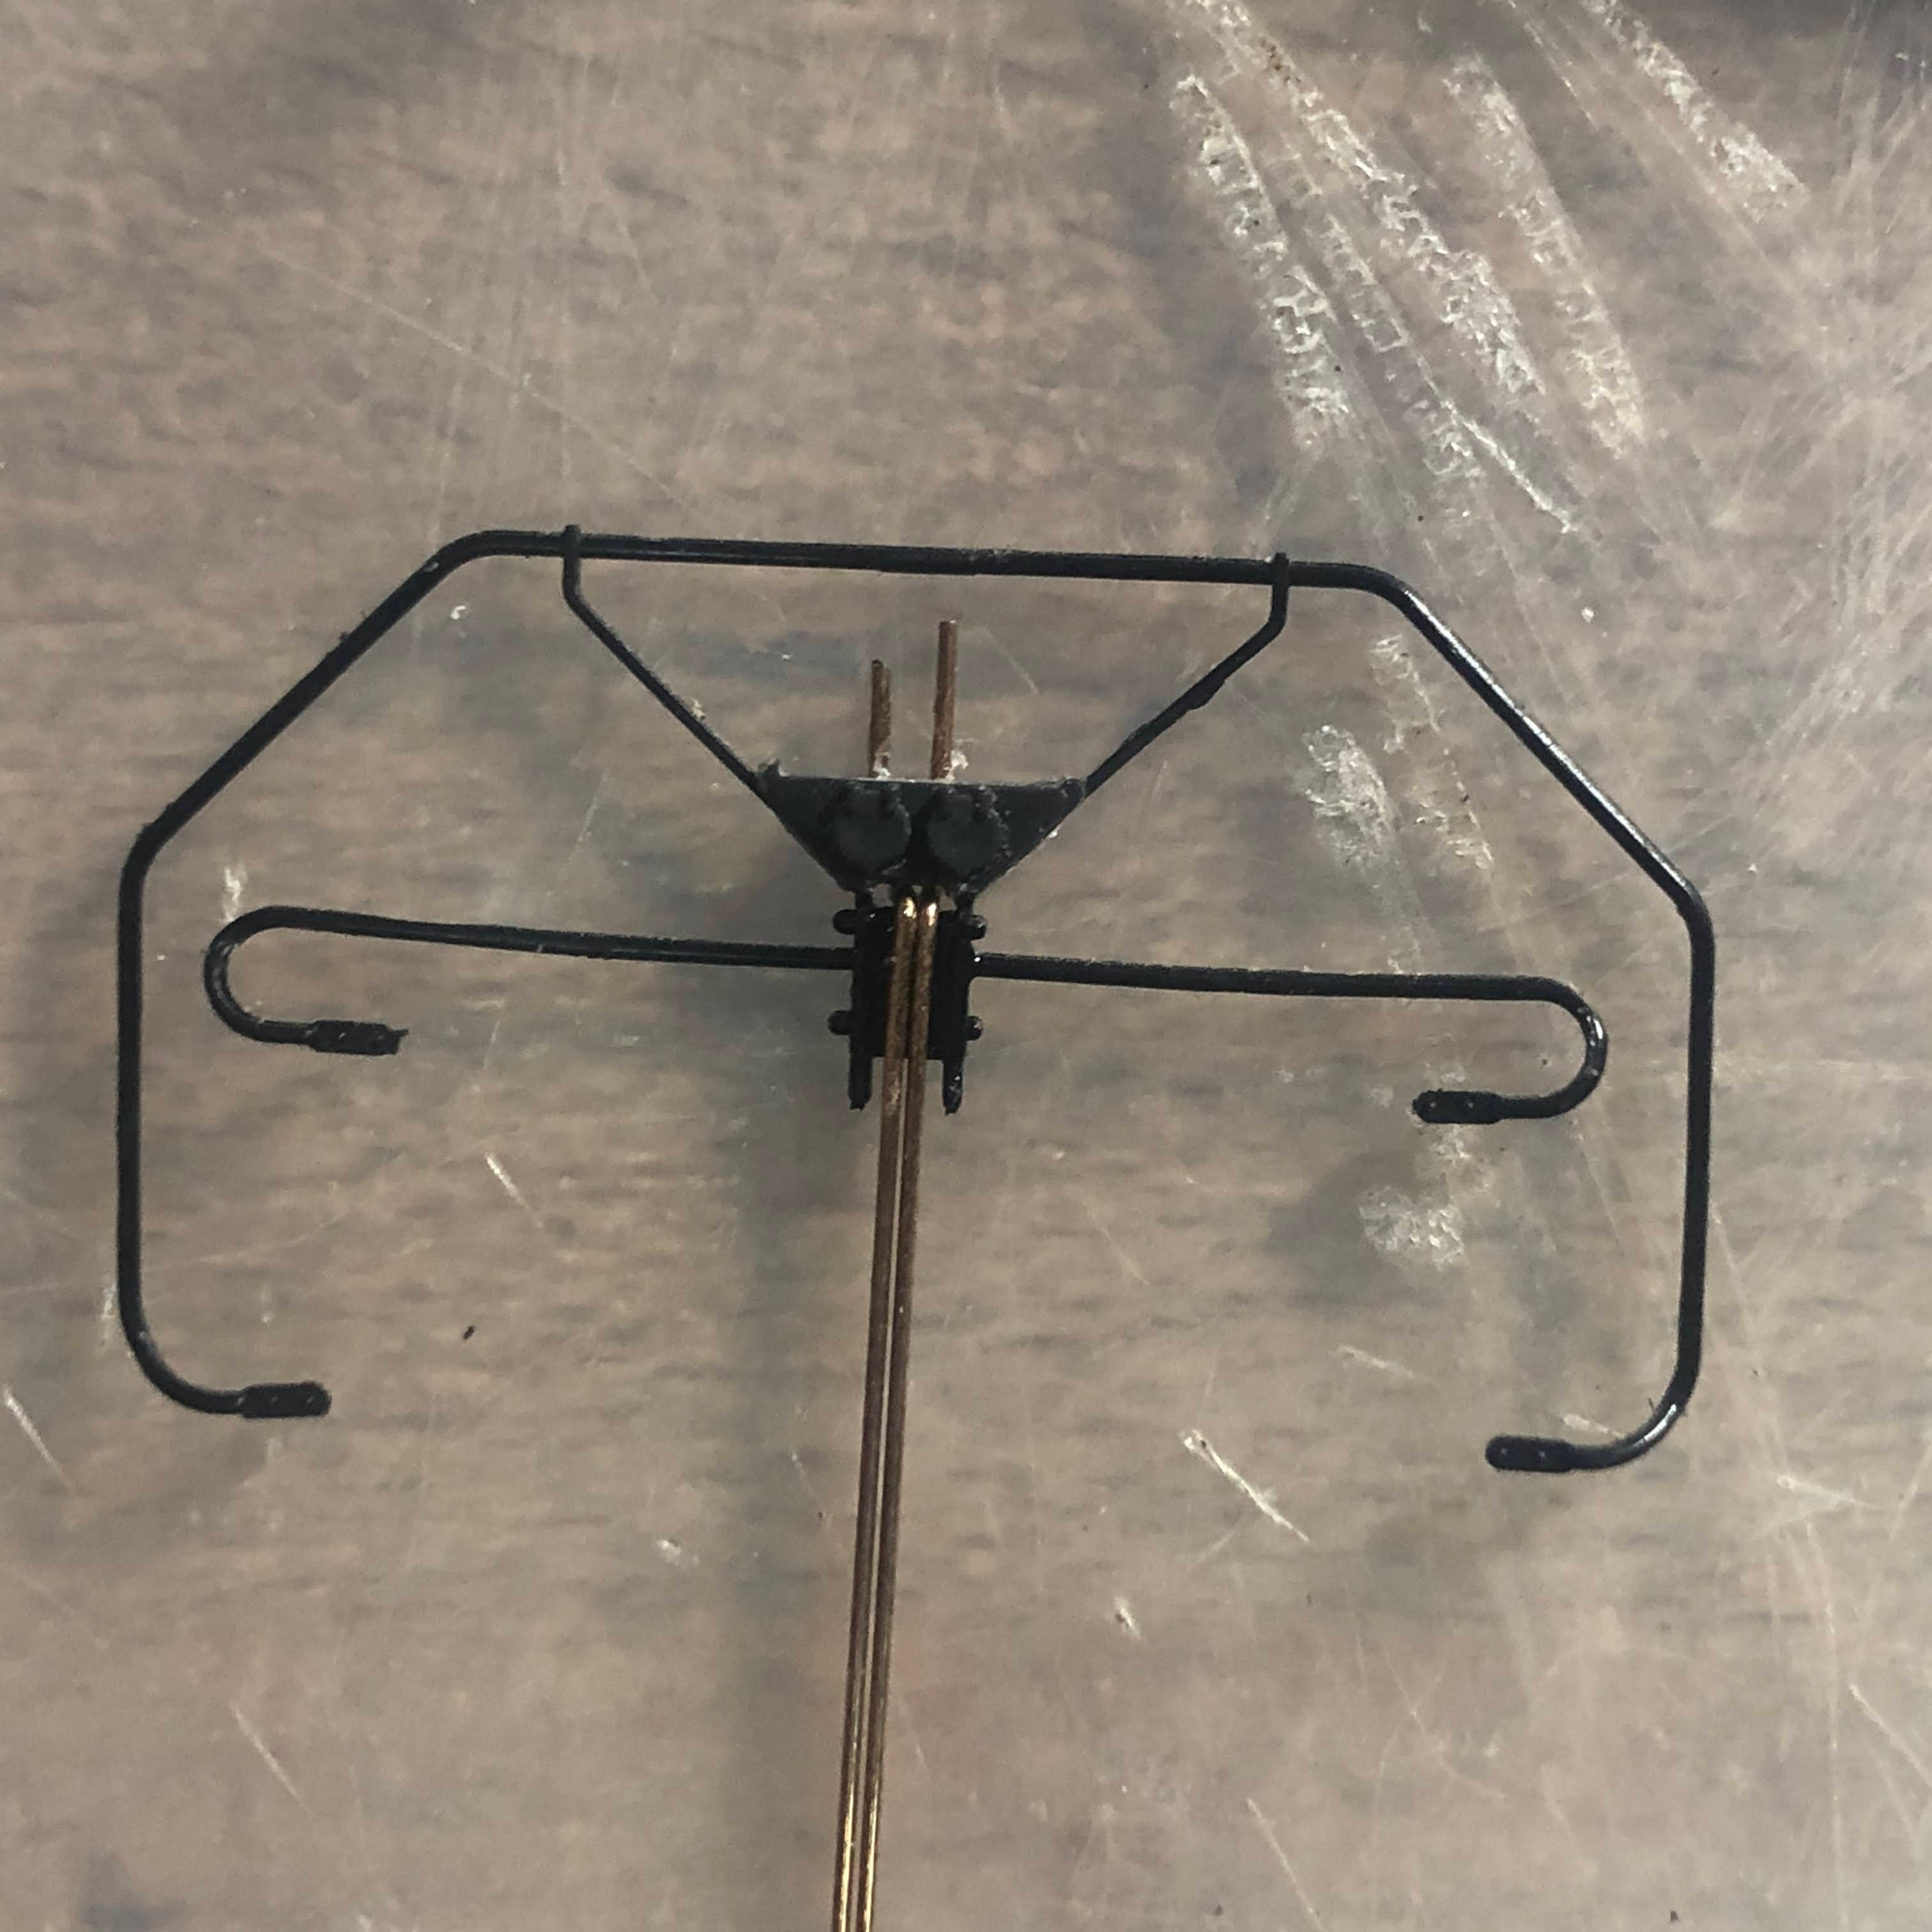
First, the Kato end railings have the correct MU receptacles (minus the piping that goes into the walkway). I considered using them as is, but the Proto railings are significantly thinner and better looking. So instead I cut the MU receptacles off of the Kato end railings, and glued them to the Proto ones.

This is the Kato end, showing where I made the cuts.
I then filed the back of the part to eliminate the portion of the railing, and to thin the part.
This is the Proto end with the MU receptacles and wires bent and installed.

On the back I used .030" styrene rod, and bent the end to represent the MU pipes. In reality, there are more rectangular box-like structures at the top, but I didn't take the time to figure out a way to make those.

The next step was to bend the wires and cut them to go around where the buffer will be, then cut to length. It was trickier than I expected.


Precision Scale elbows and Hi-Tech Details rubber air hoses completed the end railing details. The rubber air-hoses take ACC very well, attaching pretty much instantly to the brass elbows. 


Next up were uncoupling levers. I originally started with the Kato ones, since they have the correct brackets. However, I found it very difficult to measure and drill holes in the precise locations needed for the one-piece part. 

So I decided the try the new Cal Scale Coupler Lift Bar Mount Brackets. I already had some Detail Associates Uncoupling Levers. I believe the brackets are from the forthcoming RS-3 models. They are tiny, and have two mounting pins. However, I didn't think I could drill that many holes that accurately, so I cut off one of the mounting pins, and installed it so the mounting pin went into a hole underneath the lever. The bracket fits over the bar and with styrene cement, the second pin isn't necessary. Because they are separate parts, you don't have to be as precise with your drilling.


I also added the Cal Scale poling pockets. Since I've seen the air hoses pulled to the side, and also left to hang, I modeled this one with the hoses just hanging.

I will complete the buffer once the walkway is installed on the chassis, since I'll have to build it around the coupler box. There's also a second stiffening piece of strap steel (which looks like where the piping was attached on the back side) above the receptacles. I missed it here, but added them later. 

Next up was the brake equalization lever. Thanks to that photo, I was able to see how to best mount the part (it's not really an exact match but it looks good), and also add some additional piping.


It's .010" wire, except for the short piece beneath the elbow which is .020" wire. I cut a small piece of .030" styrene rod and even a tiny triangle for the bracket next to it. I think the extra piping helps tie it into the model. I also tried to carve out the square-shaped hole on the front of the styrene rod (I couldn't find a part...)

I've also attached the railing so I could paint everything black. I'll brush paint the front and side of the box Hunter Green.


Parts Used in this post:
The model is a Life-Like Proto 1000 (now Walthers Proto) RS-2

Cal Scale (order from Bowser Trains)
190-734 Poling Pockets
190-729 Loco Coupler Lift Bar Mounting Brackets

Custom Finishing Models (order direct)
308 Brake Equalization Valve

Detail Associates (eBay or old stock at hobby stores)
2205 Diesel Uncoupling Levers
I had them on-hand, otherwise I would have used Cal Scale 190-514 Coupler Lift Bar

Hi-Tech Details (order direct and can be found in hobby stores)
HTD-6038 22" A.A.R. Air Hoses

Kato (eBay)
Just the MU receptacles from the RS-2 end railings. The handrail set is out of stock at Kato. Otherwise I would have made the steel strap from styrene and used the Cal Scale 190-618 MU Receptacle Set or Detail Associates 1507 (or several similar ones that come with these parts)
 
Precision Scale (eBay, local hobby store or direct with $25 minimum)
48395 Elbows (0.020")
 

Oops. That's not an RS-2...where did that come from?!?

Tuesday, August 4, 2020

What else am I working on? Hoppers and Boxcars

With at least 7 dealers selling anthracite coal, and so many large industries receiving bituminous, it should come as no surprise that I'll need a lot of hoppers. So I have a bunch in progress. These are mostly MTH USRA hoppers, a few Atlas, along with F&C and Westerfield resin kits. I'm sure more will be added as well.


Just above it is a shelf primarily consisting of in-progress single sheathed box cars from F&C, Westerfield, Speedwitch and others. There are several double sheathed and even a steel car mixed in.