For the DEY-3 (S-1) locomotives, I'm using the Proto 2000 model. Mine are the pre-Walthers, my understanding is that Walthers made some modifications to the drive/chassis with a shorter motor, which would alter the process I used slightly.
The models themselves need very little in the way of detail alterations, with the biggest one being the cab. One of my shells (well, three of them, I have two spares) are at Chris' but Mike Redden is finalizing a new set of radiator louvres for the earlier version of the locomotive. So I'll cover all that in detail in the future.
After a couple of evenings of experimenting and testing, it took me an evening to do each one. I don't rush, and do a lot of test fitting and tweaking. I also ended up completely disassembling it to the frame so I could properly clean the trucks and to keep bits of metal from getting into the gear boxes while modifying the weight and frame.
For soldering, flux then tin each wire, and flux both wires before soldering them together. If everything is tinned and fluxed it goes very quickly and cleanly. I use a no-acid no-clean flux. Don't forget to thread a bit of the shrink tubing on first.
I wanted to use Scale Sound Systems' speakers in these (and future) locomotives. They appear to be 3D printed enclosures and have the speaker preinstalled. Most importantly, it is designed to fit a specific model by an audio engineer. His instructions specifically note that you should not modify the enclosure to make it fit. Of course, that means I did. I don't think these are problematic, but YMMV.
The instructions JT provides has you remove the weight altogether, and install the speaker using screws that used to hold the weight in place. There's a gap under the speaker on mine, and I suspect that's due to this being the older chassis. It's unclear in the pictures on the site whether a spacer was used under the front.
But I wanted to keep as much of the weight as I could as well, since these will have to haul the New Hartford Local up the helix. Out comes the Dremel.
I cut it just beyond the portion that covers each flywheel.
I had to cut off one of the mounting lugs on the speaker as well.
This allows it to sit in the same location, but retains 2/3 of the weight.
Of course, it no longer screws in on the left. I had to modify the lug on the right because it extended too far, and then extend the hole to the edge of the enclosure itself. It still doesn't screw straight into the existing hole. However, with Kapton tape to hold the speaker in place, I decided the screw wasn't needed.
I frequently test-fit the shell to make sure everything was low enough.
An ESU Micro conveniently fits in the cut-out for the motor connection:
And an ESU Power Pack fits in front of the cab as well:
One issue with the Proto S-1 is that motor is electrically connected to the frame. Note that this doesn't prevent you from installing DCC, it's a similar design to a brass steam locomotive. However, a problem can arise is the wheels of the opposite polarity accidentally touch the frame (which can happen in a derailment). That short can fry the decoder. So I decided to go ahead and isolate the motor electrically from the frame. First by using Kapton tape:
You can see the nut on the bottom of the motor above. That's usually in contact with the frame. Fortunately, they also provided a copper tab for soldering a wire to it. The fit is very tight, so I soldered the wire to the side of that tab:
Then tested:
For the second one, I decided to cut away a portion of the frame here, to give it more room.
The Kapton tape was working fine, but after installing/removing the motor several times I noticed I had torn it on the second chassis. It doesn't appear that I did so on the first one. But this ensures that it has enough space and won't happen again.
The next challenge was the wiring. The old wiring went through holes in the weight, which is now covered by the speaker. Instead, I taped the wires from the front truck along the chassis. You'll see that there is a flat spot on the chassis just next to each flywheel. It's just the right width for the wire to pass. The tape keeps it in place.
Incidentally, I use the NMRA Standard wire colors. They look a little different in the lighting because the wire I use has silicone insulation. So the color is a little different, and looks even more so in this lighting for some reason. The main advantage to the silicone is it doesn't melt back when soldering to the wire like ordinary insulation.
I found that the wire that is pre-attached to the ESU decoder was fine enough that it just fit next to the speaker. It was not, however, long enough. So I had to splice in another section in the middle. I use shrink tubing for all of my solder joints. I used the pre-installed wire on the decoder to the top motor connection. The Power Pack is held in place by Kapton tape over the decoder itself. Otherwise it's hanging freely. I tape things down in layers, so probably use more tape than others. Another challenge is determining how much extra length of wire you need to work with, but not too much.
I haven't done anything with the headlights yet. I'll need to get a surface mount LED to fit for the headlight itself. I'll need to do the same for the reverse light. I'm on the fence about doing it at all, since during the majority of the era I model, the NH didn't use the headlight during the day.
I also took the time to replace the oversized brake chains while I had everything apart. I covered one way that I've installed chains
on the RS-2s here. In this case I used .006" wire and instead of a small hook, I used a long "U" and twisted it after attaching to the chain. Each one was slightly different.
On the last one I experimented with using some of the extra copper wire trimmed from the decoder. I removed the insulation, and used the wire to attach it to the model, and then soldered the wire closed. It worked well and I'm likely to continue to experiment with that approach in the future.
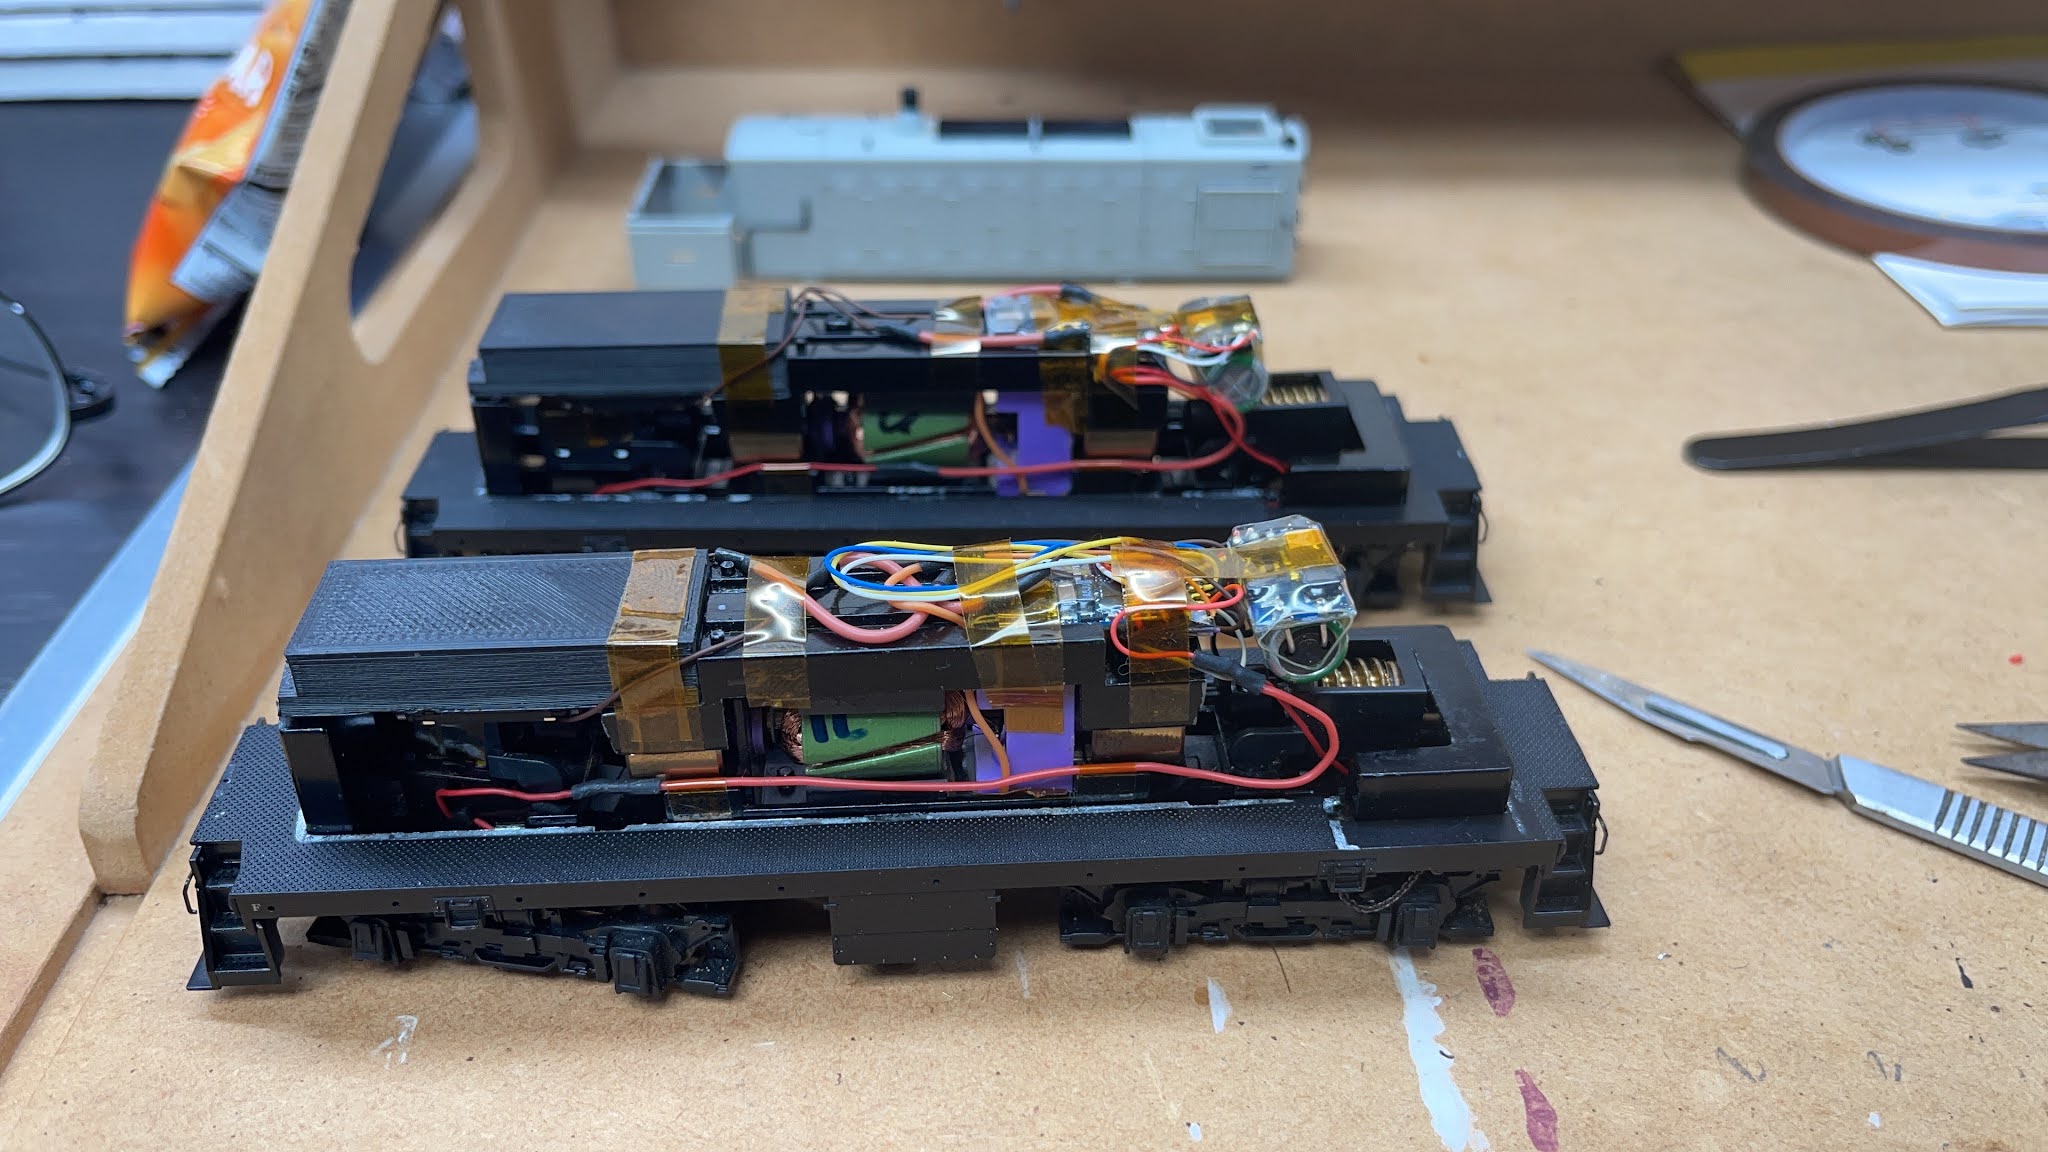
So here they are. Two naked Proto 2000 S-1s with sound (and tested). I try to be neat while installing decoders, but I'm not fanatical since I'm hoping I'll never see the inside of these again once they are finished.


LOVE this! I may decide to have you do mine after all 😏
ReplyDeleteIt's not that bad. Probably took more time to figure out how I'd do it, than it actually takes to do the locomotive at this point.
ReplyDeleteNice job Randy. A few improvements over what I did for an S-1. I cut down the enclosure of an iPhone speaker to make it fit in the slot of the top weight. I'd like to try the Scale Sound Systems speaker and add an ESU Power Pack. I'm sure the sound is better than my chopped up iPhone speaker.
ReplyDeleteRandy, on this install, do you loose the cab interior?
ReplyDeleteNope. Everything is contained within the hood. I'm actually working on these locomotives now, so there will be some new posts covering my modifications in the next few weeks.
Delete