Well, the last part of the year has gotten ever busier, so my modeling (and blogging) has been reduced. That's OK, it would have set a high bar to do three posts a week for an entire year.
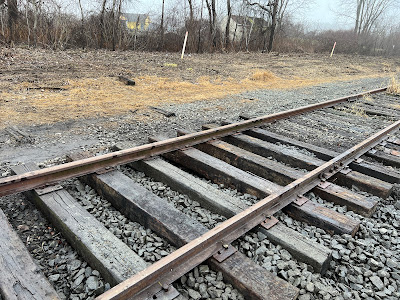
The busy schedule continues, as spent the day ballasting the Armory Line (and will probably do so tomorrow as well). It was unseasonably warm today.
You can make out the old passing siding (I think) to the left.
Probably 13' track centers. I'll have to measure it.
They replaced these ties, and we're filling in the ballast.
The compressor didn't feel like working today. So no tamping, just some old-fashioned manual labor with ballast forks, and then we used the Trackmobile to bring up a car full of ballast to dump along track. This section of track is still disconnected and requires work before it will support a locomotive anyway.
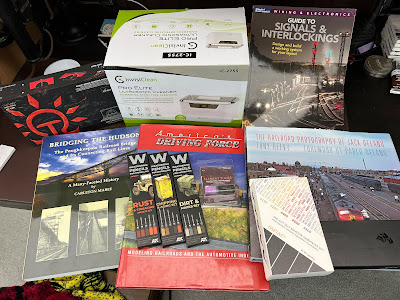
We also had a fantastic Christmas, and I got quite a bit for the railroad. A number of books, new tools and weathering pencils that I look forward to trying.
I'll report back on the tools and weathering pencils in future posts as I try them. I'll also need to look at where I stand on my current goals and how I'll address them in the new year.
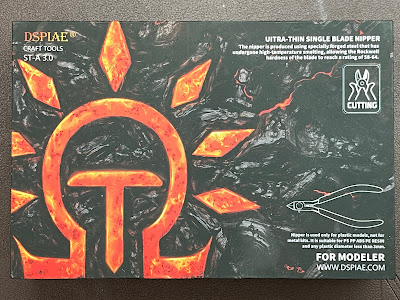
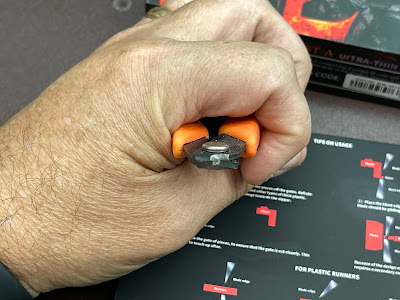
For my birthday I got a new tool. This is from the same company that produced the bending tool I recently picked up. Since I received a free Amazon gift card I decided I'd see how their other tools are.
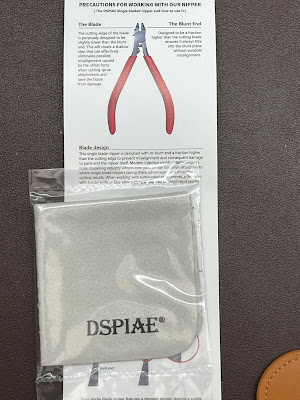
It's packaged in the Apple approach, with a very well-designed box and inner packaging. Although I don't particularly care (and environmentally-minded types probably wouldn't like it), it does give the feel that this is a high quality product.
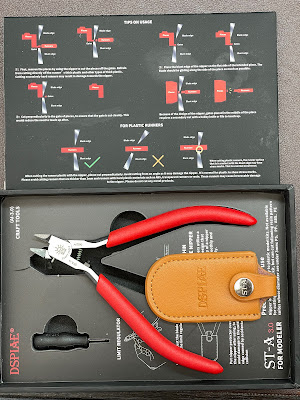
It really is. It works considerably better than any other nippers I have, including a couple of types of Xuron nippers, and some other brands I don't even recall. Although they are sharp, I think the real key to their performance is their design.
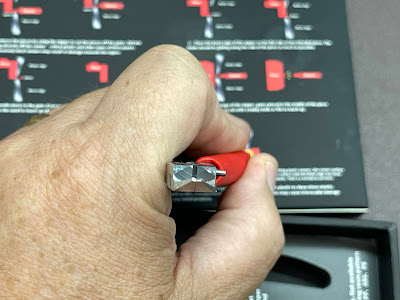
In the regular Xuron nippers, the blades meet rather than sliding past each other. This makes it possible to get a flush cut. But they tend to have relatively large wedge-shaped blades that push apart the material when cutting. Like track cutters, it means that one side of the cut is flush, but the other side is more "squashed" and not square. Even worse, if you desprue fine plastic parts in the wrong order, you can break some as the blades push apart the material.
These nippers are similar to the typical Xuron flush nippers. But it has one blunt blade that is a similar thickness to the usual nippers, and a second cutting blade that is nearly as thin as a razor blade. The blunt side works as a cutting surface for the razor. As a result it makes a very clean, stress-free, flush cut.
I'm sure this isn't the only brand that makes a nipper of this design, but this is the only one I'll need. The ultimate test for a nipper for me is an old Branchline sprue. The plastic for a lot of these kits has turned brittle over the years. They were tough to desprue cleanly before, but now I've even had an entire passenger car side break just from the force/stress of cutting it off the sprue. These cut it cleanly, easily, and no significantly noticeable stress to the parts.
It even comes with written instructions (in addition to the ones on both sides of the inner packaging), and a cleaning cloth.
A new tool. The packaging was impressive enough to do an unboxing:
It consists of a base, with a removable base plate, a spring that is over the post, and the knob with a nylon washer that holds the bending brake (I think that's what it's called...) to the tool. The larger one has two base plates, one like this one, and a stainless steel one with a mirror finish. I liked that it also comes with the handheld bender. That worked well, and seemed to be a little easier than using a straight-edged razor.
There are two plastic nubs that keep the brake in position. Unscrewing the knob loosens the brake, and unscrewing it more lets you rotate it. These nubs are loose fitting, allowing you to wiggle the brake when it is not fully tightened:
I had read a review on their larger bending tool, but thought that the smaller size would be more useful for what I'd need. I got mine at Amazon. There are a lot of these tools on the market, but I found very few reviews for any of them. There are almost no comparison reviews, nor could I find much that explains the purpose of their design or use.
I decided to get one because I have a couple of sets of the ALCO S- and RS- series stanchions from KV Models. Once I received them, I realized I'd be more likely to be consistent with a bending tool.
The stanchions are made from phosphor bronze, to be able to solder the handrails, with detail on both sides of the etching:
Each stanchion requires two folds, the rivet plate that extends from the side, and another one that extends to the bottom (the rivets are on the back side of the etch).
Since the bends go in opposite directions, the best option is to use the side of the tool. That allowed me to bend the side one down, and the end one up. On these etchings, you always bend toward the etched bending line:
What worked best for me is to get it close the correct position, then tighten the brake so there was some friction. Then I could tweak the position without overdoing it. When it was in the correct position, I then tightened the knob. Because of that wiggle I mentioned, I had to hold the brake with the other hand to ensure that things didn't move. It's not a huge deal, but something to be aware of. I plan to shorten the tip of one side of a pair of tweezers so I can let one extend down the side and the other (shorter) end can align the part even easier.
The fingers of the brake are different thicknesses, widths, and spaced differently. The space between the fingers makes it easy to align the parts with the side, and I used the side that allowed two fingers to hold the part. Apparently the inside curves between the fingers can be used to curve parts. They have another tool specifically for that purpose.
Once the bend is started, I found I could complete the bend by hand. Here are the first two.
It only took about 30 minutes to do the 16 that I'll need for one S-1. This included cutting them from the fret, filing the attachment point, and bending them.
For me, a single-edged razor blade worked better to cut the attachment points on the sides of the stanchions. I did this by starting the cut from one side of that point, then a second cut from the opposite direction. This left almost nothing to file off after the cut. I used Xuron etched-part nippers for the bottom attachment because it was quicker.
The reason I used the razor is that the nippers work like scissors, where one blade slides past the other. I found that this required more filing, it would bend the part up, or both.
For the end railing, a more complex part, was easier to use flat pliers. The part is large enough that I could handle it, and because of the multiple cuts in different directions, I wasn't sure how I would do it on the bending tool.
These are preliminary bends, since I'll have to determine the exact angles when fitting it. I started with the top bend:
Then the main bend in the opposite direction:
Two bends for the base and mounting pins:
Lastly the two bends to align the stanchions back-to-back. I used a different pair of pliers that was small enough to fit between the other bends. They happen to have an angled end, but that's not important.
I checked and adjusted the angles against the model version.
These are really well designed parts, and a really useful tool. Why would I bother with using the etched parts (other than just to try it out)? I'll get into that in a future post...