Wednesday, March 31, 2021

New Haven Yard Operations II

On October 21, 1947 the New Haven Railroad published a booklet entitled New Mechanized Train Consist and Car Record System in which it states: 

"...developed by New Haven officers in cooperation with engineers of the International Business Machines Corporation. Studies first projected in 1940 by the New Haven's transportation and communications departments culminated in a definite plan in 1942, but, because of war-time priorities, equipment was not received until the latter half of 1945 when operation was commenced between Maybrook, Cedar Hill, and the car service office at New Haven."

This booklet tells the story in great detail of the old and new Yard Operations processes and paperwork. In my quest to better understand the the inner workings of  New Haven Railroad, this was the single most informative document I found regarding the paperwork and processes used in yard operations. 

This is also not that story.

But it is the story of an article in the February, 1946 Along the Line that provides an overview of the new system.

Another New Haven First!


The article proudly states:

Revolutionary developments in the handling of interchange reports and train consists are being put into effect by the Car Service Department. They represent the first civilian adaptation of techniques used during the war by the Army Air Forces and the Office of Defense Transportation in Port Control work.

The piece is largely promoting the benefits,

...each yard will receive detailed train consists showing all pertinent information on each car in the train well in advance of the train's arrival at the yard. This will enable the yard to know exactly what is coming and allow it to plan its work before the train has arrived.

This is the biggest advantage, and the biggest change in operational procedure because of the system, as we'll see in the booklet that was published later. 

Already installed between Maybrook, Cedar Hill and the Car Service Office, the new procedures will be extended to Bay Ridge, Oak Point, Hartford, Springfield, Worcester, Northup Avenue, Framingham and Boston.

It continues to detail how it will streamline the processes of moving freight trains through the yards quicker, reducing errors, and providing information more quickly between points on the railroad, among other benefits such as,

Prompt transmission of this information and its quick availability also will forestall many of the telephone calls now being made to various interchange points and yards. For example, since January 15 the Car Service Office at New Haven has been furnishing most of the car records and passing information that previously was only available at Maybrook. This will relieve the already crowded telephone circuits and should make for general improvement in telephone service.

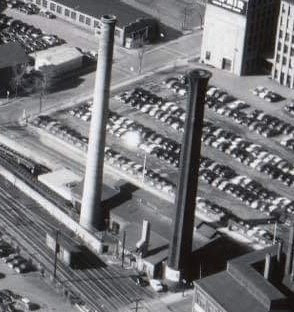
It provides an example of an Erie freight entering Maybrook:

As soon as the train reaches us at Maybrook, the bills are forwarded to the General Yard Office through a pneumatic tube and cards are punched from the bills on a printing key punch which types across the top of the card as it punches holes in the body of the card. Punched and typed on these cards is the car initial and number, contents, kind of car, gross tons, billing road and route, arrival train and time and data of arrival, the origin, shipper, consignee and destination. 
 
These cards are then put through a card-controlled tape punch which cuts a teletype tape. The tape is put through the teletype printer which simultaneously prints the interchange report (at Maybrook this is the inbound consist) for Maybrook's use and transmits it to the Car Service Office. 
 
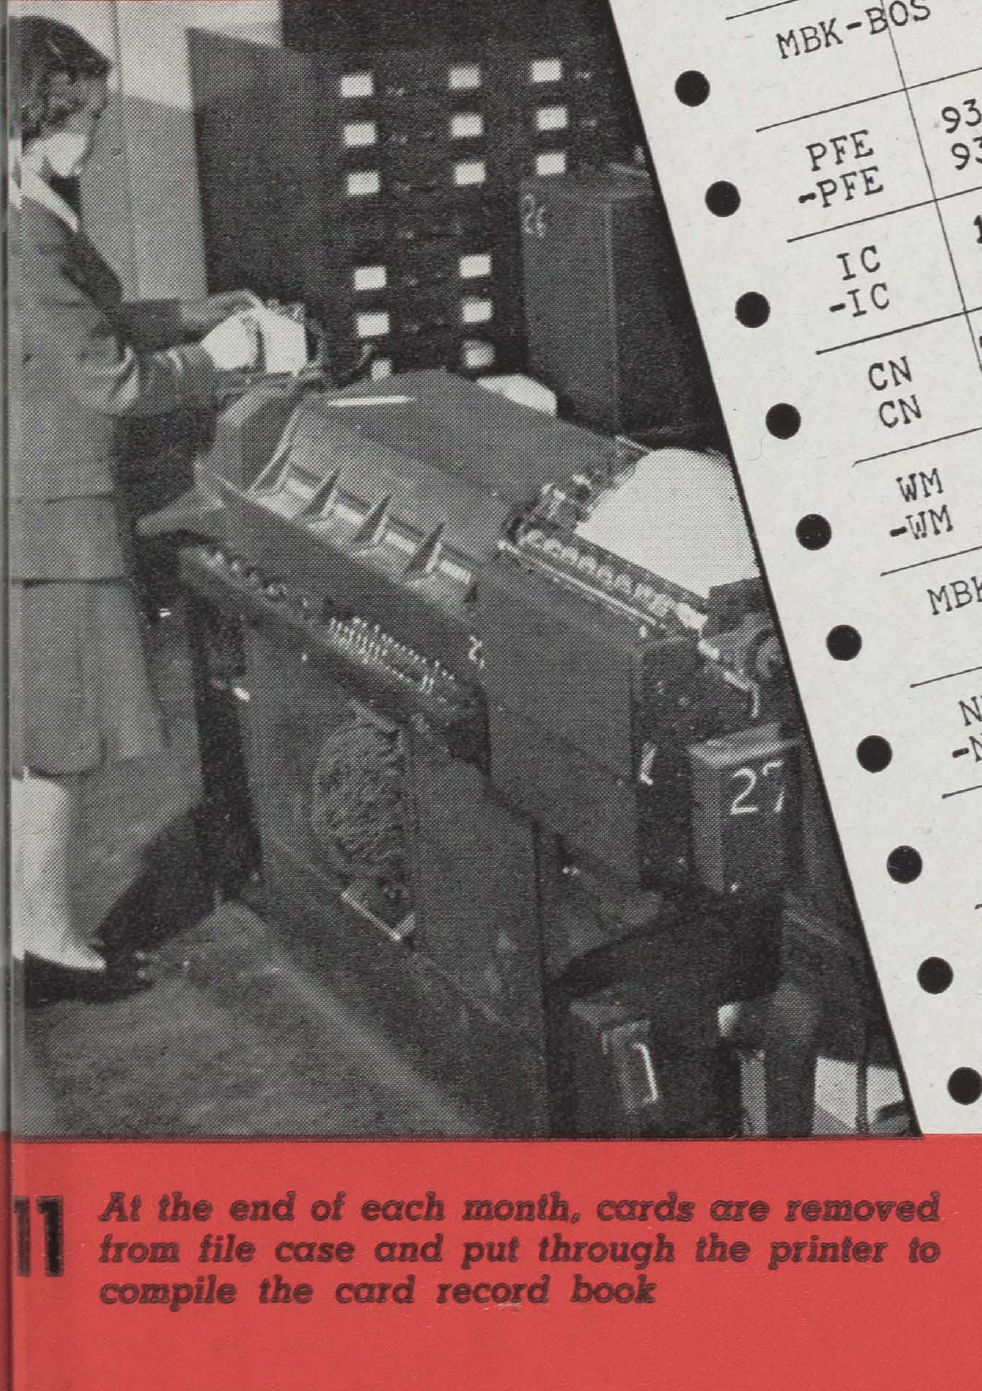
After the cards have been used to make the tape, they are racked with the bills in the eastbound bill rack, awaiting departure in an outbound train. 
 
When the track check for the outbound train is received at the yard office, the bills with the cards are pulled from the rack and arranged in the outbound train order. The cards are then separated from the bills and put through the card-controlled tape punch to cut a teletype tape, which is put through the teletype printer to print the outbound train consist and simultaneously transmit it to the Car Service Office and to Cedar Hill. After the train has departed, the cards are sorted in car number order and filed for index record purposes. 
 
Under these operations, it is no longer necessary to sheet by hand the inbound train consist, type the interchange report and write up by hand the outbound train consist or wheel report, nor post the records manually to index books. 
 
When the advance consist of a train departing from Maybrook is received at Cedar Hill, a teletype tape is produced at the same time as the consist is being printed. The printed sheet goes to the various clerks at Cedar Hill for checking diversions, etc., while the tape is put through the printing punch to produce a card covering the cars in the train. 
 
These cars are held until the arrival of the train when - after necessary checking and making out of new cards for any cars that might have been picked up enroute - they are used to make a teletype tape and print a final inbound consist, which is transmitted to the Car Service Office. This final inbound consist becomes the wheel report in the Car Service Office. 
 
Following this, the cards at Cedar hill are racked with the bills and the same cycle of operation as occurred at Maybrook is repeated to secure an outbound consist of a train as it leaves Cedar Hill.

The emphasis is mine, because that particular bit of information is not noted in any of the other sources I've found on this system. This accounts for the fact that even on a through freight there may be work on the way to the "next" yard.

It also includes a two-page photo essay of the process:


12 a. Interchange Report of receipts from the Erie at Maybrook prepared from cards punched from bills, in lieu of typing from hand-written train sheets. 
 
b. Advance Outbound Consist of OB-2, printed from punched cards and transmitted to Cedar Hill, Supt. of Frt. Trans. and Supt. of Car Service immediately after departure of the train from Maybrook. Inbound train reference appears after each car on outbound consist. Punched record cards for (c) and (d) a loaded car, and (e) and empty.

This last photo also gives us some additional information we can mine from the paperwork.

Freight Cars from Erie NE-98 January 30, 1946
SFRD    33313    loaded with cauliflower from Mobest, AZ via ATSF-ERIE
NWX    2269    lettuce from Huma, AZ via SP-ERIE
FGEX    51211    lettuce from Blythe, CA via ATSF-ERIE
RD    24663    lettuce from Blythe, CA via ATSF-ERIE (with typos)
BREX    75825    GRJC (?) and it looks like there's a second line for that car

Freight Cars on OB-2 (Maybrook to Boston) January 5, 1946 

PFE    93889    carrots from Watsonville, CA via SP-ERIE
IC    via B&O-ERIE
CN
WM
MBK
NH
WFEX
WFE 
 
RDG    74107    coal from Meadowbrook, WV via B&O-LNE
PRR    348864    empty

Some industries as well, Sawyer CO, and S. Strock Co in Boston receiving produce, WJ Fallon Lea (?) in Boston, Thompson Wire Co in Fairmont, Blaine C Co in Midway.

Monday, March 29, 2021

Is it the Highland?

Last week I posted two photos of the Comet in an unknown location, but looks like it may be on the Highland somewere. The primary clue is the line poles on both sides of the track, and their configuration. The general topography and scenery also resembles some areas on the Highland as well.


However, the double track configuration threw me, since this looks like it should be someplace west of Terryville Tunnel, and that was single tracked long before the Comet ran on the Highland Line.

I still don't know exactly where this is, but I no longer think they are on the Highland. I found some other pictures that look like the same location, and unfortunately all of these negatives are damaged. All appear to be Kent Cochrane photos.


Here's a double-headed train led by DL-109 No. 741 in the same location with a good size passenger train. The first car is a combine, and I don't have any records of a combine, nor is there any reason for a pair of DL-109s to be running on the Highland in this era. 

I-2 class 1312 with a short passenger train, with a stainless steel coach on the front. Again, no record of a stainless car ever running on the New Haven except. Bob Vancour pointed out the stainless car is probably dead-heading, since it's in front of the baggage cars. 

Lastly, here's a pair of PAs, led by 0768, again with stainless steel cars. I have no record of PAs running on the Highland, and in this era they were almost all assigned to Shoreline trains, including the most prestigious ones.

No dates on any of these, and they aren't necessarily all from the same day, although they could be. Only the first 10 PAs, delivered in 1948, wore the Hunter Green and Warm Orange pinstripe scheme, and were repainted in the early '50s to match the additional 17 delivered in 1949 in Pullman Green and Dulux Gold. I don't have any specifics on when that repaint happened, but the last photo is most likely c1949-51(?).

Without anything else to go by, the best guess right now is that this was on the Shoreline, someplace in Rhode Island. If you can identify it more precisely, let me know!


Friday, March 26, 2021

Modifying Tichy Flat Cars, Part III

In the first post I showed how I modified the deck and assembled the basic kit.
The second post covered scratchbuilding side sills and measuring and installing stake pockets.
The impetus for this particular project was a photo of a T&P flat car.

In this post I'll be looking at...

Rivets!

When I got back into the hobby and started looking at kitbashing or potentially scratchbuilding things, rivets sort of seemed like kryptonite. I collected as many articles as I could find, but still felt it was well beyond my capabilities.

There are three basic options for adding rivets to a model. The first, using a punch of some sort to emboss them won't work at this stage since the sides are already on the car. 

The second option, and a method I learned about from Ted Culotta, is harvesting rivets. You scrape the rivets off of a model (Athearn snow plows are a popular options), and then glue the individual rivets on the model.

Another option are the rivets Tichy sells, but they are quite large. I always thought you drilled a hole for every one, but later learned of those that would cut just the rivet head off, and then it's just like working with harvested rivets.

But the thing that finally put the possibility of adding rivets to models for me are the excellent Archer rivet decals (yes, I know there are others available, I have found their consistency and quality, particularly adhesion, to be unacceptable). I was comfortable with the idea of working with decals, so this was something I could do. But I appear to have exhausted my current supply, and since there aren't that many rivets and I'm always working to improve my skills, I decided to give harvesting rivets a try while I replenish my supply.

Harvesting rivets.

This requires a donor model and, as I found, a little patience. Athearn blue box models appear to be the most common source, especially the plow, but I don't have those. In fact, I have pretty much sold or given away any spare models that I won't use. I did have a bunch of NERS windows and tried one of those, but found that there's a reason to use the old Athearn kits. The rivets are larger (overscale, really). This is important because even with a razor blade, the kerf is reducing the amount of rivet you end up with.

I did have some parts for E&B Valley passenger cars, courtesy of Ted Culotta (thanks, Ted!), which is appropriate since this is a technique he uses frequently and has told me it's not that hard. I had kept these because the steps are excellent and I think I can use some for future heavyweight models. These have tons of oversized rivets. So I tried that.

With a single-edge razor blade I shaved off a bunch of rivets onto the box (because it's white and they'll be easy to see).


Not all will be usable (some too small), but it's not all that bad. Simply wetting the corner of a scalpel or hobby knife is enough to pick up the rivets. Overall it goes pretty quickly, although I found that gluing them sometimes made it tough. I tried putting either CA or wetting it with styrene cement first to give it a little tack, then carefully wicking CA from the side seemed to work OK. Eventually I decided that gel AC (that dries slower) gave me just enough time to put it in the correct position. Once dried, I brushed styrene cement across the rivets to ensure they were fully adhered.

Styrene cement melts the plastic, but I find that if I brush it on and I'm careful not to touch it, then it retains its shape while it is softened, but otherwise doesn't cause any issues.


I copied the rivet pattern from the model on the first side.


For the second side, I realized that the rivet pattern on the CP car was different, so I followed the drawing in the Car Builder's Cyclopedia for the other side. Although I didn't make major modifications to the underframe to match the prototype CP car, I lined up the rivets with the underframe components where I could.

For comparison, this is a box car end I made as an experiment years ago with Archer rivets. A few have been rubbed off. This is an Improved Dreadnaught End for a 10' 0" IH car. I was kitbashing the Intermountain model for a class of NH box cars, but Intermountain has since released the correct model. I shortened the end at the top and bottom, and the original part was welded at the center, so I added the rivet strip.


Archer vs Harvesting

For that rivet strip across the center, definitely Archer. For individual rivets it's not all that different. With a gel AC, you'll have a little time to adjust the location, and with the Archer decals you can do the same while it's wet. When I did this end, I attached the decals directly to the end. In the future I would use Future to provide a better surface. Note that on the end I made, I also included the smaller intermediate rivets that attach the interior framing to the ends, something that is missing on most commercial models.

I'm comfortable enough with both approaches, so I think I would go the Archer route when there are a significant amount of rivets, and always if there are rows of more than a handful of rivets. 

Wednesday, March 24, 2021

New Haven Yard Operations

On October 21, 1948 the New Haven Railroad published a booklet entitled New Mechanized Train Consist and Car Record System in which it states: 

"...developed by New Haven officers in cooperation with engineers of the International Business Machines Corporation. Studies first projected in 1940 by the New Haven's transportation and communications departments culminated in a definite plan in 1942, but, because of war-time priorities, equipment was not received until the latter half of 1945 when operation was commenced between Maybrook, Cedar Hill, and the car service office at New Haven."

This booklet tells the story in great detail of the old and new Yard Operations processes and paperwork. In my quest to better understand the the inner workings of  New Haven Railroad, this was the single most informative document I found regarding the paperwork and processes used in yard operations. 

This is not that story.

But it is the story of the first hint to the public, and most employees, of what was to come was reported in the October, 1945 issue of Along the Line.


We "Kept the Home Fires Burning"


This is an article about the movement of tank cars during the war. Due to U-boats attacking tankers offshore, the movement of oil was moved (almost?) entirely to rail. ODT Order No 7 required the railroads to move tank cars of oil as soon as they were ready, over the shortest routes, and with the highest priority, superseding all other rail traffic. Since the oil was for the war effort, it was shipped primarily to northeastern ports, of which the New Haven had "between 600 and 700 unloading places." The change in traffic on the New Haven was enormous, and immediate.

In January, 1942, the New Haven handled 702 tank cars of oil. In February, this total more than quadrupled to 3,198 cars. March and April continued the trend, to 8,993 and 13,365. From that point the New Haven handled between 12,000 and 16,000 tank cars daily, with the highest total in March 1943 of 19,351 cars. The decline in shipments occurred in 1944. In January it was 11,507 cars, and 8,461 in December. In July 1945 the total was 6,747, still almost 10 times the prior normal.

In September 1942, a new process was implemented on the New Haven to make it possible to track the tank cars "hour-by-hour." As the article states:

Agents had a special report requiring the following information:
Car Number;
Oil Train Symbol;
Shipper;
Consignee;
Commodity;
Point of Origin;
Destination;
Date and Hour Received;
Date and Hour of Each Move;
Date and Hour Placed for Unloading;
Date and Hour Released by Consignee;
Date and Hour of Each Move;
Date and Hour Delivered Off Our Line.

These were transferred to individual car records, filed numerically in loose-leaf binders-a separate "car record sheet" for each car. As soon as report of a car's arrival on our line was received, a record sheet was inserted for that particular car. Then, as each subsequent move was reported, it was "posted" on the record until the car was delivered back to a connecting line..."

To start, I just want to point out how efficient, if labor intensive, this process was. The amount of information generated and recorded by the railroads through paper was enormous. This was a special project to track tank cars, but this information was recorded for every car, every day. For tank cars alone, the war-time increase was on the order of 400-500 cars per day. That's 4 to 5 additional trains running of nothing but tank cars.

While there is a lot of work involved, when the process as a whole is studied, I can't imagine a system that would be more reliable or efficient than what the railroads had devised by this time. Reports were sent to the Car Service Department by train. I've seen it noted somewhere that important ones went on the next passenger train. So as soon as the reports are finished in, say, Providence. They are sent via the next passenger train to the Car Service Department in New Haven.

It was the next step of the process, though, that I think also served as a test/proof-of-concept for the new system that would be implemented shortly after the war.

The finished record sheet was then removed from the loose-leaf binder and all the information was transferred to a "punch card" on an International Business Machines tabulator.
Number symbols are used for this purpose. Commodity "3" for instance, is heavy fuel oil. Origin "1" is Texas. Shipped "99" is a miscellaneous shipper. Consignee "3" is Socony. Junction point "31" is Maybrook, and connecting line "56" is the N.Y., O.&W., so entry 3156 means it was received at Maybrook from O.&W. Destination 2022 is East Providence. "17" is Cedar Hill. "23" is Northup Avenue.

This system allowed them to quickly and easily print reports, usually for 10-day periods. The 10 days ending Septermber 30, 1943 showed 4,718 cars took an average of 20 hours from arrival to destination, 5 hours to placement, 11 hours to release, 12 hours to departure, and 18 hours back to the connection, or an average of 88 hours on the line.

They show examples of the paperwork involved:

The implementation was centralized at the Car Service Department. That is, the Agent reports were taken to the Car Service Department, where the loose-leaf records were kept and then transferred in the "punch-card bureau" as noted in one of the photos. These were where the IBM tabulators were to create and read the punch cards.

With tank cars, the IBM system was used only for the purpose of reporting after the car movements were completed. But I think it was more than adequate to prove that the IBM systems could streamline the process, if there was any question before. The next step would be to use the machines in "real time" to generate operational paperwork.
 

Monday, March 22, 2021

The Comet

In lieu of the normal Thursday night Photo Library, we have started getting together on Zoom. So we went through a folder of photos I had that I knew they hadn't seen before. This first photo is one of them, a rare shot of the Comet in service on the Highland Line: 


This is taken from an overpass at Newington Junction, and the train is #128 (eastbound) in 1951, and I'm pretty sure it's a Kent Cochrane photo along with the others in this post. It was scanned backwards, and I hadn't caught that it was in fact Newington rather than someplace east since it ran for most of its Boston to Providence, and then around the Boston area.

In 1950, though, Train 128/129 was added as a second Boston - Waterbury (along with 131/136). It is not listed in the June 25, 1950 time table, but is in the September 24, 1950 one. To the best of my knowledge, it was created for the Comet which was no longer serving between Boston and Providence. Although it was sold for scrap in April 1952, my understanding is that it was no longer on this run by November, 1951. In the April 27, 1952 Engine Assignments, it is hauled by RS-3 543. It was annulled prior to November '52, but reinstated with RDCs by the following year.

So for me, it will be running for ops sessions in 1950. Unfortunately, the Con-Cor model was never released in this later paint scheme, so I've stripped mine and need to work on repainting it.

I do have a few more pictures in service on the Highland. The negatives for these two were both damaged unfortunately, both and eastbound and westbound run.


I'm not sure of the exact location of these photos. It certainly looks like the Highland based on the terrain and line poles. On the south side of the track is a line of poles with two cross arms, and the north side has poles with 6. It also makes it possible to identify which way its running by which track it's on.

This looks like the same location, and I would consider it someplace east of Plainville since it's two tracks. 

The problem is, I don't know of any location that really looks like this east of Plainville. There was a siding at Terryville and Bristol, both west of Plainville and in single track territory, but since the train is on the right hand track in each photo, it appears to be in the double track portion.

Although the Comet did run elsewhere before and after it was on train 128/129, but this really looks like the Highland. So the exact location remains a mystery, but they are interesting in-service photos regardless.

Regardless, there's no question where this final photo was taken:


This is Train 128 again, eastbound. It's not clear why the two baggage cars are sitting on the westbound main instead of either Track No. 5 to the right, or the station track (off the Berlin Line) where they are usually when being loaded. My only guess is that they are in position to be moved after 128 passes.

Train 128 was an early morning train, in New Britain at 7.07 AM, and 129 was evening, leaving New Britain at 6.23 PM. So I'm guessing these photos are summer of '51 prior to it being pulled off the run.

Friday, March 19, 2021

A Pleasant Surprise


I thought that the finished product would have far more impact than the build-up...

While we have discussed this in the past, my buddy Craig Bisgeier texted me one day a couple of weeks ago and said he wanted to see if he could make this smoke stack. He has been doing a lot of 3D printing recently, and he knew this was going to be an important piece for the layout.

Craig's an excellent modeler and had a website long before me, but also hasn't updated it in years. But he's been active posting things on Facebook. He models the Housatonic RR in 1892.

This was one of two stacks for Russell & Erwin, and was built in the late 1800s. The Sanborn map indicates it was 175' tall, but doesn't give a diameter. I estimated 15' wide.

I have several photos:


This one is a crop from a 1947 Kent Cochrane photo and the first one I had.


I don't remember where I found this color one, looks like it's in the '60s.


This is a shot of it being knocked down, but I don't have the date.
It's also visible in the 1955 Thomas Airviews aerial shots:


It took him about 15 minutes to make a rough drawing:


It turns out it's an 8-pointed star, which also means it would have been much easier to build than I originally thought. It's basically two squares, rotated within each other. 

The question was what we wanted to do about the flare at the top. It's quite noticeable in the 1947 photo. All of the other photos are later, and while it seems odd that they would have removed some of it, Dick says that if it was weakening, with bricks coming loose, it wouldn't have been a big deal to strip it back a bit for safety. So we decided that the full flare was the way to go.

The next question was how big to make it. As I noted in an earlier post, I wanted to go big because it looked more appropriate. In this case, it's a question not only of it towering over the trains, but it's quite visible towering above the building while looking down the tracks from New Britain Yard:

Jim Karl 1949

We decided to scale it down just a little bit, making it 21" instead of 24" tall. This will work better visually since I'm missing an entire city block between the yard and the stack, so it won't look too tall from that angle.


The next day he had finished the drawings. The flare, of course, was the biggest challenge. That was why he had reached out, he really wanted to take a crack at such a complex drawing, since the whole thing is tapered as well.

The next picture was the printing underway:


We decided that it would probably be better to use N-Scale Architect brick sheet instead of trying to print it with the brick pattern. I got more pictures throughout the day...


As you can see, he had to print it in sections since it was too large for the printer to do in one pass. This was another reason why I thought the brick sheet would work well, it would help hide the seams and strengthen the joints.


I started with the curved portion, curling it tightly to take away some of the tension. Since I don't have any rubber bands, I used twine to keep it secured. I used some Liquid Fusion polyurethane glue, I also experimented with styrene cement, and found that it worked well, especially if I applied a liberal amount to the stack first.

For the stone around the base, I had some flexibile Chooch material on hand. I decided to try to thin it as much as possible using the Dremel:


I also found that I could use the Dremel to roughen up the top edge and blend it in better. Then it was a matter of cutting out pieces of brick sheet for the stack itself. Since it would require three courses of brick sheet from top to bottom, I decided it would be easier to work in halves. I glued the two lower pieces together, and the two upper pieces. Once they were sheathed, I could glue the two halves together and then finish the sheathing in the middle. This also meant that each joint was in the middle of  a section of brick sheet.

The flare was tricky. I first did a couple of sections up to the top just below the flare, then worked in smaller pieces. I decided that the seam was hard to work with that way, so I then just started working with a full length piece. As it turned out, it wasn't that tough. I cut out the rough shape, held it in position to trace the curve on the the back, then cut it out. A good amount of styrene cement and finger pressure and it went pretty quickly. I tried to ensure that the last pieces would be added to the back in case I couldn't make those seams as clean.


My go to brick paint right now is a Rustoleum dark red plastic-safe primer in a spray can. I had drilled a hole in the base so I can eventually mount it over a piece of dowel mounted into the benchwork so it won't fall over. I used a piece of threaded rod and clamps to hold it while painting:


It was in the 50s, but I brought it in to dry as soon as it was sprayed. My method for applying mortar is to brush on full strength acrylic unbleached titanium white paint. This is thick, like from a tube. I then just wipe off the excess with a paper towel while it's still wet.


I then did a quick weathering with Bragdon Powders, as an initial attempt with Pan Pastels came out with a bit of a sheen. For the stone base I used my usual technique of a paint pen and stippling Pan Pastels while wet. I then used a fine brush to "paint" with Pan Pastels to provide a little more variation and highlight the seams between the stones. They look more gray in the photo (the lighting isn't great here either). In person it has more of a brownstone effect which is what I was looking for.


I'm happy with the current effect, and will see if I need to make any adjustments once I have scenery and structures.

Actually, more than happy, it's an amazing model and without Craig I wouldn't have it here at all.