Friday, December 31, 2021

Happy New Year!

Well, the last part of the year has gotten ever busier, so my modeling (and blogging) has been reduced. That's OK, it would have set a high bar to do three posts a week for an entire year. 

The busy schedule continues, as spent the day ballasting the Armory Line (and will probably do so tomorrow as well). It was unseasonably warm today.


You can make out the old passing siding (I think) to the left.
Probably 13' track centers. I'll have to measure it.


They replaced these ties, and we're filling in the ballast.

The compressor didn't feel like working today. So no tamping, just some old-fashioned manual labor with ballast forks, and then we used the Trackmobile to bring up a car full of ballast to dump along track. This section of track is still disconnected and requires work before it will support a locomotive anyway.

We also had a fantastic Christmas, and I got quite a bit for the railroad. A number of books, new tools and weathering pencils that I look forward to trying.


I'll report back on the tools and weathering pencils in future posts as I try them. I'll also need to look at where I stand on my current goals and how I'll address them in the new year.

Tuesday, December 14, 2021

New Haven Traffic Density

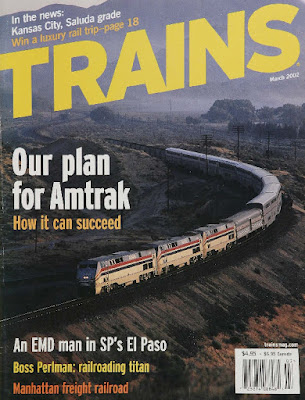
I recently subscribed to Trains Unlimited, which provides digital access to every issue of Model Railroader, Trains, Classic Trains and other Kalmbach train magazines (including new ones as they are released). And I found something interesting in the March, 2002 issue:


They have a map of traffic density on the New Haven in 1955. There are two similar maps in the Characteristic Charts (once published by NHRHTA), but they are for 1918 and 1919. I won't reproduce the Trains map here, but let's look at the data for New Britain.

The maps in the Characteristic Charts indicate the number of trains and average daily tonnage:

1918

  • 6 westbound, 3624 tons
  • 6 eastbound, 5592 tons

What's interesting, though, is they indicate the traffic in each segment. In this case, between Plainville and New Britain, and vice versa. By looking at the next segments, we can deduce the traffic in New Britain:

New Britain to Hartford is:

  • 6 westbound, 3221 tons
  • 6 eastbound, 4846 tons

So on the westbound run, an average of 403 tons was added in New Britain, and on eastbound trains 746 tons were dropped in New Britain.

The Berlin Line doesn't have any traffic noted, but there's an arrow that indicates "Switching Service."

I can't do a similar calculation west of Plainville because there are 7 trains each way.


1919

  • 8 westbound, 5826 tons, 1657 tons picked up in New Britain
  • 8 eastbound, but I can't read the tonnage. 

Number of Cars

I don't know what the average load was for each freight car, but I do know that the average load was less than the capacity of the cars based on other research. So here are two estimates using the 1918 data:

  • 30 ton cars, 13 cars westbound, 25 cars eastbound.
  • 20 ton cars, 20 cars westbound, 37 cars eastbound.


1955

So how does this compare to 1955?

The cool thing about the map in Trains magazine is that it gives the number of cars instead of tonnage.

  • New Britain to Plainville: 3 trains, 101 cars, both ways
  • New Britain to Berlin: 3 trains, 113 cars
  • Berlin to New Britain: 3 trains, 121 cars

Since all trains route over the Berlin Line, that gives us 12 cars dropped and 20 cars picked up.

One thing to keep in mind is that this shows us the net change but hides equal numbers of drops/picks. In other words, it could be 32 cars dropped and 40 cars picked, with a net 12 and 20. Those three trains in 1955 served the Canal Line north of Plainville or the New Hartford Branch.

  • New Hartford Branch is 1 train, 8 cars both ways
  • Plainville to Westfield is 2 trains, 88/86 cars
    • Williamsburg/Northampton is 1 train, 14/15 cars
    • Holyoke is 1 train, 51/34 cars

The imbalance in Holyoke is probably outbound cars being interchanged.

So it won't actually give us a specific count of cars to/from New Britain, but it does give us some more information to help make sure that the amount of traffic looks right. As modelers I think we sometimes have the tendency to run more cars during an ops session than is prototypical. That's fine, of course, and it's often because we want to have enough to do during a given session. In the near future I'll explore an alternative to adding additional traffic to provide enough work for your operators.


Friday, December 10, 2021

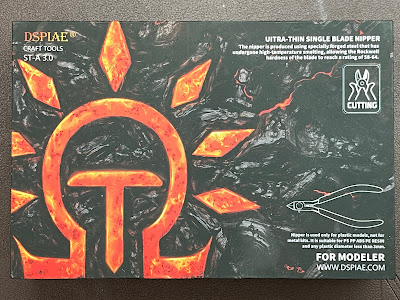
New Tool - DSPIAE Sprue Nippers

For my birthday I got a new tool. This is from the same company that produced the bending tool I recently picked up. Since I received a free Amazon gift card I decided I'd see how their other tools are.


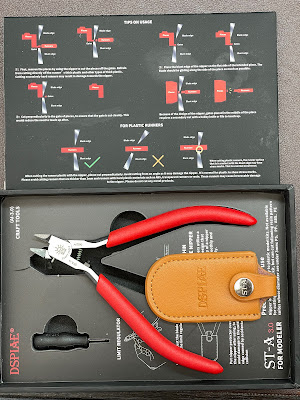
It's packaged in the Apple approach, with a very well-designed box and inner packaging. Although I don't particularly care (and environmentally-minded types probably wouldn't like it), it does give the feel that this is a high quality product.


It really is. It works considerably better than any other nippers I have, including a couple of types of Xuron nippers, and some other brands I don't even recall. Although they are sharp, I think the real key to their performance is their design.

In the regular Xuron nippers, the blades meet rather than sliding past each other. This makes it possible to get a flush cut. But they tend to have relatively large wedge-shaped blades that push apart the material when cutting. Like track cutters, it means that one side of the cut is flush, but the other side is more "squashed" and not square. Even worse, if you desprue fine plastic parts in the wrong order, you can break some as the blades push apart the material.


These nippers are similar to the typical Xuron flush nippers. But it has one blunt blade that is a similar thickness to the usual nippers, and a second cutting blade that is nearly as thin as a razor blade. The blunt side works as a cutting surface for the razor. As a result it makes a very clean, stress-free, flush cut.


I'm sure this isn't the only brand that makes a nipper of this design, but this is the only one I'll need. The ultimate test for a nipper for me is an old Branchline sprue. The plastic for a lot of these kits has turned brittle over the years. They were tough to desprue cleanly before, but now I've even had an entire passenger car side break just from the force/stress of cutting it off the sprue. These cut it cleanly, easily, and no significantly noticeable stress to the parts. 

It even comes with written instructions (in addition to the ones on both sides of the inner packaging), and a cleaning cloth.


Tuesday, December 7, 2021

Rapido X31A - Trucks

I've been continuing my work on the Rapido X31A box cars, but I've seen (or been told in person) several comments about the quality of the casting of the trucks. I found that interesting, since nothing jumped out at me. At least two have mentioned they will use the superior Bowser ones intead.

That piqued my interest, and since I have both I thought I'd compare.

Which do you prefer? I put the same wheelsets in both


Here's a prototype photo:


And after I painted them with raw umber oils and stippled in raw umber Pan Pastels.


The other side:


I'll do additional weathering, but I like this as a base.

My thoughts? The Rapido is superior. It's the one on the right.

First let me point out that the Bowser truck is at least a decade old. I don't know when they first produced the car, but it is a very well tooled truck.

It's not easy to see in the photos, but the brake rigging is cast as part of the sideframe, while on the Rapido trucks they are separate parts and in line with the wheel treads.

The bolster is different, with the Rapido one a better match for the prototype, as are the journal box covers.

The Bowser truck is also lacking a spring plank. It's the U-shaped steel sheet that can be seen under the springs in the prototype photo. This spring plank spans the truck between the two side frames. A patent was issued in 1940 for the spring plankless truck design, with the application from 1939, 3-5 years after these cars were built. 

Another comment I've heard is that there is no raised lettering on the Rapido truck. Well, there isn't any on the Bowser truck either. But I also haven't been able to find any prototype photos where it is anywhere near as obvious as it is on other types of trucks. 

The Bowser truck isn't a bad truck at all. But the Rapido one is quite a good match to the prototype photo. At least to me.

Thursday, December 2, 2021

The Next Layer of Weathering

An important part of, well pretty much anything you learn, is figuring out how to recover from a mistake or when a problem arises. I wasn't completely happy with the last layer of weathering on this car, but I don't think it's easily removeable. If this was a model I cared about, how would I fix it?

I went back to oils. Since the tinted clear coat should have sealed the initial layer (which is pretty invisible now anyway), I should be able to do this without affecting it. Regardless of whether it's having the effect I wanted, I could at least test this theory...


I picked up a couple of other colors, and worked on a layer using primarily the raw umber as a sort of wash/filter to tint the grime, and also to add a bit of rain streaking from top to bottom.


Tuesday, November 30, 2021

More Weathering Experiments

 After the oils, I wanted to try to do a layer of soot and dust using the airbrush. Having never done this, I decided to start with tinting a clear coat with a little black. The idea being that not only will I add the layer of grunge that I want, but it will also seal the oils.


It took some work, and I did test it on a couple of spare models first. It was quite challenging to not get stripes. Since the coverage is light, when you do the next pass, the overlap is darker than the areas that don't overlap. It also basically obliterated the oil weathering I had done, probably being too heavy. It's still there, but not nearly as prominent as before.

I also think that this had a slightly different effect than I was hoping, although subtle. It almost looks too even, to my eye. Overall I think it will be fine, but needs something else to make it less uniform. But I either need a lot more practice, or to find a different approach to get that overall layer of soot and dust I'm looking for.

With the oils, I was ready to get started on the actual model immediately. I'm glad I didn't as I work through further processes. I think I need to weather another scrap model (or a few) with oils for practice, but also so I can compare them side-by-side as I try other approaches layer by layer.

This is a new paint, too. Dale and I stopped at Time Machine because I wanted to get some Vallejo Model Air black. They didn't have any, but they had a new rack with Mission Models paints, which neither of us had tried. Since we were going back to work on the layout, and Dale was going to show me some airbrushing tips, it seemed like a good opportunity to try them.


They were thicker than we expected, but airbrushed very well, with or without thinning. I think we both really liked how they handled. He did another coat on the X31a underframe and the color is good, not jet black, but much darker than the Vallejo color that I thought was a match for Grimy Black.

They were out of the gray primer, but I'm quite interested in trying it. It's a two-part mix and must be "activated" with up to 1/4 of their primer. I guess it's supposed to help it adhere better. They also recommend spraying at quite a low PSI - 10-15 PSI. So far I'm quite impressed.


Sunday, November 28, 2021

Rail Length


Getting ready to move a pile of rail from here to there at Depot St. I walked about 3 miles around the circumference of a 20’ radius circle in an afternoon.

What I also found interesting is the ratio we were moving. It was rolled in 1915 and 1922 for the NH, 107 lb rail taken out of the Canal Line near the Massachusetts border.

New Haven Rail

What’s the length of a piece of rail? The conventional knowledge is 39-feet, so it would fit in 40-foot gondolas. While that is true, 40-foot gondolas weren’t always the standard length pre-depression. In addition the surveying, real estate, and railroad industries use some standard systems of measurement.

These rails are two rods long, or 33-feet long, a rod being 16.5-feet. Of course, that worked well since it fit in 36-foot cars. The NH didn’t have 40’ gondolas (or flat cars) until the 58000-series of gondolas were built in 1929. (For more on those, including a diagram, see this post.) So they may have continued to receive 33-foot rail until those cars were built.

The 16.5-foot rod is related to other measurements - a chain is 4 rods (66-feet), a furlong is 10 chains (660 feet), and a statute mile is 80 chains. The surveyors’ chain is just that. A chain with 66 foot long links.

So for those modeling earlier eras (pre-depression to a large degree), it may be more appropriate to put those joint bars every 33 feet instead of 39 feet. This is appropriate on some lines even today, large portions of the CNZR is CNE/NH rail from pre-1926, the oldest I think from 1896-7. The Highland Line is still largely 107 lb NH rail, so I’ll have to go take a closer look at when it was produced. I suspect that I’ll need to go with that measurement on the layout.


Thursday, November 18, 2021

Weathering Experiments

I'm making some modifications to one of the Rapido X31a box cars that recently arrived. Since I'm going through that process, I want to complete the car, weathering and all. To that end, I've grabbed a spare body (I removed the roof for another project) to attempt to develop a basic process.

Because the X31a cars were built 1934-6 and still in their delivery scheme, I'm using several of Jack Delano's excellent photos as inspiration. I believe these photos are c1942. I also found that there's a book of his railroad pictures, which I immediately added to my Christmas list.

The late '40s/early '50s is still the steam era, so the cars will still weather in a similar manner, so I think these are a good reference for any car that is still in the same paint scheme in my era.


While all of these are useful, I'm focusing on the Pennsy cars, like the X29 in the front.


There are two X31a box cars in this photo.


There's an X29 in the back row, left.

Key Observations

  • The cars in this era don't show a lot of heavy areas of rust like modern cars do.
  • There is a fairly consistent coating of dirt/soot on the dirty cars.
  • There is a range of "dirty." The density of the coating of soot likely has to do with how many months/years a car has gone without a repaint.
  • The roofs tend to be darker.
  • Some of the roofs show paint failure.
  • Some of the wood roofs and running boards show repairs.
  • A few cars (very few) show "chalking" or streaking of the lettering, like the X29 in the third photo.
  • Reefers tend to be cleaner. I know that PFE washed their cars, presumably others did as well.

Base Weathering with Oil Paints

Using this as a guideline, I started with painting along the rivets and other raised elements (including the door) with burnt umber oil paint. I really like working with this medium, and expect that it will form the base of most of my weathering. These photos show the process of working the oils.


You can apply it fairly heavily, since it's easy to remove.


After drying, I was seeing more streaks than I wanted.


I found that removing the excess on the panels with a paper towel was more consistent than a brush.


Here's a few photos on the layout after it had dried.


I tried a number of approaches, all of which worked pretty well. Wetting with (odorless) mineral spirits first, or not. Applying as a wash vs. a thicker application and taking away/thinning with a brush and mineral spirits, and similar variations.

I did find that I preferred upstrokes (from the bottom of the car) with fairly thick paint to apply the color, and down strokes with a damp brush to remove it. This was basically a brush that had been cleaned with mineral spirits and then dried with a paper towel.

I wanted there to be more dirt under the rivets than on top. I used a very fine brush to work on other fine details to ensure they received as much dirt as I wanted. Thinned paint, but not to the point of a wash, on a very fine brush worked well for along the panel lines.

A generous wash in large depressions, such as the door corrugations, did a nice job of providing a random application or dirt. Once dry I used a brush or paper towel to remove excess on the corrugations themselves, particularly along the top.

I wanted a very thin coating to dull the bright white of the lettering.

So far I'm quite happy with the approach, and I can see how it would be easy to do a number of cars at once time. 

Tuesday, November 9, 2021

Just post something. Ha!

So here it is, a week, a week and a half, ummm, nearly two weeks since my last post. After being very consistent all year, my busy schedule has caught up with me. In this case it's been extra hours at all of my work/business endeavors, plus it was my birthday, etc.

That's not to say that I haven't been able to do anything.

After the last post, I was able to finish soldering all of the feeders to the rail at Whiting St. Yard that evening. I have also connected enough under the layout that it's even operating!

AML Modeling buddy Mark Stafford pointed me in the direction of Krone connectors. These are a type of punch block (well, several types) where you can terminate dozens of wires that are then connected to an output wire. In the US we have similar punchdown blocks for phone, and sometimes network systems. These look like a great idea, but getting it done now was more important, so I went ahead with my original plan of wire nuts and T-Tap Connectors.

As is typical, a few models have crossed the desk. I started working on a Wright Track (ex-Smoky Mountain Model Works, potentially available from Southbound Model Works & Decal Co). This has turned out to be quite a challenge, which I'll explain when I get to actually building it. I also cleaned up all the parts for a Resin Car Works DSS&A box car. This will be a fun (and quick) build, just not sure when.

Work at CNZR has been great, naturally. I take a lot of photos like these:


Bloomfield freight house from Wintonbury St.


A frosty morning at Savin Road.
Two ex-B&M Pullman PS-4 50-ton flat cars.


Morning (prior to daylight savings) at Tobey St.

There's also a lot of wildlife, like this deer right near the Copaco cattle chute.


I've seen bobcats, foxes, turkeys, a bear, lots of snakes and frogs, a very large praying mantis, and others I'm probably forgetting.

For fun I sent my daughter a few pictures like these:

There's a frog in this photo.


There are two frogs in this one.

But I'm not sure how much of this I want to keep including things like these on a blog about modeling and my layout. So I've decided to start a group on Facebook where I can post things like this, and also be able to communicate more directly. It's also a place where I can provide more informal updates and previews for what will often end up on the blog.

You can let me know in the comments what you think, and of course on the Facebook Group.

--

I plan on trying to post to this blog weekly (instead of the three times/week I've been doing for about the last year). I have several posts in progress, but there are a few other priorities right now:

1. Complete the update of the website (I have to switch over by the end of the year).
2. Finish a clinic for the December Hindsight 20/20 meet.
3. Build a website for a friend's model train business - I'm very excited about this one, but can't say anything else yet...

In addition, I'll have work, business, and family things to manage, with Thanksgiving and Christmas right around the corner.

Posts I'm working on:
1. A tour of my buddy Dale's layout.
2. Modifications to a couple of Rapido's X31a models.
3. (Semi) handlaid switches with CVMW tie strips and Proto 87 Stores parts, among others (I have to build two), and Fast Tracks Diamond Line crossing.
4. More work on the Proto S-1, Atlas S-2, Bachmann/W&R 44-tonners, and Crown Custom I-2 locomotives.
5. Upgrading NE-5 and NE-6 cabooses.

--

So that's where things stand today. It's really adding 40+ additional hours working at the railroad that has restricted the amount of time I have to work on the layout/blog for now. But it's an adjustment, and it's not uncommon for me to get more accomplished when I'm very busy compared to when I have more free time.

Wednesday, October 27, 2021

Just post something...

Like getting down to the layout, time has put a crunch on posts to the blog too. I have been working on the new website, and I'm in the process of building another new site for something I can't divulge just yet. Plus work, work, and business too.

So here's a few unrelated things that are happening. First is a wonderfully windy and moody autumn morning/day following a decent amount of rain yesterday (a nor-easter apparently). I had the day off from the railroad yesterday, but apparently none of the line or construction crews were working due to the weather anyway.


The line crews were on storm duty today (and probably tomorrow) so there weren't nearly as many crews working today. I spent the day at Plainfield St. activating the signal for the hi-rail flatbed and dump truck a few times. I was also fixing a computer for Jeremy, and Dale loaned me a new book that I heard about on A Modeler's Life:


It sounded interesting on the podcast, but was way better than I even expected. I'm doing a clinic for the next Hindsight 20/20 event in December. I've decided to do a short clinic on operations, and this covers a lot of similar thematic ground and I'll be able to point folks to the book for more ideas and inspiration. I highly recommend it, and just added it to my birthday/Christmas list (I'm not allowed to buy it right now...). I'll be getting over to Dale's house in the next week or so to get some photos and videos for the clinic.

I was also able to join the weekly Modeler's Life Patreon Zoom for the first time. Talk about inspiration. Much like the blog, it provides an impetus to get something done on the layout. Feeders are the big thing, so that's my (self-imposed) homework for next week. It's time to get trains running again (which Chris reminds me pretty much every time I see him). Since the west side Highland Line is still operational, the goal is to complete the other half of Whiting St. Yard along with the Berlin Line. This is because I already have the RS-2 ready for testing the NY-4 train from Berlin (Cedar Hill) staging to Holyoke staging. It really shouldn't be more than a couple of hours of work between now and next Wednesday. We'll see how it goes!

Friday, October 22, 2021

NH DEY-3 (S-1) Railings

The railings on the Proto 2000 models are very fine, and appear to be to scale. So why would I want go through the trouble of replacing them with etched parts? 

This crop of 0937 taken by Ed Ozog shows the end railing matches that of the Proto 2000 model. The lower portion of the railing curves back up and attaches to the pilot above the uncoupling levers.

This arrangement was only used on the first 10 (0931-0940) New Haven DEY-3 locomotives.

On the remaining locomotives, the railing continues straight, with a right angle turn to attach to the pilot just above the step. This is visible on this crop of 0994, photographer unknown.


Otherwise, the rest of the arrangement appears the same.

So that leads me to checking out the etched parts as an alternative. But they are slightly larger stanchions than the P2k ones. In addition, they have the additional detail of the two rivets on either side of the stanchions (not just the ones that attach the stanchions to the frame). Plus, I just like trying different things and expanding my skillset.

Wednesday, October 20, 2021

Riding the CNZR

 Work has kept me pretty busy, and I haven't really gotten any more done on the S-1. 

So here's a video at work, running from about mile 3.5, or the Hartford Bloomfield border just south of the cattle chute, across Cottage Grove Rd, and then along Savin Rd. past the Roger Sherman switch to about mile 4.5.

A beautiful October day on the railroad.


Here's a link in case the video doesn't show in the mobile version: https://youtu.be/WuKANfu04nE

And here's a track chart of the line:


Monday, October 18, 2021

DSPIAE Bending Tool and KV Stanchions

 A new tool. The packaging was impressive enough to do an unboxing:


It consists of a base, with a removable base plate, a spring that is over the post, and the knob with a nylon washer that holds the bending brake (I think that's what it's called...) to the tool. The larger one has two base plates, one like this one, and a stainless steel one with a mirror finish. I liked that it also comes with the handheld bender. That worked well, and seemed to be a little easier than using a straight-edged razor.


There are two plastic nubs that keep the brake in position. Unscrewing the knob loosens the brake, and unscrewing it more lets you rotate it. These nubs are loose fitting, allowing you to wiggle the brake when it is not fully tightened:


I had read a review on their larger bending tool, but thought that the smaller size would be more useful for what I'd need. I got mine at Amazon. There are a lot of these tools on the market, but I found very few reviews for any of them. There are almost no comparison reviews, nor could I find much that explains the purpose of their design or use. 

I decided to get one because I have a couple of sets of the ALCO S- and RS- series stanchions from KV Models. Once I received them, I realized I'd be more likely to be consistent with a bending tool.

The stanchions are made from phosphor bronze, to be able to solder the handrails, with detail on both sides of the etching:


Each stanchion requires two folds, the rivet plate that extends from the side, and another one that extends to the bottom (the rivets are on the back side of the etch).

Since the bends go in opposite directions, the best option is to use the side of the tool. That allowed me to bend the side one down, and the end one up. On these etchings, you always bend toward the etched bending line:


What worked best for me is to get it close the correct position, then tighten the brake so there was some friction. Then I could tweak the position without overdoing it. When it was in the correct position, I then tightened the knob. Because of that wiggle I mentioned, I had to hold the brake with the other hand to ensure that things didn't move. It's not a huge deal, but something to be aware of. I plan to shorten the tip of one side of a pair of tweezers so I can let one extend down the side and the other (shorter) end can align the part even easier.

The fingers of the brake are different thicknesses, widths, and spaced differently. The space between the fingers makes it easy to align the parts with the side, and I used the side that allowed two fingers to hold the part. Apparently the inside curves between the fingers can be used to curve parts. They have another tool specifically for that purpose.

Once the bend is started, I found I could complete the bend by hand. Here are the first two.


It only took about 30 minutes to do the 16 that I'll need for one S-1. This included cutting them from the fret, filing the attachment point, and bending them.


For me, a single-edged razor blade worked better to cut the attachment points on the sides of the stanchions. I did this by starting the cut from one side of that point, then a second cut from the opposite direction. This left almost nothing to file off after the cut. I used Xuron etched-part nippers for the bottom attachment because it was quicker. 

The reason I used the razor is that the nippers work like scissors, where one blade slides past the other. I found that this required more filing, it would bend the part up, or both. 

For the end railing, a more complex part, was easier to use flat pliers. The part is large enough that I could handle it, and because of the multiple cuts in different directions, I wasn't sure how I would do it on the bending tool.

These are preliminary bends, since I'll have to determine the exact angles when fitting it. I started with the top bend:


Then the main bend in the opposite direction:


Two bends for the base and mounting pins:


Lastly the two bends to align the stanchions back-to-back. I used a different pair of pliers that was small enough to fit between the other bends. They happen to have an angled end, but that's not important.


I checked and adjusted the angles against the model version.


These are really well designed parts, and a really useful tool. Why would I bother with using the etched parts (other than just to try it out)? I'll get into that in a future post...