Showing posts with label YN-3. Show all posts

Tuesday, December 8, 2020

YN-3 in Simsbury

 Bob Belletzkie, creator/curator/maintainer of the excellent Tyler City Station site that covers CT railroad stations in great detail, came across this photo:


What a pleasant surprise! This is, of course, YN-3 in Simsbury, c1948-51. The freight house is still there, now as Plan B Burger Bar. (Excellent burgers, too!)

Bob thinks he may have seen a couple other photos from the same sequence, but can't seem to find them right now. So there may be more to come...

--

Interesting NYC box car, too. Unfortunately the photo is too blurry to make out the Lot number. The NYC had two major and one minor class of early steel box cars.

The first group was 6,500 steel auto cars built in 1916. They were later modified into single door box cars starting in 1937. The rebuilt cars are available as resin kits from Westerfield.

There were also 9,500 double sheathed auto cars built in 1916. Many of these were rebuilt 1935-7 into steel auto or box cars. One group of the rebuilt box cars was released in resin by Sunshine.

The NYC also built nearly 30,000 cars to a design produced, but never built, by the USRA. They were as numerous as the Pennsy X29 box cars in this era. These cars were built through the '20s. These cars are also available as resin kits from Westerfield, or in plastic from BLI. The Westerfield models cover the life of the cars, with BLI good for a smaller group.

In addition to these cars, there were also 4,000 auto cars built to this design. These are available from Westerfield.

Which car is this, though? 

The rebuilt double sheathed cars have a side sill that is narrower than the car body itself, like many rebuilds. This isn't evident in this photo.

The 1916-built steel cars have a stiffener below the side sill that runs from bolster to bolster, so that can't be it either. The best I can tell, they also had ladders instead of individual grab irons.

So the USRA design cars would make sense, especially since there were so many of them. The side sill looks like a match, and the (blurry) build date looks like it's from the '20s. But those cars only had 6 grab irons, not the 7 in the photo.

That leaves us with the USRA design auto cars. The 40'7" IL is also visible and matches this group (but not all of the other possibilities). These are lots 417-B, 418-B, and 419-B. 

Although, another look and now I think the blurry lot number might be 414-B. In that case it would be in the 101000-101999 series of box cars, built in 1920 to the basic USRA steel box car design, but with slightly larger dimensions. There isn't an existing model that matches, as it's 1" longer and 6" taller than the other cars built to that general design. This makes some sense since it was built before the 1923 ARA recommended practice (basically the X29 design), since the NYC cars built after that time generally conformed to the ARA recommended dimensions.

Another thing of note is the 5-pointed star under the herald on NYC box cars indicates it is used in grain service. Many of these cars were converted to box cars. They were assigned lots 659-B, 696-B and 718-B. Lot 659-B is available as Westerfield 7951. Note that the model has ladders instead of grab irons. I don't know if any of the double door cars would be in grain service, nor how many of the cars received ladders. I also don't know what industry in Simsbury would have received grain, or if the cars stenciled for grain service were used only in that service.

--

The northern part of the Canal Line job is interesting during the postwar period. As I noted in this post, YN-3/NY-4 was eliminated by September 1953. Since this was the "Canal Local," what trains worked the job after that date?

Alternate schedules actually started before that time. In Spring of '52 the job was moved to originate in Hartford as YA-1/AY-2 (with 'A' being the symbol for Hartford, and 'Y' Holyoke). By fall of '52, it was back to originating in New Haven.

In fall of '53 it was handled by NX-28 which was a local that originated in Plainville and operated to Westfield.

But by spring of '54 YN-3/NY-2 was reinstated.

In fall of '56, the through train is NY-2/YN-1, and the local traffic is handled by NX-25. That's the Cedar Hill - Meriden - New Britain local, and operates to Plainville, plus Collinsville and Westfield as needed. 

By fall of '57 NX-28 is now a Hartford to Westfield local, but by fall of the next year NX-28 is gone and Canal Line north freight is being handled by NX-25 again.

In spring of '62 traffic to Simsbury is handled by the (lower) Canal Local, NX-18 at this time, which also handles Collinsville on alternate days. This is the case through at least spring of '65, the latest freight schedule I have.

In this post with several train orders I indicated that I thought the two orders from 1968 were likely for the Holyoke freight. With this new info, I think it was NX-25, or the New Britain local.

Thursday, September 10, 2020

Modeling NY/YN Freights - DERS-2b (RS-2) 0502 and 0503 - Part VIII

Part IIIIIIIVVVI, and VII...

The fine details were basically done. I added a crew from a Proto S-2 and painted the interior in an attempt to get 'Boat Enamel Green' which is one of the colors that was specified for the interior of the NE-5 cabooses and I assumed is sort of a gray-green that I've seen inside some locomotives. I think it came out a bit too mint-green, but it's good enough. I covered the wires that go through the cab with a piece of styrene, and also capped off the top half of the ends of the shell to make the front and back cab walls. This was simple since the long and short hood are separate parts.

Weathering Attempt #1

So with the last few details added, it was time to weather the shell itself. And while I was quite happy with the way the walkway and underframe weathering went, the rest was a different matter.

I followed the same process as the underframe, which was basically just a dusting of Pan Pastels. Unfortunately, it was too heavy in some areas, and non-existent in others. One of the problem areas was that anyplace I had touched up paint, or parts I had added and painted, weathered completely differently than the rest of the shell. 


Since I wasn't happy with the results, and not sure how to proceed I set them aside while working on other things. In the end, I washed the weathering off. It's odd how they seem to disappear on the chassis, but were so hard to clean off the shell... In the end, a fingertip worked better than a toothbrush.

Weathering Attempt #2

This time I did a wash using Vallejo paints, basically a reddish brown to highlight the crevices, around the doors, the louvres, etc.

I then dusted it with Vallejo pigments, using a light beige to simulate a light coating of dust. In and around the stack and the radiator fan housing I used black Pan Pastels, and also in the radiator shutters.


I didn't like how heavy it was in the shutters, though, so I washed most of that off.

I found weathering the cab more difficult. The wash puddled in weird patterns on the broad, flat areas so I wiped it off. But it also was not very visible on the dark green. It's a bit early in their life for a heavy covering of soot and dirt on the roof, so I didn't want to overdo it. So the light dusting seems to be good for now.

Finished...for now

While overall I'm happy with the weathering, it's not quite what I was going for. It's heavier than I'd like, although at this stage much more difficult to alter. I think it looks more appropriate for their appearance in 1960 than 1950.

But here's what the finished locomotive looks like. 


The small pipe right next to the radiator shutters (on both sides) is simply a piece of styrene rod, painted and weathered before gluing it in place. I made it long, then cut/filed to be flush with the bottom of the shell.


Based on the photos, I cut the hose off of the signal line leaving just the angle cock, since it looks like they removed it sometimes when using the locomotives in freight service. I've left the hose on 0502 for a different variation.


I had removed the wheels and masked off the axle holes when I sprayed the entire chassis with Rustoleum black primer. While they were out, I weathered the wheels using my usual approach of a paint pen then applying Pan Pastels to the wet paint.

There are a few minor details I might add, and I need to get my Microscale decals back from a friend to add the, 'Observe Rule 92,' lettering to the pilots. I find the picking up the locomotives by the shell works best to preserve the weathering, but ultimately I intend to leave them on the track. 

The weathering from the walkway down is easy, and I actually like the idea that I'll touch that up every once in a while, so it will change over time. For 0502 I think I'll glue the shell to the walkway. I'll eventually do this one too, but I'm not ready to take it apart right now. But there are a few spots that aren't as tight as I'd like.

I need to finish up 0502, but the Thursday project this week is a bit more substantial. More on that next time!

Thursday, September 3, 2020

Modeling NY/YN Freights - DERS-2b (RS-2) 0502 and 0503 - Part VII

 Part IIIIIIIVV, and VI...

I was hoping to finish these off this week but got tied up with some other projects. So I'm continuing to finish up the small details after looking through the pictures again. First, I can confirm that the unknown commenter was correct, those little things on the walkway are oil cups. 

I went over to CNZR with my buddy Dale so he could show me some on the ex-NH RS-1 they have. In this case they are below the walkway, just above the truck and apparently lubricate the center pin of the trucks.


One of these days they'll get this running again...I hope!

You can also see a small pipe in the upper right corner of this photo, which is a lot of what I've been finishing up on the models. Initially I was just using styrene rod, but I decided to see if I could do something about the interesting pipes above the truck on the RS-2s:


It looks like a pipe-within-a-pipe. It doesn't show up in many photos, and it's another detail that nobody is likely to see unless I point it out to them. But it lets me experiment with something different, and hone some more scratch building skills.

So I started with the largest styrene rod I had which is 3/16", or 0.047", or which is more relevant, 1.2mm, and drilled out the end with the .7mm bit:


You need to be careful to keep it centered, since you'll have a wall of .25mm. I then used a reamer to flare it slightly to widen the hole as much as I could:


If you're paying attention, you'll see a small yellow piece in the picture above. That's the insulation stripped off of a 23 AWG wire. I glued that inside the tube. Here are a couple that have been completed:


Here it is installed:


I also drilled out the end of a 0.020" rod and bent the end for the drain pipe next to the water tank. I then added the diagonal wire for the pipe that's there too. 

I also noticed a pipe I hadn't added yet to one of the models. Instead of the styrene rod I used wire insulation again.

To make it easier to see the other details, I decided to weather the chassis again.

I painted all of the unpainted parts black first. Once that's dried, I used a paint pen to apply wet paint to the truck sideframes, the battery boxes, and the air tanks. Basically all the parts that are likely to be handled. I then applied black Pan Pastels to those parts while wet, hoping that will help it adhere a little better. 

I then use gray and burnt sienna to add brake/road dust and rust. The effect should be close to the RS-1 truck above. Here are a number of shots of both sides. The approach makes those tiny details pop:


With luck these will be finished by next week. You may notice I decided to add the ESU Power Pack (keep-alive) to these, since I had them anyway. They fit above the short-hood truck without a problem.

There's very little touch-up left to do. A few things on the shell, the final application of the ATC boxes and step, a couple of air hoses, and maybe one or two things I'm forgetting.

The one that has the biggest chance of something going wrong is renumbering the second 0503 to 0502. I've already removed the '2s' and have the decals, so we'll see how it goes!

Thursday, August 27, 2020

Modeling NY/YN Freights - DERS-2b (RS-2) 0502 and 0503 - Part VI

  Part IIIIIIIV and V...

I know I said this was going to be a short couple of posts, but as I've been looking closer at photos, I keep noticing some other details I want to try to include. Case in point, when examining this photo of 0502 and 0503 in Plainville c1948 (photo by Cochrane)...

...I noticed something on the walkway that I hadn't seen before. 

I don't know what that little thing is just behind the railing stanchion, but there's one at the other end too:

Looking more closely at this photo of 0509 (photographer unknown), it's there as well:

We can see it more clearly. Examining other photos, they appear to only be on the engineer's side. In part because I want to get better at scratchbuilding, I wanted to see if I could make these. It's another example of something that I have no idea what it is, but all I really need to know is that it is there, and what it looks like.

So I started by drilling into the end of 0.020" styrene rod, and inserting a short piece of 0.010" wire (I think, it was scrap).

After cutting the styrene to a length that looked good, I sliced a thin sliver of 0.030" styrene rod to make the cap:

Then it was a simple matter of drilling a hole in the walkway and installing it:

One tip - really good drill bits. I recently ordered some from Amazon for a slightly different reason. One of the challenges I often struggle with is getting a wire-gauge drill bit chucked up so it is straight. The slightest bit of off-axis alignment means the tip is moving quite a bit out of alignment, often causing it to walk, or break. I thought this design would make it much easier, and it did, since it's a much larger portion to chuck. In fact, it's not much smaller than the maximum my Dremel chuck will accept.

So as I thought, that worked great. What I didn't expect was how sharp they were. The first thing I needed to drill was a hole in the metal frame. It was like drilling styrene it was so easy and fast. They are incredible. I've even used them as their own without the dremel or pin vise, as the 'handle' is large enough as it is. They do break easily with any side-to-side force, but I've broken far fewer since they drill so well. I highly recommend them. They do come in many different sizes, all labeled in mm, so you can consult a chart like this to select the sizes you want. 

BARCO Steam Lines

I also cut out the front of the pilot to allow installing the BARCO steam lines as seen in the picture of 0502 and 0503 above. To do this, I notch with the corner/edge of a file to define the width, then continue to shape it with a file.

I used Custom Finishing parts. They are cast in a soft pewter and aren't quite as crisp as the brass ones were. These are spun cast in rubber molds, and it's also clear that the molds are old because many of the parts are incomplete. You can see the difference between these two castings:

In the first one, several of the parts are malformed, including one of the BARCO steam lines, which are the only parts I'm using from this casting. So I recommend ordering at least one extra set of parts. I usually do this anyway, since there's a good chance I'll lose or break a part anyway. If you can find the brass version, grab them. I'm happy that they are still available at all, and an occasionally bad casting is not something I worry about.

After bending the casting so I could glue it against the inside of the pilot, I used 0.010" scrap styrene to put across the bottom to complete it. I did a quick paint/preliminary weathering as well.


Hand Brake Chain Guides

Stephen Wintner asked how I installed the truck chains. I started by drilling the holes for the two parts of the chain guide. The Custom Finishing set has a third part, with the wheel horizontal, but they aren't used on the NH locomotives.

Incidentally, I also ordered some of the new Cal Scale plastic ones, which are the two parts with a plastic chain between them. Presumably you can add a real chain to the truck, but I didn't care for the appearance, and it would also have required drilling two holes in the precise location for the parts to install properly. Something I'm not good at.

Although I originally used a No. 70 or 72 bit (I think), I used the new 70 mm one for the final hole. I then filed the pins, especially where it meets the part, so it would fit properly against the bottom of the chassis. It also requires reaming out the hole for the larger chain guide so the 40-lpi chain will fit through it. 

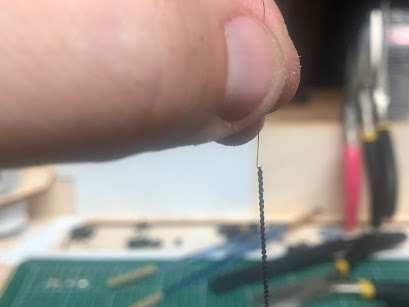
I install only the smaller guide (the small wheel) first. I then make a small needle by bending 0.006" wire. Rather than bending it against the edge of the needle holders, I use them to hold the wire and bend it free-form to make it as small a hook as possible.


I thread it through the end link of the chain from the straight end (not the hook) because I find that easier. Then I crimp the end. I have two needle-holders for this. Holding the wire with the needle-holders locked in place prevents the wire from rotating when crimping the hook with the other one.


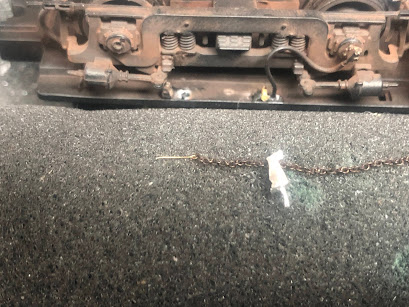
It's much easier to thread the chain through the guide using the 'needle' that we just created. Make sure the chain guide is facing the right direction. I then thread it through the smaller guide that's attached to the model already, then bend the wire around the back and glue the wire to the bottom of the chassis with ACC.


That keeps it secure at that end, and also prevents the chain from filling with ACC and stiffening. I then drape what looks like a decent amount of droop for the chain, and cut to length.


I then make a new 'needle' for the end of the chain.


I thread that through a hole I drilled in the end of the brake lever, and bend over the top and bottom, then glue the needle in place. This photo shows it bent into place, but before snipping of the excess wire.


This is an evolution of the process I used on the one RS-1 I've done so far. When I did the first RS-2, I hadn't installed the LEDs yet, and the way the chassis is designed it could be set upside down and worked on that way. For the second one, I had already installed the LEDs, so I used the foam cradle. This ended up being an advantage, because one of the things I struggled with the first time is the weight of the chain itself constantly pulling the chain out of the holes when I was trying to thread them. With the foam cradle, I could lie the chain on the foam slightly above the truck I was working on and it made it much easier.

I have a couple minor details left to add to the chassis, and I'll (re) weather the walkway and chassis. The shells are basically done, and I'll put them together.

Parts Used in this post:
The model is a Life-Like Proto 1000 (now Walthers Proto) RS-2

Custom Finishing Models (order direct)

147 ALCO Handbrake Chain Guide
336 BARCO Steam Heat/Trainline Hoses

 Detail Associates (find on eBay)

2210 Safety Chain - Black, 40 links/inch