Showing posts with label Layout construction. Show all posts

Wednesday, July 12, 2023

Designing and Updating Staging

Over time I had added additional staging/storage tracks where I had space. The primary purpose for these is to store locomotives when they are not in use during a session. As I've been preparing the layout for signaling, it occurred to me that it would be useful to minimize the number of turnouts on the signaled track. 

There were seven turnouts to staging/storage tracks along the run-through staging track, but by reconfiguring the arrangement, I can reduce that to two. While these weren't in my original staging design, they were dead space and I decided it would be useful to have storage tracks where locomotives not used during the session could remain on the layout. 

On this side I'll eliminate one turnout on the main, and the second one is moved to a new location. This will create a "lower staging yard" of four short tracks for the RDCs - three long enough for a pair, and the fourth for a single unit. For 1953 sessions, these trains can operate right out of this location. As usual on my layout, they terminate in the same track as they originate.

An additional two tracks will go around behind the Agents desk and will be on a grade. That's fine, because it's storage for locomotives. This replaces the turnout that is currently back there to access these tracks. They will be long enough for the A-B-A and A-B-B-A sets of FA-1/FB-2 locomotives.


I have a general idea of how I think I can fit this using Microengineering Yard Ladder turnouts. I did pick up an extra middle turnout (you can see it in the lower right) but came to the conclusion that it wouldn't fit.

If this were for a scenicked portion of the layout, I would have modified the regular No. 5 or No. 6 Microengineering turnouts so I could curve them to follow the main, but in this case a straight ladder is fine...provided I can get reasonable radius curves to enter and exit.


I have a further two yard ladder turnouts to fit at the far end, so I mock up some ideas there too. I've tried drawing things out like this, and spent some time in the past with some of the CAD programs designed for model railroads but have found that nothing is as good as just working with track, for me. In part because as I see where things lie, I see other options and can tweak the concept instantly.


I had some cork sheets left over from making the cork board at the Agent's desk and they were the correct thickness so I used those as the roadbed and started connecting track. I'm shooting for a minimum of 26" radius here, but 24" will work just fine if I have to do that. 


This process involves ensuring that the tracks not only fit for this section, but that I'll have enough clearance at the far end for the curve to the second part. At this point, it looks pretty good.


Of course, prior to gluing it down I want to test it with the RDCs too in order to make sure they are long enough.


Looking around the corner, I've switched to Woodland Scenics foam roadbed sheets, since that's what Roger had in stock, and also their 2% grade starters to get up to the higher benchwork as it goes around the corner. 


I have a window cut out in the utility room to access behind the Agent's desk. I need to fill in the track where I removed the turnout - easily accessible but hidden while operating from the layout room. Locomotives can be stored here from the clearance point of the turnout, and I took care (using 85' passenger cars) to ensure clearance around the corner of the desk and between the tracks. The main line track will run along the edge of the cork roadbed, and I can move it further out if needed, to ensure the storage tracks won't interfere with operations.


On the other side, I've already moved the main line turnouts. Like the other side, I had HO scale cork roadbed in the original track arrangement. I found it easier to rip that all out and use the foam sheets instead.

To make this side work, I have a couple of Walthers curved turnouts, one curved Peco, and the rest standard Microengineering ones that I had on hand. I've tried a number of configurations and landed on this. It eliminates 4 main line turnouts.


One track will be sized specifically for the Comet and another track for spare cabooses. That will leave two longer tracks for storage of diesel locomotives not in use. The track through the ladder goes to the Walthers turntable used to turn locomotives during the session. I went with the Walthers one because the controller has a button that will turn the bridge 180 degrees, which is really all I need it for. But I will have room to make storage tracks for the steam locomotives when the time comes.

I used insulated joiners to isolate these storage tracks, and may also add switches so I can turn them off during sessions. 


Wednesday, March 1, 2023

Feeder Frenzy


In the past couple of weeks I have added more than 100' of new feeders. Where?

Stanley Works is a new track arrangement, the whole section needed new feeders.

Fafnir, Corbin, and Russell & Erwin off of Track 5, all new track arrangement, all of it needed feeders.

New Britain Yard, completely relaid with new track. Everything needed feeders...

You can see where this is going. Pretty much the entire Highland portion of the layout has been redone, and the feeders needed to be done too.

In addition, I'm adding more blocks, and decided to redesign the bus so each block is easily identifiable and uses a different color. This was needed for Track 1 and Track 2 for the new signal blocks anyway. I did the wiring (and track) a decade ago and can do much better than my initial design and installation.

Moving along...

Wednesday, February 15, 2023

The new New Britain Yard

Thanks to John Drake switching back to N-scale, I was able to get the turnouts I needed to rebuild New Britain Yard.

I covered the reasons I did this here, but I'll summarize in no particular order - 

  1. My modeling skills have improved, and the ground cover and ballast of this section (the centerpiece) wouldn't match or be up to the standards of what I'll be doing now.
  2. I wish I had used code 55 track for the yard.
  3. I need to add switch machines to the main track switches, which is easier to do when they aren't already in place.
  4. I need to separate track 1 and 2 into individual electrical blocks for signaling.
  5. I was very happy with the 1-7/8" track centers in Whiting St. Yard. which would also allow me to add the missing track to New Britain Yard.
  6. Other track arrangement issues, I was able to make more room for the crossing shanty, for example.


Here's a few in-progress shots. Because I tore everything up, instead of using N-scale cork roadbed I used the craft foam I used for Whiting St. Yard. Although just a smidge shorter than the N-scale cork coming into the section, it's not a huge difference. I can draw on it to lay things out easily.


To mock it up, I have 3/4" wide strips of masonite (left over from the prior layout when I had cut them for spline roadbed). I prefer to work from the edge of the track, rather than the center line. I think it's more precise (at least for me). The 3/4" between the edge of the ties sets the track centers to 13'3" with the NH standard at 13'. Close enough for me. I think it looks better too, with another bonus being that I can fit the missing Track 13 and have a slightly wider spacing before tracks 15 and 17. 


I didn't pull out the tracks in the asphalt. So Track 1 and Track 2 are still on 2" centers. Although by the time I was finishing this up I realized it wouldn't have been too difficult to deal with that, It will work fine as is.


The switch shanty has an appropriate amount of room now. Still tight, but not much more than the prototype. It also required reworking the engine servicing tracks, also code 55 now.


Is all this worth it? I think so. Here's a picture of the original arrangement:


Note that the yard proper is only 3 tracks. Track 13 should be a long track that crosses Elm St. Without the fourth track, the crossover between the two is missing too. Here's the prototypically accurate arrangement:

Not a huge change by itself, but operationally I think it may be. In addition, the yard tracks are now Code 55 rail. I'm also not using any rail joiners in this section. Instead, I'm using KV Models joint bars, which can be soldered.

Wednesday, November 2, 2022

I Did a Thing (No Sacred Cows)


Ever since I had the issue with the white film over the yard (and here), I have been struggling with trying to entirely eliminate it. For the main yard I had simply removed the track and all the ground cover, but I didn't do the main tracks or Track No. 5.

Several months ago, I started cleaning out all of the ballast and most of the ground cover to the section west of Main St. In addition to not taking very long, I was able to address a few other minor issues in the process.

I wasn't entirely happy with how the ground cover, ballast, and track weathering itself. At the time I really liked it, but I've continued to experiment and improve my approach. This is the centerpiece of the layout but wouldn't be up to my current standards. So, I started the process of removing the ground cover and ballast here as well. As I was doing so, it occurred to me that I could do the same thing I did before with the yard tracks, leaving just the main tracks and Track No. 5 to clean.

Not all that much, but it is a slow process. I considered what replacing these tracks would entail but didn't want to go there. But then I damaged a piece of track. Easy enough to fix, but I could also just cut out that section of track and replace it. In fact, I could cut out all of the track, leaving the crossovers and working from them, right?

One of the things that has always worked for me is to plant the seeds of a problem in my brain, and then just go about my regular activities. In a few days, if there's a solution to be had, it will just come to me. In this case there were several other factors that I hadn't considered that really settled the best course of action.

1. I made no allowances for under-table switch actuation. I didn't intend to use it but learned that I need to tie in the main track switches with the signal system. This requires removing the spring from the throwbars, and installing them under existing, ballasted track. Furthermore, at least one is directly over joist.

2. There were some issues with the track arrangement. For example, the location where the crossing shanty sits is much tighter than it should be. Also, as I've learned more, I set the Whiting Street Yard tracks on a prototypical 14' track center. In addition to looking better, it makes enough room to add a missing yard track in New Britain Yard. Correcting the arrangement also moves a switch from Track No. 5 to a side track where it belongs, and properly extends one of the yard tracks across Elm Street. The new arrangement also increases capacity of the yard by about 10 cars. 

3. Laying new track would be much faster than cleaning and working with what was there. Furthermore, it feels much more like progress than the slow process of cleaning out the ballast. That also didn't address the issues with the track weathering either. The only delay is that Microengineering turnouts aren't readily available in Code 70 right now. But I've found much of what I need, and the rest is on the way shortly.

4. I can add all of the detail parts to the track at the bench, before installing. I can also switch to using KV models joint bars instead of standard rail joiners, improving the appearance even more. 

It also feels like progress. Cleaning out old ballast and "fixing mistakes" feels like a step back. It's often hard to step back and decide that the best option is to "start over" but with over a decade of working on this layout, helping friends on theirs, I've obviously developed new skills, perspectives and goals. 

I can confirm that grout does a great job of securing track.

Online there are a lot of folks who have built multiple layouts. My buddy Bill has been rapidly building his new layout. In his case, it was necessity that required the removal of the old layout. Tony Koester tore down the Allegheny Midland because he eventually found it wasn't lining up with his actual goal (even if he didn't realize it initially) of modeling the NKP. Progress comes in many forms, but in the end it really just means one thing - moving closer to the goal.

This seemingly drastic step is definitely achieving that, all while making a number of tasks that would be more challenging and time-consuming if I tried to accomplish them with the existing trackwork. I wouldn't even call it a step backward since it will drastically improve the scene with a decade of things I've learned along the way.

Wednesday, July 13, 2022

Where has the year gone?

Well, after a very consistent 2021, I've been very inconsistent posting in 2022.

Even the NE Proto Meet didn't kick off a flurry of modeling activity this year. It's not that I haven't been working on anything at all though, but I think it's time to take stock of where I am and what I need to work on this year.

First off, I've been able to put in a lot of hours at CNZR since last fall, which has severely cut into my normal modeling time. We're also nearly 23 years in this house (new when we moved in), so household projects have been taking up a lot of the time that has been left each week. This is all in addition to my usual "day job" activities that pay the bills. We usually only take one vacation each year, but for whatever reason we've already gone away once this year and have three more trips over the next several months. It has been an unusually busy year on non-modeling activities.

On the model railroad "business" side, rebuilding the website is still behind schedule, but fortunately Google extended the deadline another 6-months before the old site is shut down. I'm also involved in several model kit (passenger and freight car) projects that will start to be released over the next 6-months or so. In addition to the research and work related to the production of the kits themselves, I'm also working on getting clinics prepared related to them. 

I have also found that with so much going on, when I have had time to get down and work on things, I've lacked motivation or even the energy to do so. Things are progressing, just not at a record pace.

The point is, like most of us, model railroading fits within the spaces of the rest of our lives.

Starting the second half of the year, what are the goals? After watching Bill's layout growing so quickly, operating on Chris' layout and, in particular, visiting a number of new layouts this year, there are two obvious goals that I continue to avoid, despite my declarations in the past.

  1. Operating
    1. Test and glue down remaining track.
    2. Install feeders, including modifying the mainline wiring for signaling.
    3. Install switch machines for the mainline switches.
  2. Base Scenery
    1. Ballast
    2. Ground Cover
    3. Fences/Gates

Operating is key, because I really like getting together to run trains. I've been working on things like passenger cars, some locomotives, etc., because in the long run they are key elements that need to be completed for full operating sessions. But as I've noted before, for a 1953 session all I need are RDCs, two 44-tonners, and another switcher of some sort for Stanley Works. That could easily be the third 44-tonner, so that means getting those three locomotives finished. Not all of the passenger cars, etc.

While not all of the layouts I've seen were completed in terms of scenery, I definitely felt that those that were further along were far more inspiring than the current state of my layout. Even those layouts that aren't "complete" yet, like Bill's and Chris', they have a significant amount of scenery done.

Since most of the time I'm visiting a layout specifically to operate, my focus hasn't been on the scenery as much. I've appreciated the work they've done, but it wasn't as much of a priority for me. However, when visiting several layouts for open houses after the NE Proto Meet, my focus was entirely on the scenery and the layout presentation. 

For all practical purposes, the amount of scenery Bill and Chris have completed on each of their layouts is no more than the space my entire layout occupies. And those are completed scenes, with structures, etc. I should be able to complete at least the basics relatively quickly. I know I can, since I did it on Harvey's layout.

It's not to say I've done nothing this year.

In addition to the passenger cars that I've been working on, I have built several Campbell horizontal oil tanks (2 sizes), a Rix vertical oil tank (not pictured), and a pair of Walthers LP tanks that I shortened. The three tanks on the right will go elsewhere, but the LP tanks, pump houses, and single horizontal tank are mocked up where I think they will reside for Fafnir Bearing. 

The next few weeks look to be just as busy, but I can at least start prepping for some of the jobs that need to get done so I can work through them more quickly.

Wednesday, March 23, 2022

Progress: More Trackwork

Coming around the helix you and you'll be at the start of what is continuous industries. I've made a few modifications here. The two tracks in the front of the photo with the hopper and the tank car are Hardware City Fuel. I moved these over to make room for one additional track, for the City of New Britain, with a chlorine tank car. 

The more obvious change is the addition of two tracks connected to Track No. 5 on the far side of the main tracks. These are DK Coal and Miner, Read, and Tullock. I had been postponing these because of the diamond crossing in the middle of them. I used another of the new Walthers turnouts (24' and 20" radius curved) for Miner, Read and Tullock.

The 30-degree crossing is from the excellent new Diamond Line from Fast Tracks. 

While it probably needed a different angle, and at least one of the tracks curved through the crossing, I didn't want to handlay this one. Not just because of the challenge, but this product is the first that actually looks like a prototypical crossing, with cast parts. 

I deviated from the design, though. It comes with pieces of rail that you install and then solder to PC board ties at the far end to keep everything in gauge. Instead, I trimmed away the last few wood ties and removed several ties from Microengineering flex track, then slid the rail into place in the castings. The ME track keeps itself in gauge, and it also let me curve the tracks right up to the frogs.


I'll fill the gaps with styrene. I need to get a Dual Frog Juicer or some other autoreverser to power the two inner frogs.


If these were available when I built the tracks for Shurberg and New Britain Lumber, I definitely would have used one. But that is set quite a distance away from the fascia and is already in place. I'll look at potentially changing it, but I don't think I will at this stage.

In this section, the only track that needs to be completed now is the Stanley Svea track that extends past the Household Fuel silos and onto a curved trestle. It won't stop me from being able to operate, but I'd like to finish that relatively soon too.

Wednesday, March 9, 2022

Progress: Trackwork

Finishing up the trackwork. I've frequently said, "don't be afraid to make changes."

Well...

Track No. 5 - First Modification

A few years ago, I extended Track No. 5 coming into the main portion of the layout. The initial idea was to extend the track as far as I could and provide a point where the eastbound freights could shove a cut of cars. To do this required creating a level track because it's at a point where the helix is already descending. It also gave me an opportunity to put in a nice retaining wall for the track separation.

When I later made modifications to the backdrop so I could include more industries on the north side of the tracks, it also meant I could more easily include the East Main St. crossing. 

Track No. 5 - Second Modification

The problem was now that there was only room for 2-3 cars before the East Main St. crossing. Either the freights would have to shove the freights all the way past E. Main, meaning the rest of the track was pointless, or I needed to find a different solution.

I decided to install a new entrance to Track No. 5 so that it would start just to the west of East Main. That left a portion of this track for an industry.


The plan was to use that for United Coal Co. In this section of town there are a lot of coal dealers, and there will be D&K Coal right across East Main St. In fact, in this section of about a half mile there were six.

Track No.5 - Third Modification

This industry would be tough to fit, though. In addition, it would be serviced right off the Main, instead of off of Track No. 5 like it should be. It's also the only industry track in this section leading into the helix, and it's also in a narrow aisle between the two helixes where the Stanley Crew is normally working. Not a great setup. Out it comes.


Track No. 5 - Fourth Modification

Shortly after I did, I was working on the industrial tracks on the north side of the main tracks when I realized that the crews would have to enter the main to work one of the industries. At this point, if Track No. 5 were extended, it would operate as a lead for the industry. In addition, the crew could come all the way from the yard on Track No. 5 and not need to enter the main at all. This is, of course, also prototypical. It just extended further for several other industries before connecting to the main.

This doesn't need to be level, and ideally the turnout shouldn't be as far around the helix (although it will still be on the back side). I suspect it will be rare for the crews to use it, though.

As far as cuts of cars? I've decided they'll just have to use the portion starting at the crossover. This should be long enough and will have to do since I can't install the full length of Track No. 5. The reality is, eastbound trains really left their cars on the west side of town, on a track about a mile from the yard. Since that entire portion doesn't exist on my layout, it's a compromise no matter where I spot the cars.


Working backwards from the turnout for the first industry, I used a full piece of flex track for the lead, which determined the placement where Track No. 5 will now start. Although I really liked the retaining wall, it was tough to get that extra vertical grade smooth from the end of the turnout to the top of the level portion. With this turnout closer to East Main St., it would need to have been redone anyway.

Here's looking toward New Britain, and it what you see when entering the main portion of the layout now. I also reconfigured the two tracks for Hardware City Fuel to allow space for the New Britain City Works track (to receive chlorine tank cars, among other things). More to come.


Walthers Turnouts

The two turnouts in this location were the old Shinohara/Walthers ones. I needed curved turnouts with a 26" or 28" outer radius. I could have handlaid them, but these were much faster. The two primary issues I have with them is that they are Code 100, and the points aren't sprung. Obviously, the details themselves are nowhere close to Microengineering, but I felt that based on the location I could live with that.

But Walthers just released their new version. They are Code 83 and have sprung points. Like the old ones they are 28" outer radius and 24" inner. Although that 24" is less than my mainline minimum of 26" they have been well tested in this location and have worked fine with my equipment.

I also picked up one with a 24"/20" radius for the industry track coming off of Track No. 5 (which, not being the main track, has a radius of 24"). 

Overall I think the Walthers turnouts are decent. For most modelers they will work well, although if you're particular about accuracy, not so much. The spikes are still quite large. Also, since they made the points out of continuous rail there are sections of the ties that have no wood grain.

I also found it odd that on a brand new track product that first thing you have to do to install it is remove the first tie at the end of each track (and then they recommend purchasing their extra ties). Microengineering has a tie that's slightly shorter, and has no spikes so you don't have to remove any ties. At the very least they could have designed it so it didn't have that final tie (even better would be to include three of the extra scenic ties too).

There are holes for spikes. Most are between the molded spikes next to the rail. So the placement is better, but there are still a bunch of holes if you don't spike/nail your track. A better option would be dimples on the bottom of the ties to drill out if you choose to go that route. That has been done before too.

While a lot of people will like the continuous rail points and it's appropriate for a lot of modern track, it's not accurate for my era. The rail is thinned as it gets to the end, which means it flexes too much to flip the points by a finger if you aren't close enough to the throwbar.

I would have liked to see them put a little effort into making them more accurately, and finer details overall. That's primarily a research/design thing and wouldn't have added any cost to the tooling.

The diverging rails are electrically connected to the stock rails, and with continuous rail points there won't be a concern for losing conductivity. The frog is dead, but there are two places (one underneath, one to the side of a tie) to power it if you'd like.

Mechanically they are decent and I don't have any concerns in that regard. But the overall design in terms of details and certain things, like the need to remove a tie, feels a lot more like a product designed 20-30 years ago. Not something I'd choose to build a layout with, but good enough for a few special needs.

Tuesday, November 9, 2021

Just post something. Ha!

So here it is, a week, a week and a half, ummm, nearly two weeks since my last post. After being very consistent all year, my busy schedule has caught up with me. In this case it's been extra hours at all of my work/business endeavors, plus it was my birthday, etc.

That's not to say that I haven't been able to do anything.

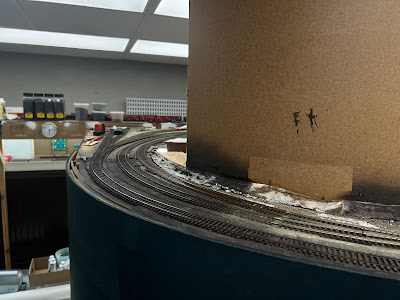
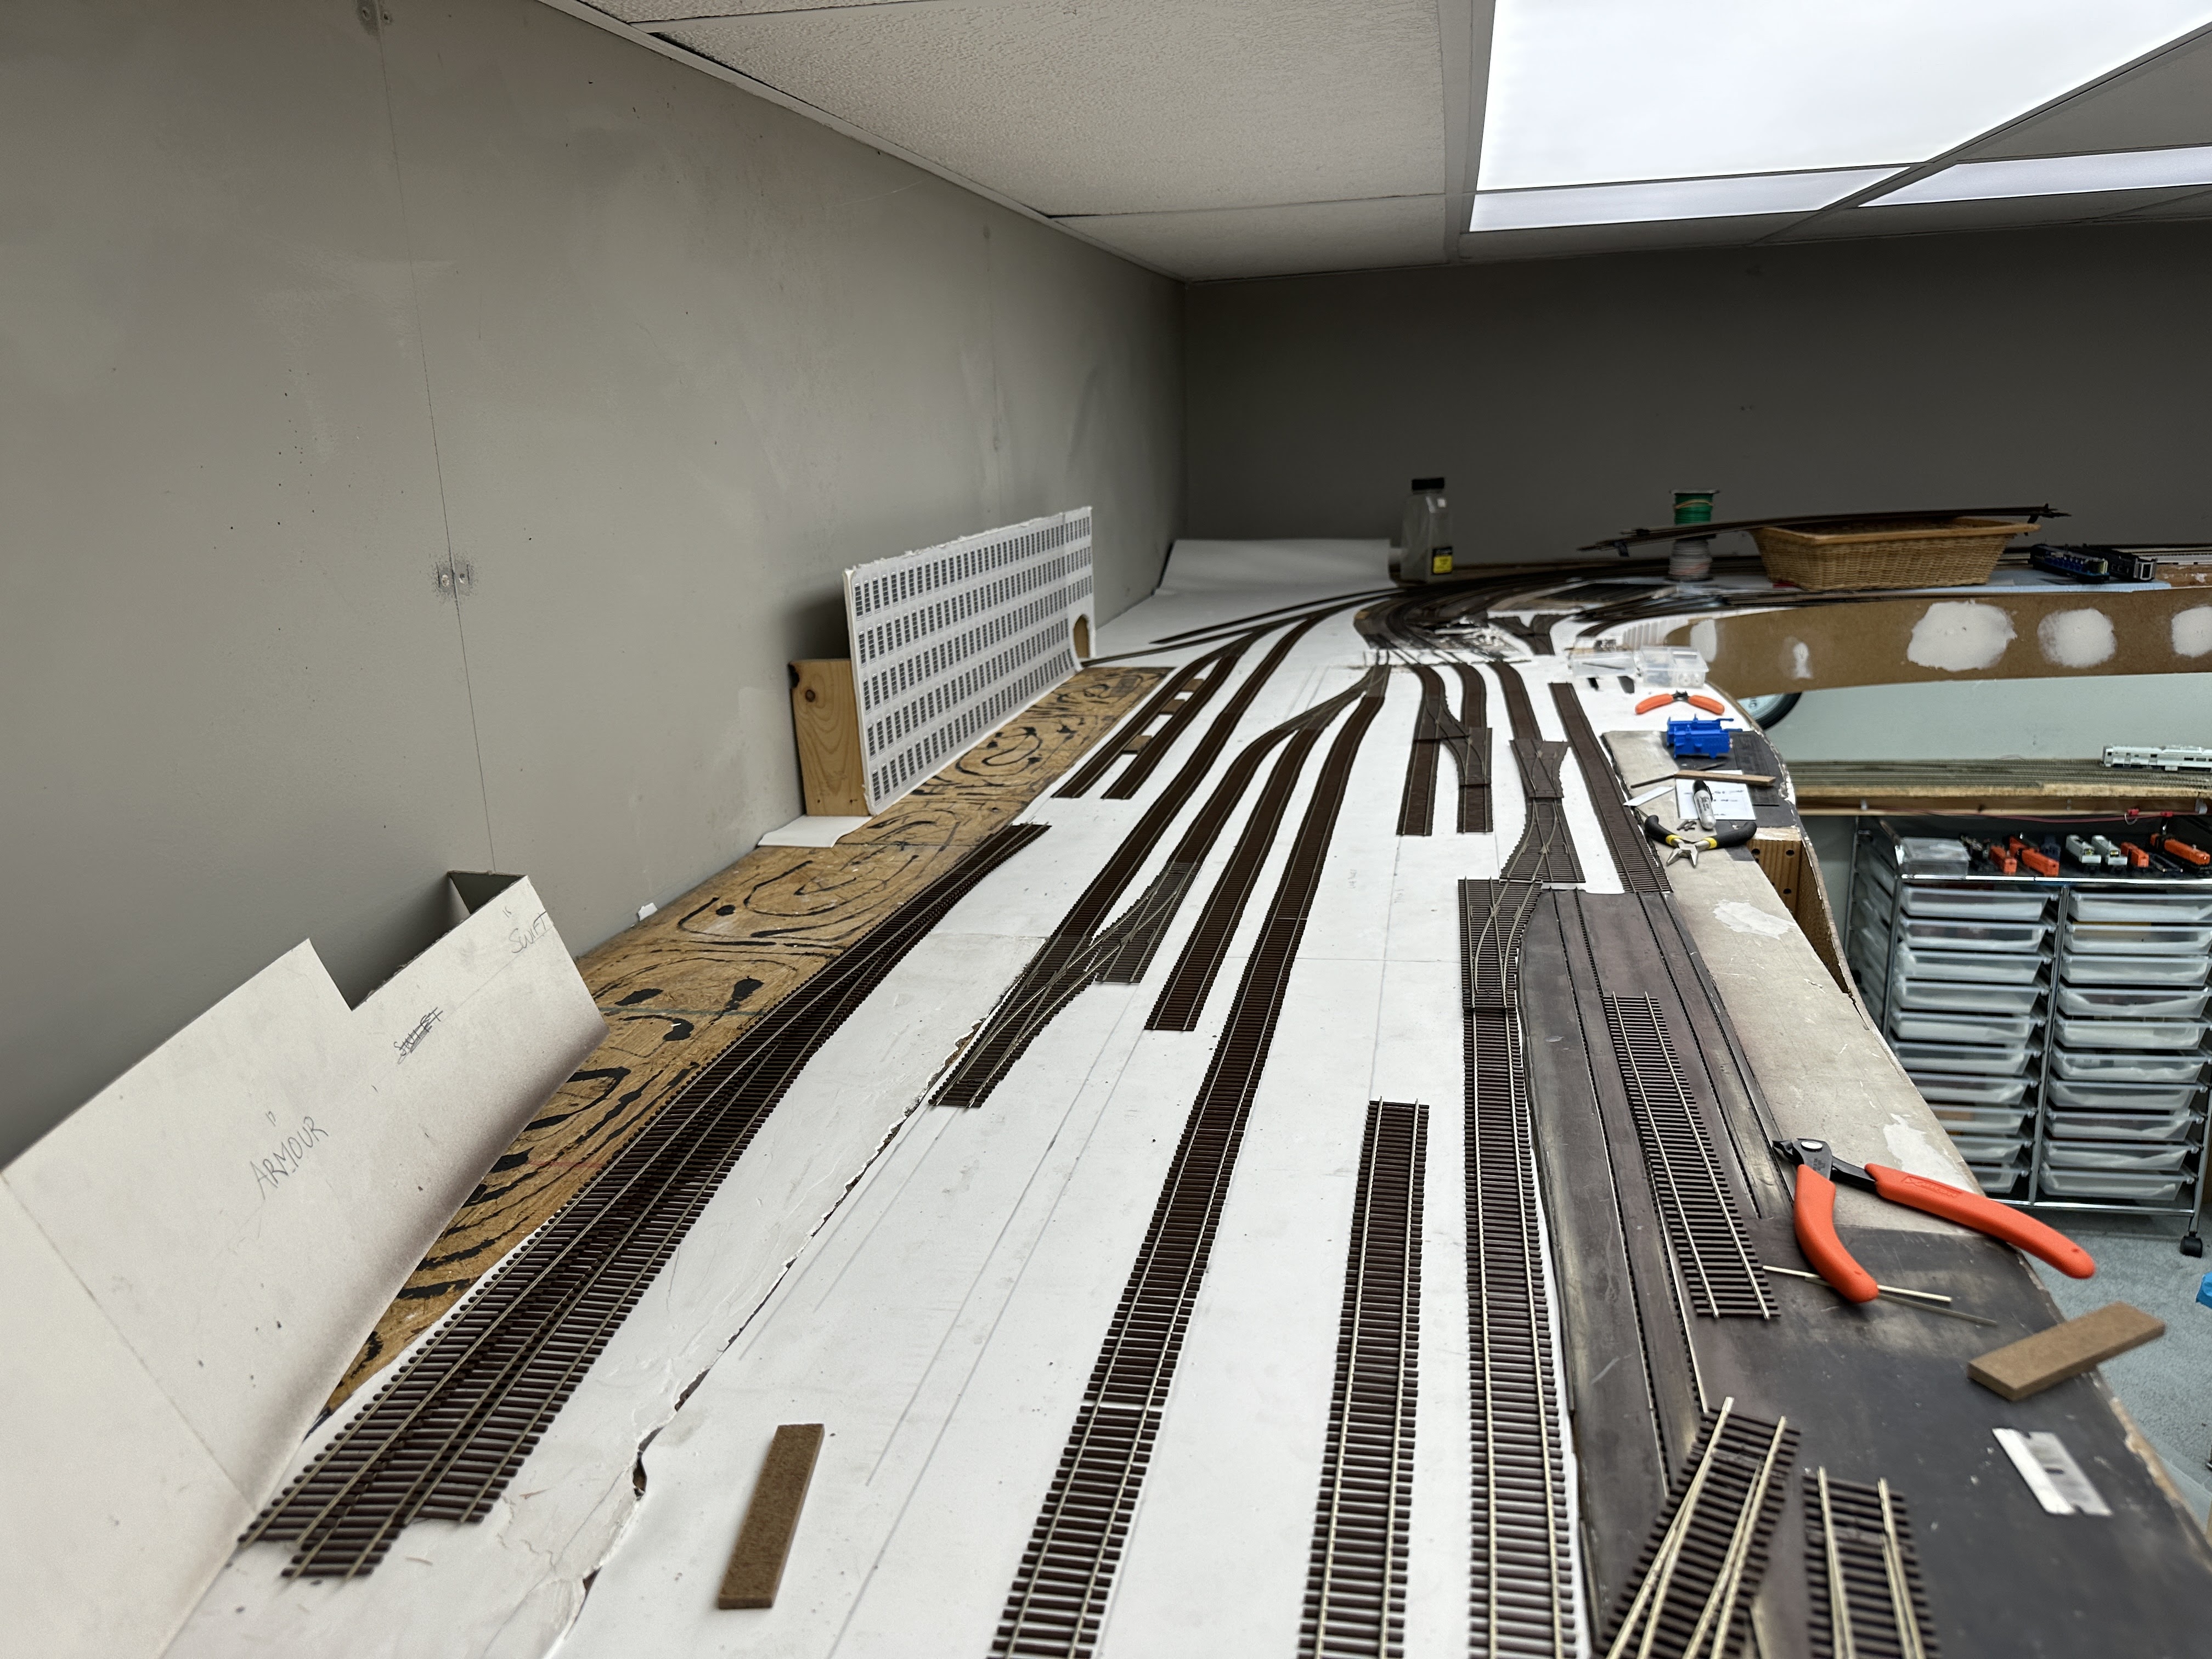
After the last post, I was able to finish soldering all of the feeders to the rail at Whiting St. Yard that evening. I have also connected enough under the layout that it's even operating!

AML Modeling buddy Mark Stafford pointed me in the direction of Krone connectors. These are a type of punch block (well, several types) where you can terminate dozens of wires that are then connected to an output wire. In the US we have similar punchdown blocks for phone, and sometimes network systems. These look like a great idea, but getting it done now was more important, so I went ahead with my original plan of wire nuts and T-Tap Connectors.

As is typical, a few models have crossed the desk. I started working on a Wright Track (ex-Smoky Mountain Model Works, potentially available from Southbound Model Works & Decal Co). This has turned out to be quite a challenge, which I'll explain when I get to actually building it. I also cleaned up all the parts for a Resin Car Works DSS&A box car. This will be a fun (and quick) build, just not sure when.

Work at CNZR has been great, naturally. I take a lot of photos like these:


Bloomfield freight house from Wintonbury St.


A frosty morning at Savin Road.
Two ex-B&M Pullman PS-4 50-ton flat cars.


Morning (prior to daylight savings) at Tobey St.

There's also a lot of wildlife, like this deer right near the Copaco cattle chute.


I've seen bobcats, foxes, turkeys, a bear, lots of snakes and frogs, a very large praying mantis, and others I'm probably forgetting.

For fun I sent my daughter a few pictures like these:

There's a frog in this photo.


There are two frogs in this one.

But I'm not sure how much of this I want to keep including things like these on a blog about modeling and my layout. So I've decided to start a group on Facebook where I can post things like this, and also be able to communicate more directly. It's also a place where I can provide more informal updates and previews for what will often end up on the blog.

You can let me know in the comments what you think, and of course on the Facebook Group.

--

I plan on trying to post to this blog weekly (instead of the three times/week I've been doing for about the last year). I have several posts in progress, but there are a few other priorities right now:

1. Complete the update of the website (I have to switch over by the end of the year).
2. Finish a clinic for the December Hindsight 20/20 meet.
3. Build a website for a friend's model train business - I'm very excited about this one, but can't say anything else yet...

In addition, I'll have work, business, and family things to manage, with Thanksgiving and Christmas right around the corner.

Posts I'm working on:
1. A tour of my buddy Dale's layout.
2. Modifications to a couple of Rapido's X31a models.
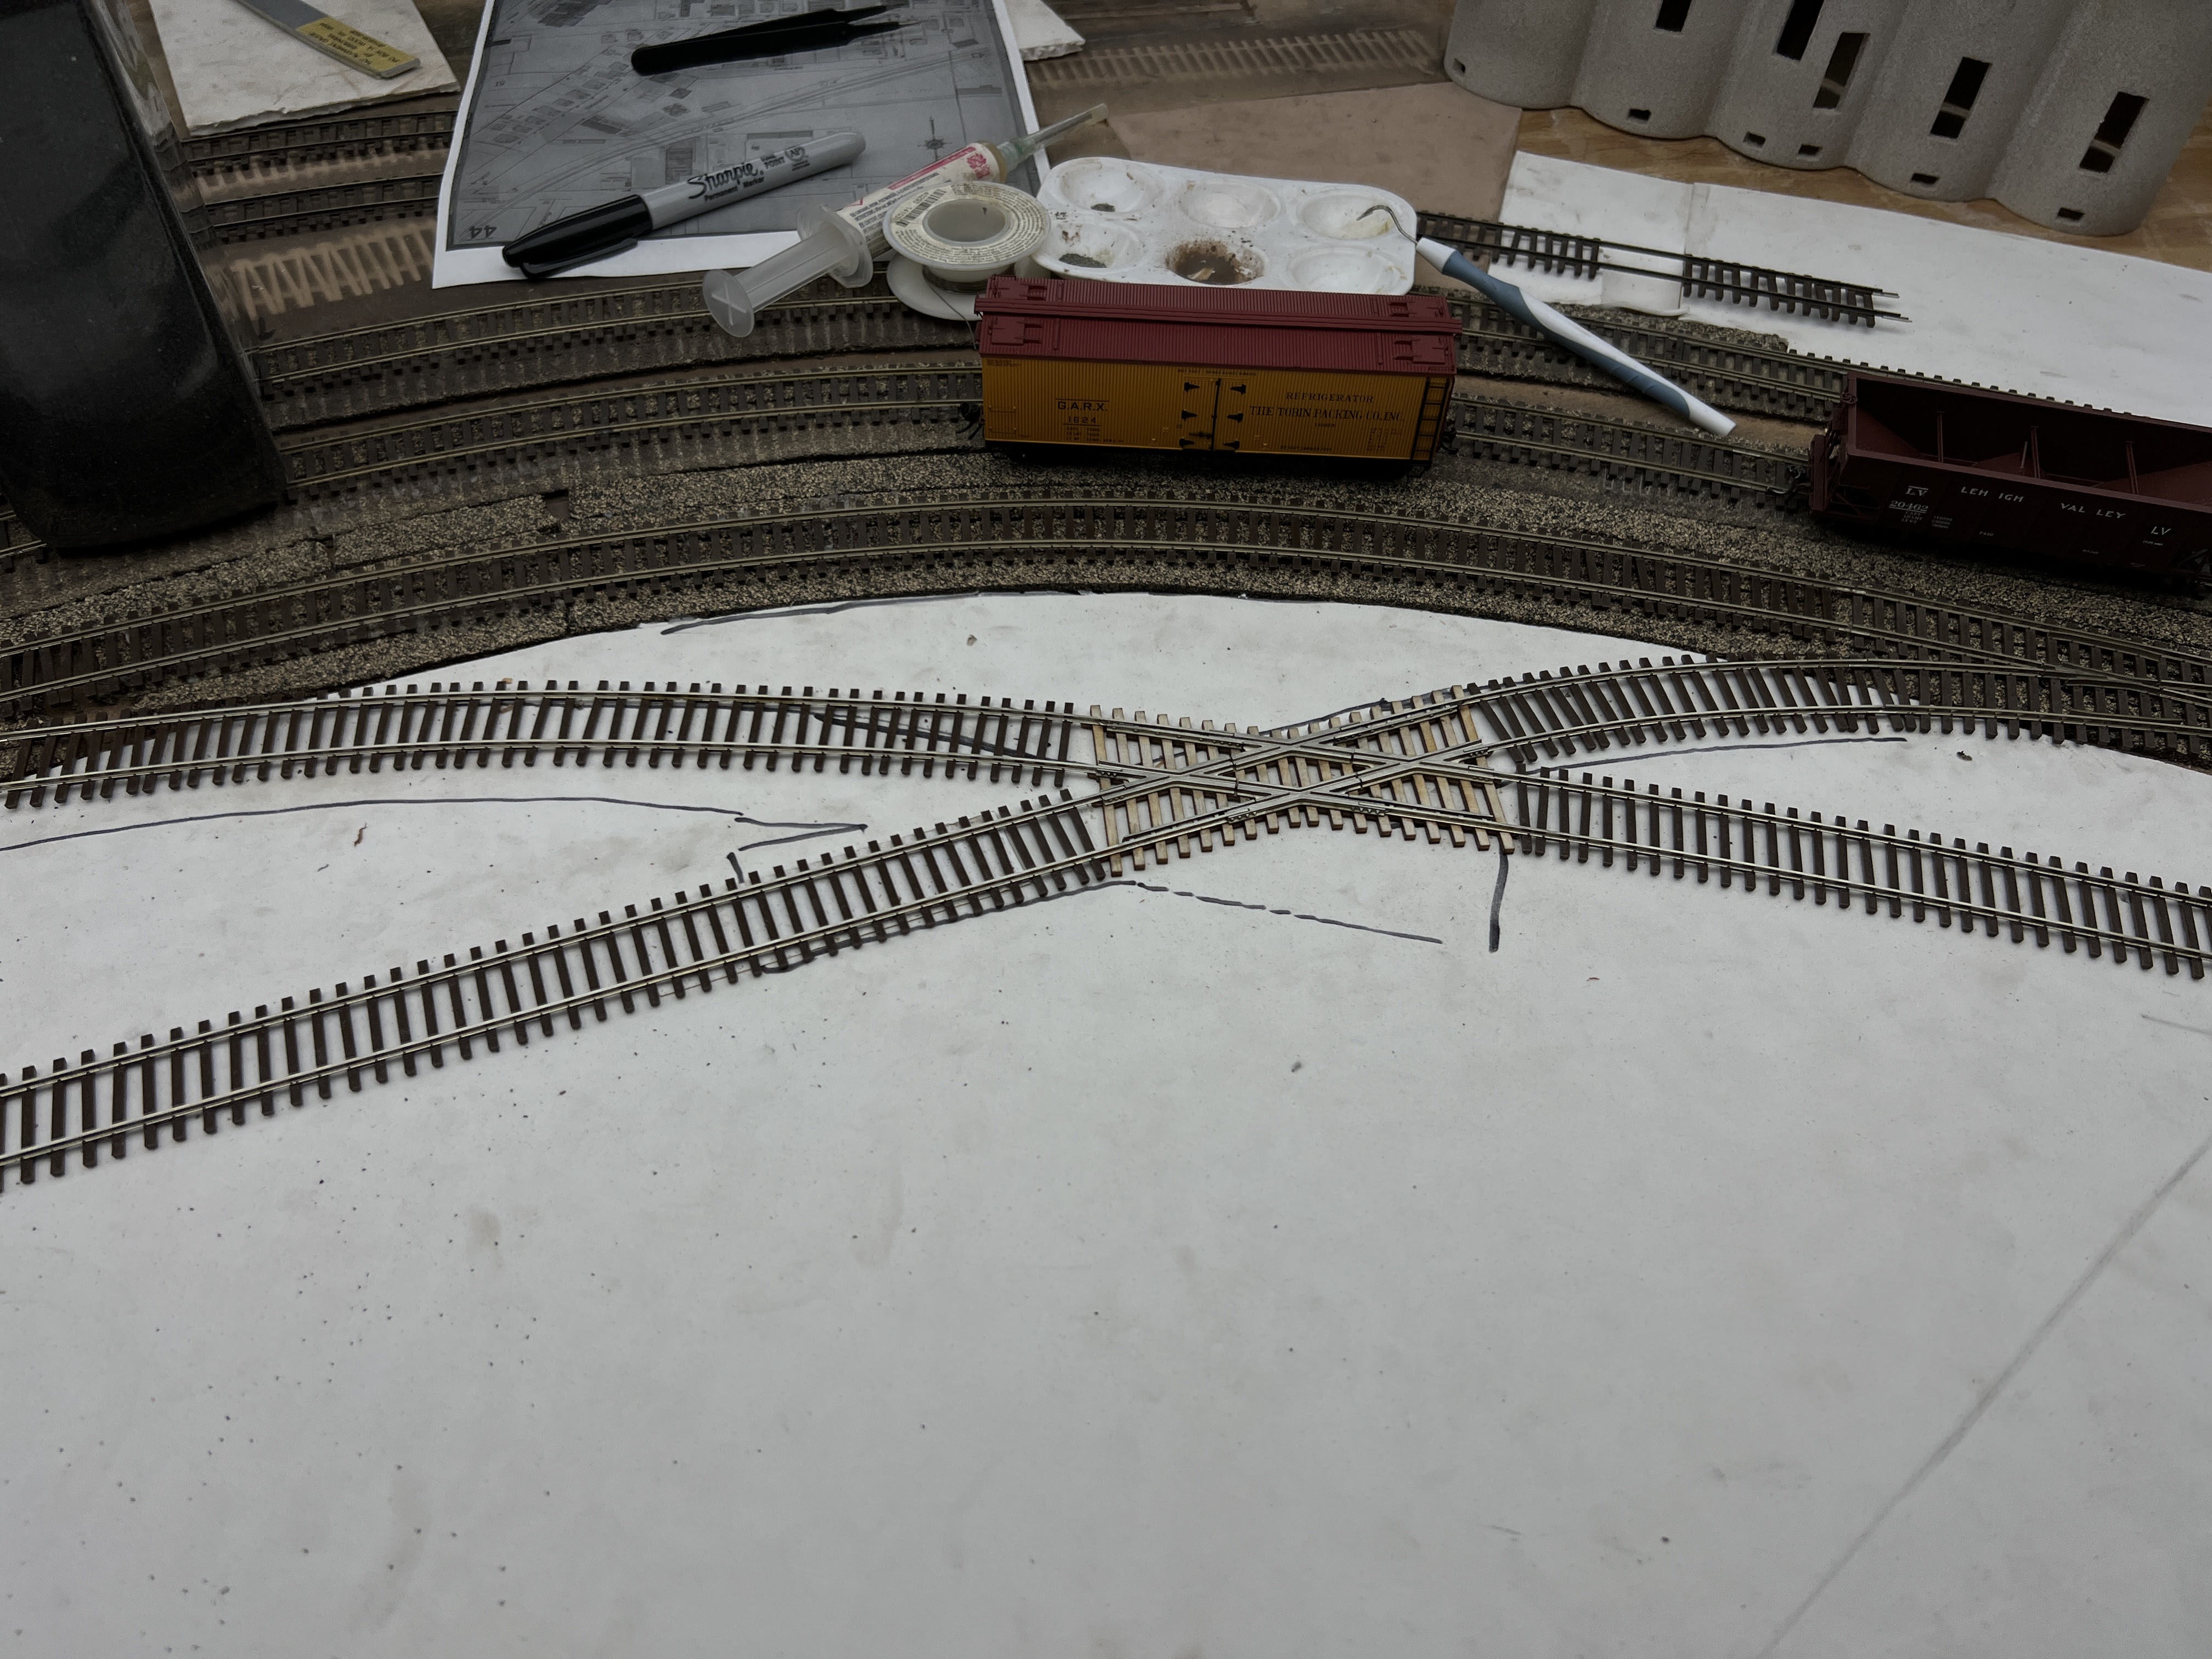
3. (Semi) handlaid switches with CVMW tie strips and Proto 87 Stores parts, among others (I have to build two), and Fast Tracks Diamond Line crossing.
4. More work on the Proto S-1, Atlas S-2, Bachmann/W&R 44-tonners, and Crown Custom I-2 locomotives.
5. Upgrading NE-5 and NE-6 cabooses.

--

So that's where things stand today. It's really adding 40+ additional hours working at the railroad that has restricted the amount of time I have to work on the layout/blog for now. But it's an adjustment, and it's not uncommon for me to get more accomplished when I'm very busy compared to when I have more free time.

Wednesday, October 27, 2021

Just post something...

Like getting down to the layout, time has put a crunch on posts to the blog too. I have been working on the new website, and I'm in the process of building another new site for something I can't divulge just yet. Plus work, work, and business too.

So here's a few unrelated things that are happening. First is a wonderfully windy and moody autumn morning/day following a decent amount of rain yesterday (a nor-easter apparently). I had the day off from the railroad yesterday, but apparently none of the line or construction crews were working due to the weather anyway.


The line crews were on storm duty today (and probably tomorrow) so there weren't nearly as many crews working today. I spent the day at Plainfield St. activating the signal for the hi-rail flatbed and dump truck a few times. I was also fixing a computer for Jeremy, and Dale loaned me a new book that I heard about on A Modeler's Life:


It sounded interesting on the podcast, but was way better than I even expected. I'm doing a clinic for the next Hindsight 20/20 event in December. I've decided to do a short clinic on operations, and this covers a lot of similar thematic ground and I'll be able to point folks to the book for more ideas and inspiration. I highly recommend it, and just added it to my birthday/Christmas list (I'm not allowed to buy it right now...). I'll be getting over to Dale's house in the next week or so to get some photos and videos for the clinic.

I was also able to join the weekly Modeler's Life Patreon Zoom for the first time. Talk about inspiration. Much like the blog, it provides an impetus to get something done on the layout. Feeders are the big thing, so that's my (self-imposed) homework for next week. It's time to get trains running again (which Chris reminds me pretty much every time I see him). Since the west side Highland Line is still operational, the goal is to complete the other half of Whiting St. Yard along with the Berlin Line. This is because I already have the RS-2 ready for testing the NY-4 train from Berlin (Cedar Hill) staging to Holyoke staging. It really shouldn't be more than a couple of hours of work between now and next Wednesday. We'll see how it goes!

Monday, October 11, 2021

Progress and work

Progress on modeling stuff is largely invisible. I'm continuing to work on the new website, feeders, additional panels to finish off the layout, and working out how I'll finish the space under Whiting St. Yard. I do have a few parts and tools on order to get moving on a couple of other projects in the next week or two.

Since there isn't much to show from the layout side of things, here are a few more pictures from work.

This is an old pipe-connected derail. It looks almost identical to the operating ones that modeling buddy John Grosner has on his layout.


The new poles are going up pretty quickly, at least I think so. Here's a tidbit (I'll let you decide if it's interesting). The state required the poles to be higher (this one is 95' tall) and spaced to allow room for catenary in case they want to electrify the line. I don't think that's likely on a one-train-a-day freight only branch line, but they are thinking ahead.


Here's another one going up.


I continue to be impressed with the whole process. There are as many as 4-6 crews working on any given day. The bases for the east side of the line will probably be completed this week. Erecting the poles themselves will slow a bit when they have to work directly from the rail. The outage for the west side of the line isn't until November, so we'll be here for a while.

Monday, September 20, 2021

Feeders and Exploring DCC for the I-2s

I've been working on one of my least favorite parts of the hobby - feeders. It's really not that bad, especially once I get started. I just have a lot of them to do. I've done about 15 pairs by the time I took this photo. 


Working at Whiting St. Yard.

Another 16 pair or so to go in Whiting St. Then I still have the Berlin Line, some in staging, the east side of town and the west side including Stanley Works. Yep, lots of feeders to go.

I have also made more progress on building the new website. 

In addition to making progress on what I should be doing, I also had my Crown Custom I-2s sitting at my desk, and started planning how I'll install DCC, sound and weight. I have an opportunity to get a couple that have already been weighted and upgraded to DCC. I'd have to sell mine, and hope that I cover most of the cost of picking those up.

Another potential factor is I have different goals that I'm trying to accomplish with my installations, and those wouldn't be set up the way I'd like. They would work great, of course, I'm just looking to do something a little different.


An ESU micro (or a Soundtraxx Tsunami Micro) will fit behind the motor. Both have a Next18 18-pin connector. This means I can do all of the wiring first, and the decoder is removable if I ever need to replace it. As a result, I plan on using these pretty much exclusively, even if the larger version would fit.

Chris prefers the Tsunami decoders for steam. Since he's fired real steam locomotives and understands the most minute details about operating a steam locomotive, I trust his judgement.  I checked and (as expected, due to NMRA standards) the pin-outs are the same, so by installing that wire harness, I can use either decoder.

Why not put it into the tender? Because if the decoder is in the locomotive, I only need to run two wires to the tender (for the reverse light). The power from the tender comes via the drawbar. In my era the lights weren't used during the day, so I don't even have to do that if I don't want to.


There's also space above the motor. Of course, I can't see inside it to tell, but a rough measurement tells me that there's quite a bit. As a test I put two layers of .080" styrene the length of the open section inside and the chassis installed without any issues. So there's room to add quite a bit of weight. I'll need that since these will have to haul as many as 5 passenger cars up the helix.


There are two electronic components (I removed the shrinkwrap) that go to the headlight. I haven't opened the tender to see if there's a similar one to the reverse light. One is a diode/bridge rectifier. I can't find it by searching for the markings on the internet, but I suspect they are for helping to protect the lights and maintain better continuity on DC. They won't be necessary if I replace the lights with LEDs, but I will need to fit in resistors. That won't be difficult, though, there's plenty of space.


I do, however, like the small plugs used for the lights. In this case there's one in the boiler and there's a second one in the smokebox. This allows you to remove the smokebox cover and unplug the light, and the same thing when removing the boiler from the chassis. I may very well consider similar connectors for other installations.

There's also space for the speaker in the front, here's an example of an I-2 that Tony's Trains did with the speaker in the smokebox. In this case there's also a speaker in the tender. I'll consider that, although I may try with the single speaker first, since adding the second one requires more wires to the tender.

I'm on the fence for adding a keep-alive. It's a decent size locomotive with a long wheelbase. It also only has to come from staging, make a station stop, and return to staging. So it's not going to get a whole lot of activity where it is necessary. On the other hand, I kind of want to use them on all locomotives as a general standard. I'll probably order a Tsunami Micro and Soundtraxx Current-Keeper to see how they (especially the Current-Keeper) will fit. Of course, there's plenty of room in the tender if I want to run additional wires there.

By now you're probably wondering why I keep mentioning that. It's primarily about appearance. It's not all that difficult to do, although there's the question of whether the wires are "permanent" or have a connector so you can still disconnect the tender. My goal is to try to make the wires look like the water lines. I'm even considering removing part of the existing lines and replacing them entirely with the wiring between the locomotive and tender. It is possible to get wire with multiple internal conductors, so I could have 4 or even 6 wires going to the tender that still look like two wires/hoses. However, with more wires, it will be harder to hide the connectors if I decide to do a removable option.

If I replace the wire hoses, I will lose some detail (there's a valve on the line), although I have been looking for something similar that is cored to receive wire (primarily at Precision Scale) and hoping I can make that hole large enough to accommodate whatever wire I'm using. I also need to find a way to stiffen the wire for most of the run, but have enough flexibility for curves.

Friday, September 17, 2021

Keep Moving Forward

I generally have two different layout work tracks going at a given time. The first is the stuff that I really need to get done. Things like the lights, feeders, some additional trackwork, etc. A lot of these projects are things that aren't always high on my list of, "things I like to do."

The second track are the things that I do find interesting, at least at a given moment in time. 

I try to make sure I make some progress in the first category several times a week. But for those times where time is short, or I'm tired (especially mentally), I try to just make sure I get down to the basement and find something of interest to work on.

The progress I've made in the basement with the lighting, paneling, and organization has helped a lot with that. It makes it a fun place to be, and I generally do a lot of other work down there as well. The more I'm in the basement, the more likely I'll make progress on something.

Tonight was one of those nights. I was tired, didn't really feel like doing anything, but I had something interesting sitting on the bench.

The KV Models handrail stanchions I got for the S-1s. But as I looked at how they need to be installed, I decided it would make more sense to get a proper bending tool.


So now I'm sitting at my desk/workbench, looking around the room and, when leaning back, the ceiling (because the lights are still very cool). But I still need to finish the (really annoying) job of fitting the (really annoying) fiberglass ceiling tiles that were left. If they hadn't used these tiles when our house was built, I would have used different ones. But they're already here. 

Originally I thought I would need to pick up quite a few new tiles for the Whiting St. Yard, but since I installed so many lights, I had a bunch of spare ones. So I might as well get working on those.

As it turned out, I was two tiles short. I didn't even need two full tiles, but I needed big enough chunks of each that I couldn't get what I needed out of one tile. Home Depot didn't carry them, of course, and the closest Lowe's that had them in stock was about 45 minutes away.

Didn't matter, I was going to finish this tonight. 


The last pieces were the far side of the ceiling over Whiting St. Yard. The great part is that the ceiling is one of those projects that only needs to be completed once.