
But really, I figured it's a simple little building to try my hand at scratchbuilding.
After going through the Railway Prototype Cyclopedia article, I realized I had missed that there is a 2-foot clearance around the scale itself, including the ends, within the scale pit. Which means there is at least 2-feet of wood boards between the end of the scale and the end of the scale pit. It also allowed me to ensure my measurement on all sides were within the standard.
So I started by taking rough measurements of the completed Scale House and cutting out the basic parts.

The basic parts and their scale dimensions.

Then I plotted out the windows and the door. Since the windows will have a frame, cutting out the side windows right to the corner won't be a problem. The same thing in cutting the front window from the top.

Board and batten siding can be made from a lot of different size lumber. But the dimensions I went with is essentially a 1" x 10" main board, with a 1" x 4" batten. The space between the battens works out to about 8" so I drew lines at 1' intervals.

I decided on the dimension in part because of what I thought looked good with the options I had on hand, and also what closely matched the dimensions noted on construction sites online.

So I marked the lines on all the parts, and started cutting out the windows and doors. I then completed the battens on a couple of pieces to see how I liked it.

You'll note that the side of the building has been redrawn with a new window location.

And the door has been moved to the back. Why? Because I wasn't really trying to recreate the Blair Line model. I want to make the structure that was there. Of course, we only have a (very) partial shot of the scale house in Middletown. Here's John Wallace's photo again:

I've decided that since most scale houses had windows on both sides, and I think a door would be taller, that the frame on the side is a window. It's pretty much centered on the side, so I moved the windows on both sides. Which means the door needs to be moved to the back. So part of me says the door would be on the side, so you're never stepping out of the building into the way of a moving train. But the general need for the windows makes a door on the back logical.

The other New Haven scale house picture that I could quickly put my hands on is this one. I've seen others, and I can say every once is a little different. Some had the angled corners like the Walthers model, and others were this simple rectangular shack. Since this looks quite similar to the one in Middletown, I'm using it as a guide as well.
Of course, the other factor is that this one has horizontal side sheathing, and looking at the Middletown photo it looks like vertical boards but no battens. Since it's for Chris' layout, I figured I'd see what his preference is. Both of us agree that's what we think it looks like. So here are the pieces cut out of some scribed wood I had on hand.

The styrene parts make a nice template, and I may decide to complete that structure eventually. But for now I'm working on the wood one.
So it seems as good a place as any for a few comments on materials. I like the idea of using wood because you can stain it and sand it to weather it like I did on the deck of the first scale track. Stain doesn't penetrate styrene, and sanding styrene after you've painted and weathered it just exposes white styrene. So there are some interesting finishing and weathering approaches with wood that you can't do in styrene. In addition, cutting out windows in wood is much easier, as it's a softer material than styrene. However, wood has a grain that styrene lacks. Cutting across the grain is much different than cutting with it, and in most cases when cutting against it I found a razor saw a better tool when I could use it.
Styrene, on the other hand, is easy to cut with the score and snap method, but that can't be used for the first three sides of a window. I also find that when trying to cut all the way through styrene (instead of score and snap), even with multiple passes, the result is an edge that requires filing to finish because it's not perfectly straight. But the biggest benefits is that it doesn't warp like wood, especially thin wood. Paint and glues have more than enough moisture to make these significant issues. Thin styrene is stronger as well. Furthermore, gluing styrene is both simple and strong with styrene cement that "welds" the parts together. While the old adage is that when gluing two pieces of wood together, the joint is stronger than the wood is true. The problem is, the wood we typically use in modeling is very soft. So a layer of wood can easily slough off with the glue.

So you'll note that after painting with a craft acrylic, the wood has warped considerably. Especially the pieces with a window or door cut out. I knew this would happen (and that this wood was too think for structural integrity anyway), but I didn't want to strengthen it until after painting...
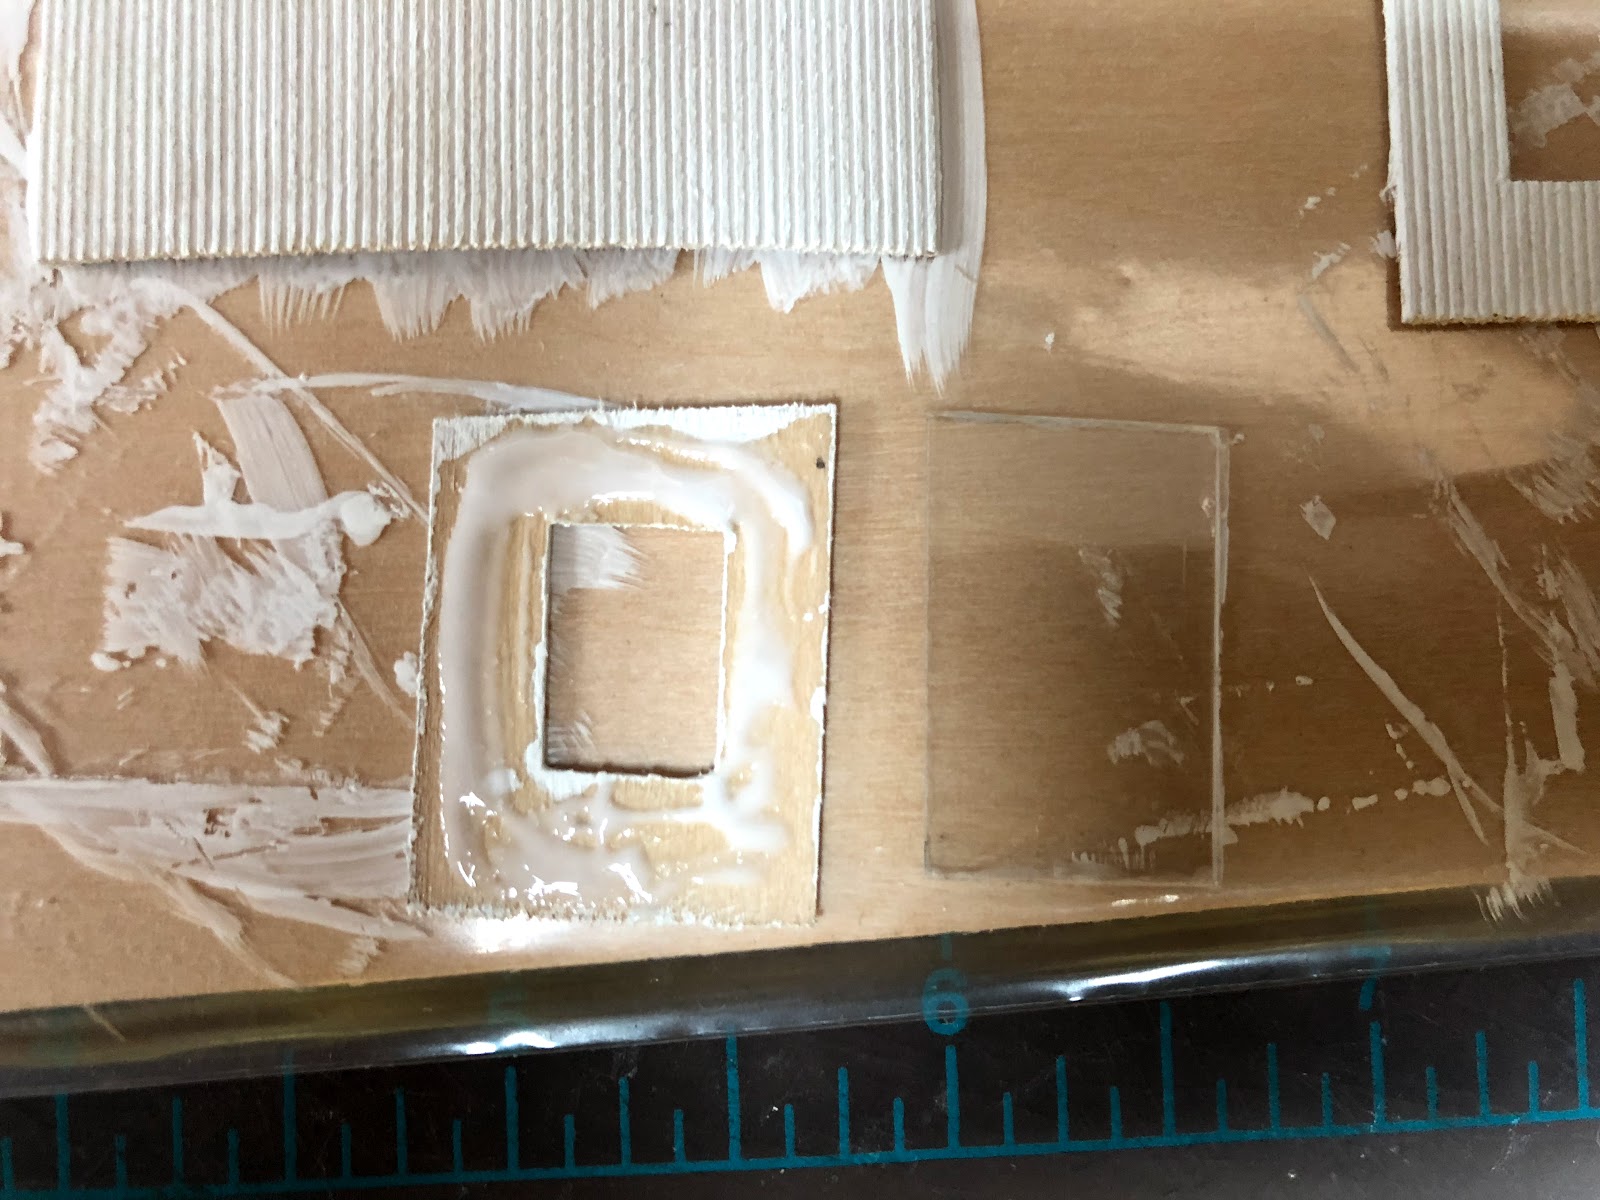
So I could use clear styrene for both structural strength and as window glazing.

Since I hadn't determined exactly how I was going to assemble the model, I cut the styrene so it was smaller on all 4 dimensions. This allowed more flexibility in assembly.

I used large 8' x 8' pieces to act as both a frame to assemble it, and the foundation of the building.

Because the primary interior structure is the clear styrene, all of the window glazing is done. I chopped up some old Walthers windows (what I had on hand), but decided they were too coarse for the model. So I have several other options on order and I'll decide which I like best. I'll be able to paint them before installation so I don't have to worry about harming the glazing.


I haven't finished the roof, obviously. The door is scratchbuilt. The interior on the back is regular white styrene since there's no window. I first drew the pattern on the door and started by installing the first horizontal piece at the top of the door, then using a full piece of strip styrene one of the vertical pieces (the long "handle" makes it easy). Once the glue had done it's job, I cut it to length (to where the next horizontal piece is), and did the same for the other two verticals. Then I added the horizontal piece, and used the same approach for the bottom half of the door. I drilled a small hole and used a piece of wire for the door knob.
I also used strip styrene to finish the corners and fascia and the frame around the door. I will do the same around the windows once I've installed mullions.
Next: The next major piece was the scale track itself. Unlike New Britain, it's a gantlet track in Middletown. Something I had wanted to try.
No comments:
Post a Comment