Modeling buddy Bill Gill contacted me after he saw my post on rivets with yet another technique he has developed. I have to reiterate this is one of the main reasons I like blogging, getting new information, techniques, and ideas from others. It's also great to hear from Bill, who I first met at RPI, and with the current state of the layout still in limbo (plus the pandemic) I miss seeing him a few times a year.
This is an Athearn flat car he modified to match a D&H flat car for the NEB&W at RPI.
There are 2 replacement rivets over the grab iron, 8 rivets between the first two stake pockets, then vertical rivets (3, 4, 8, and 3) noted by the arrows. I have to say his are more precisely placed than mine are on the flat cars I just did...
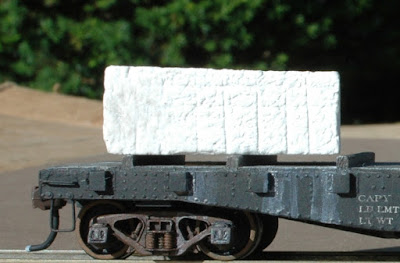
Here's a look at the finished and weathered car with a marble load.
The rivets on these cars are tiny dots of thick cyanoacrylate applied to tiny needle pricks that located the precise spot for each rivet. I printed the patterns on a piece of Scotch Magic tape and applied that to the side of the car to use as a guide for the needle marks. It took a little practice to get the feel for how much pressure to apply to the needle (held in pinvise) to get consistent size/depth, but that came quickly.
Then a bit of practice applying just the right amount of CA. A tiny dot of CA was picked up with the needle point and carefully lowered until just the bottom of the droplet touched the tiny divot.
If I got too much CA on a spot, a quick, flat scrape with tip of #11 blade removed it and I made another needle poke before trying again. It sounds more tedious than it is once you get the feel for it.
One improvement I made on later projects was to use JB Weld epoxy instead of CA. It has a much longer working time and was easier to wipe off when I goofed. It also settled better to a more uniform looking rivet head than the CA, which sometimes set pretty quickly.
I'd had a terrible time trying to harvest and use Athearn rivets, The smallest Tichy rivets were a lot bigger than the rivets on the Athearn flat cars I was trying to match and (at that time anyway) none of the Archer rivet spacings matched the Athearn spacing.
I got overly optimistic and tried this method for applying a double row of staggered rivets along the center of a tender's sides. Too many rivets to be absolutely consistent in size and spacing.
But I managed to gently scrape those off and sand away the needle marks with just a little work with 600+ grit wet dry paper. I then found some archer decals that worked ok although I wish they were just a tiny bit larger and kept the same spacing.
Thanks for the tip, and fantastic model work as always, Bill!


No comments:
Post a Comment