In the first post I showed how I modified the deck and assembled the basic kit.
The
second post covered scratchbuilding side sills and measuring and installing stake pockets. The
third post covered how I was handling the
rivets with an addendum from my buddy Bill Gill
here. The
fourth covered some additional prototypes.
Fifth was the underframe on the NH car.
Sixth was the end sill and deck of the NH car.
The impetus for this particular project was a photo of a T&P flat car which also includes prototype information for that and similar cars.
Since I had the CofG kit, I decided I might as well finish that one too. The set of decals comes with a diagram for the car, and it's about a foot longer than the Tichy model. Should I bother?
Sure, why not? In this case it's just adding a single board to the length. As I was reassembling the deck, it occurred to me that instead of just cutting it in the middle and then cutting a single board from a spare deck, it would have been easier to cut out a chunk of, say, four or six boards and replace it with a piece of five or seven boards. That would have been much less fiddly than trying to square and insert a single board.
They have some photos online of when they moved the car and a work session. It is noticeable that the fishbelly center sill wasn't as deep as the Tichy model, much like the NH car. I thought that the center sill from a Branchline (now Atlas) ACF/URTX reefer would do the trick. It's about the correct length after I added the extra board to the middle:
This is too deep, here it is compared to a spare bolster:
It looked like I could cut along the rivet batten at the bottom and it would be just right.
Then it was a matter of filing the slots for the bolsters deeper to accommodate the change. I also trimmed the tab off of the bottom of the crossbearers (that fit into a slot in the Branchline underframe):
Then I remembered that the center sill sits below the level of the crossbearers which sit on top of the stringers (when assembling the model). So those tabs probably could have stayed.
I used some strip styrene as a spacer while assembling it. When looking at the photos of the work session, it's apparent that there are two stringers between the crossbearers, so I filed slots to allow that placement:
The crossbearers and stringers are a little short, but not visible when the car is on the track, so I decided not to worry about it. For the other stringers, I just used scale 4"x4" instead of building channels:
The end sill is a channel facing outwards, but deeper than the one on the Tichy model. So I fabricated a new one from styrene:
After applying that, I cut out the coupler pocket:
The shallower center sill is quite evident next to the unmodified Tichy kit:
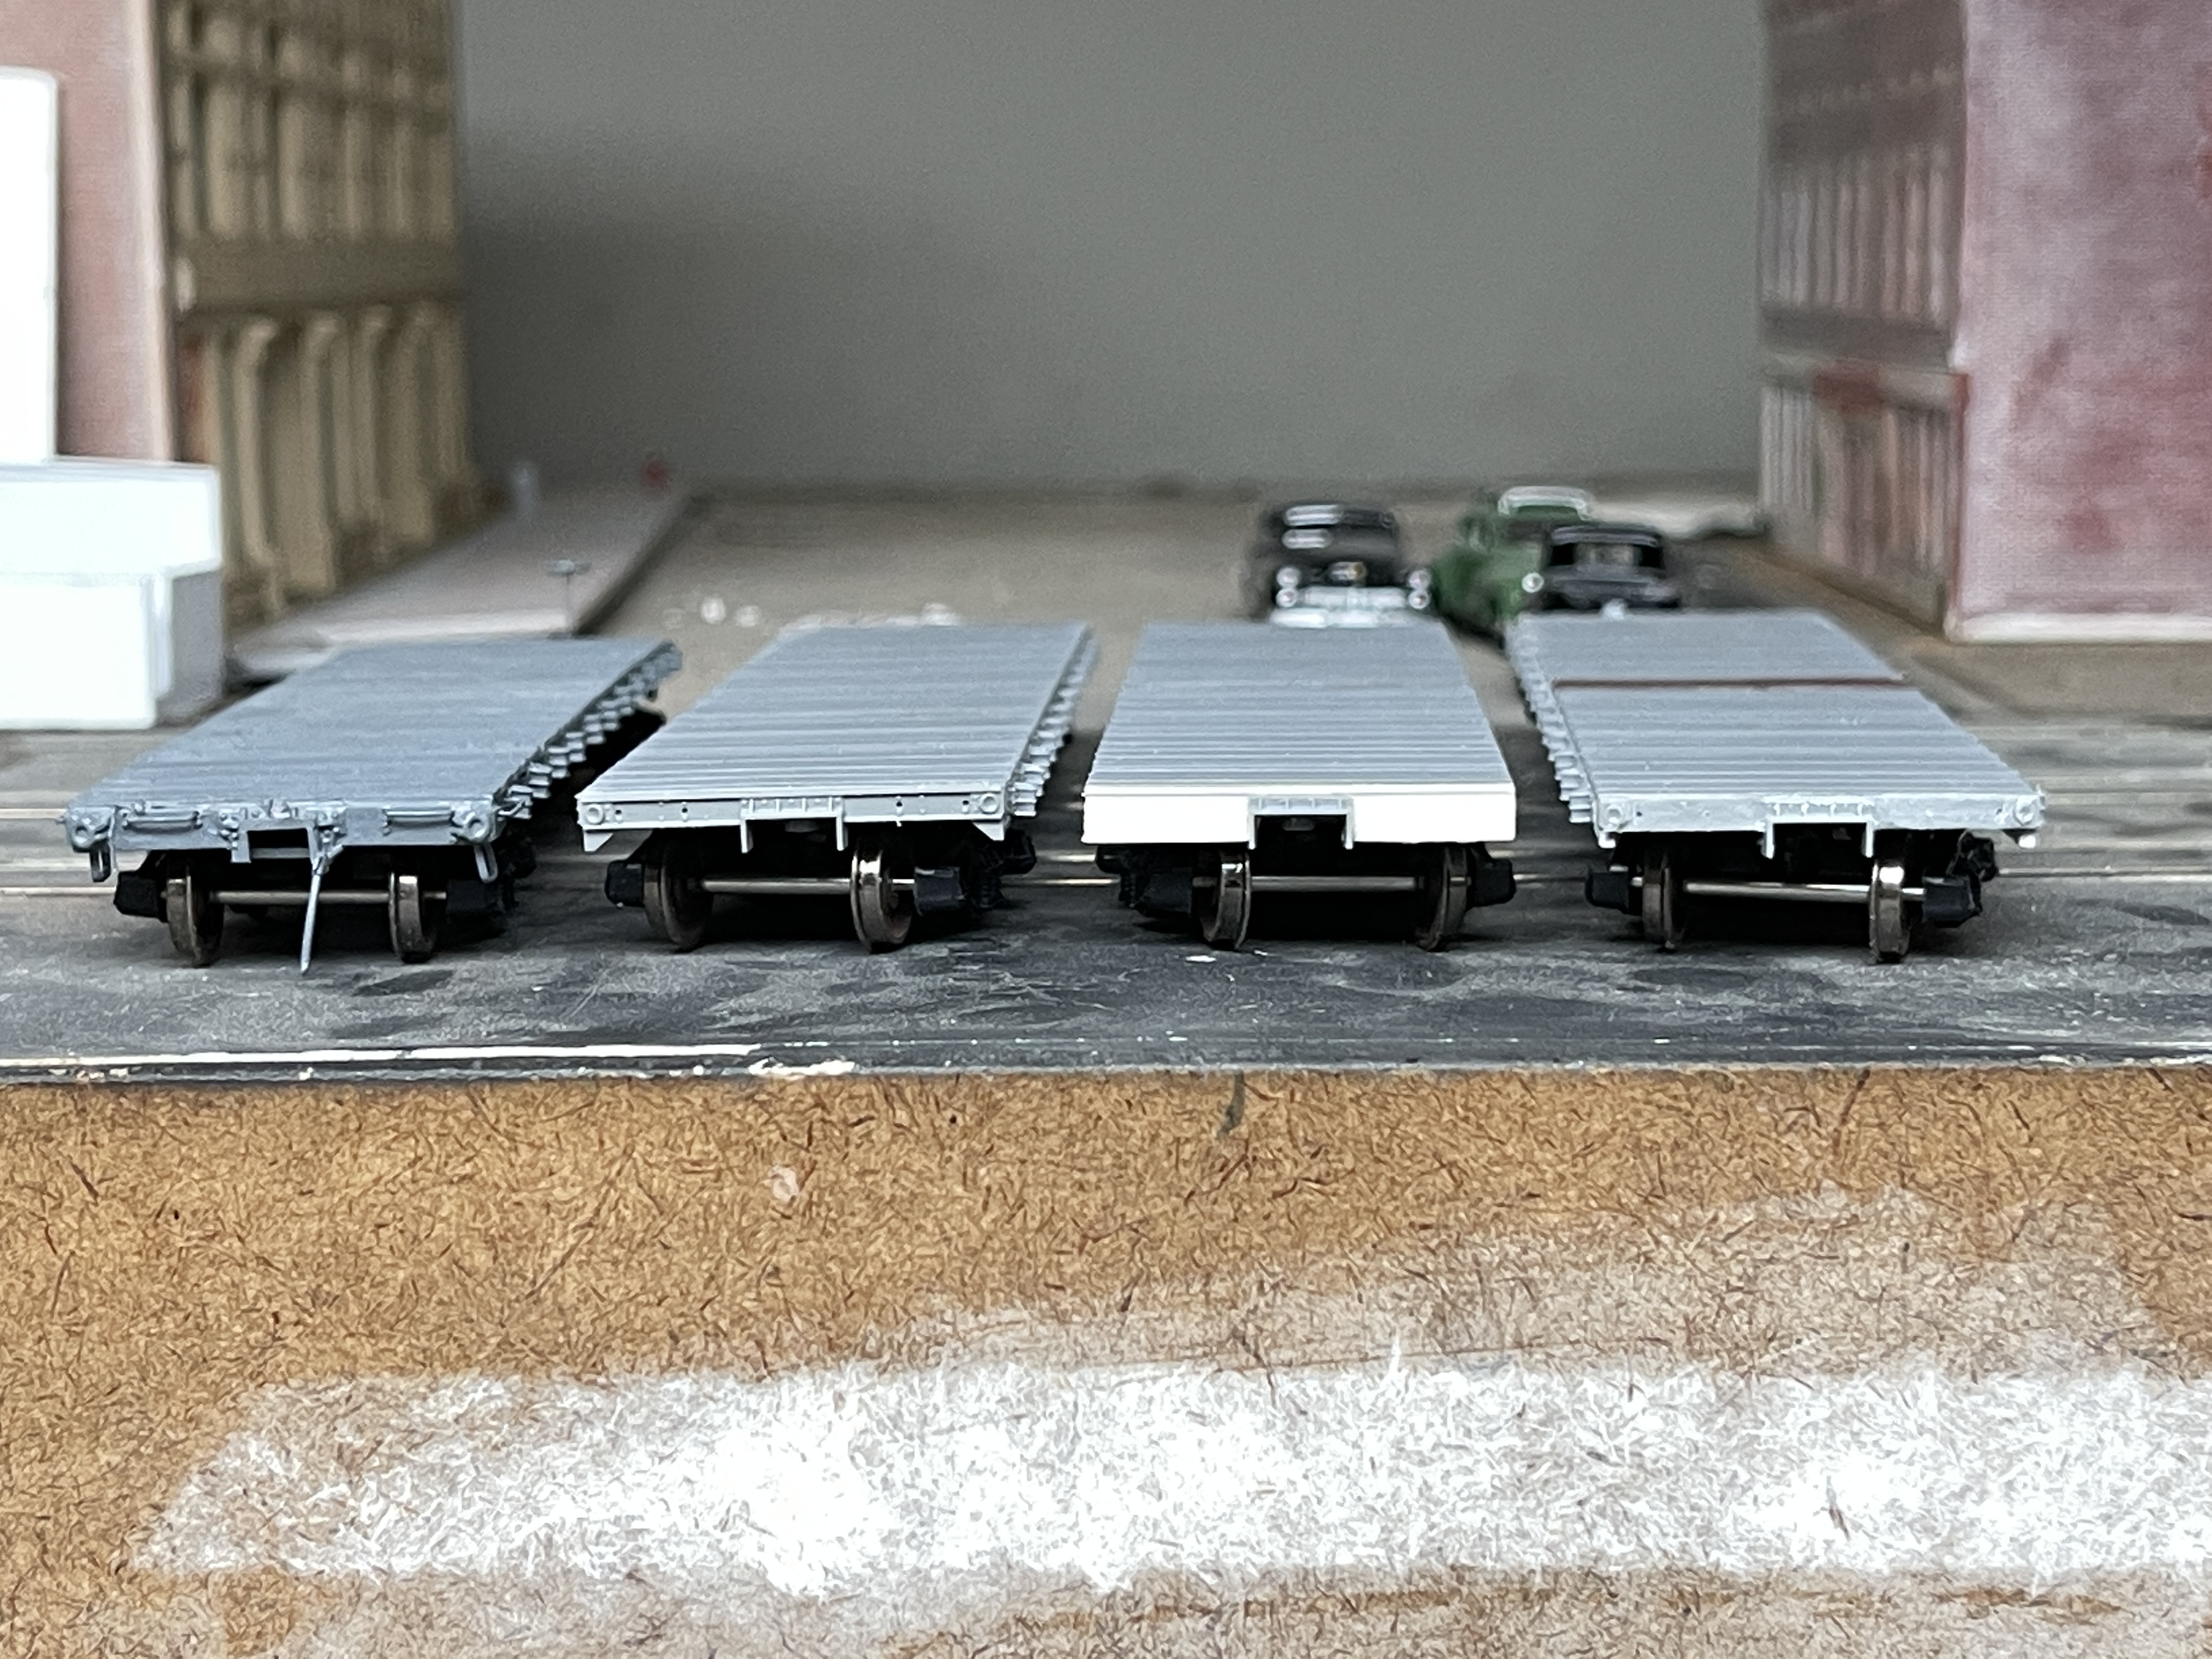
Four different ends. The NH on the left, the NC&StL (unmodified Tichy) next, the CofG one (with details to be added), and then the T&P one which is the Tichy end but with the channel flanges removed.
Note that I used the Tichy striker casting for the CofG end. It's not a perfect match to the prototype, but was a simpler solution than scratch building it.
I didn't have a good shot of the side to figure out the stake pocket spacing. But I also don't see many extra rivets in the photos. It occurred to me as I was experimenting with spacing that if one side of the stake pocket lines up with the crossbearer or stringer, then the rivets for the underframe components may have also been used to attach the stake pockets. So I used the underframe as a guide for the spacing. Since it seemed like all of them had similar spacing for the first two stake pockets from either end, I retained that spacing, then spaced the rest according to the underframe.
I still have rivets, grab irons, and other details to add, and I'll be doing the rest of those features on the other flats too. I really like the way this one is coming out. More to come.


No comments:
Post a Comment